Install Wazuh app for Splunk
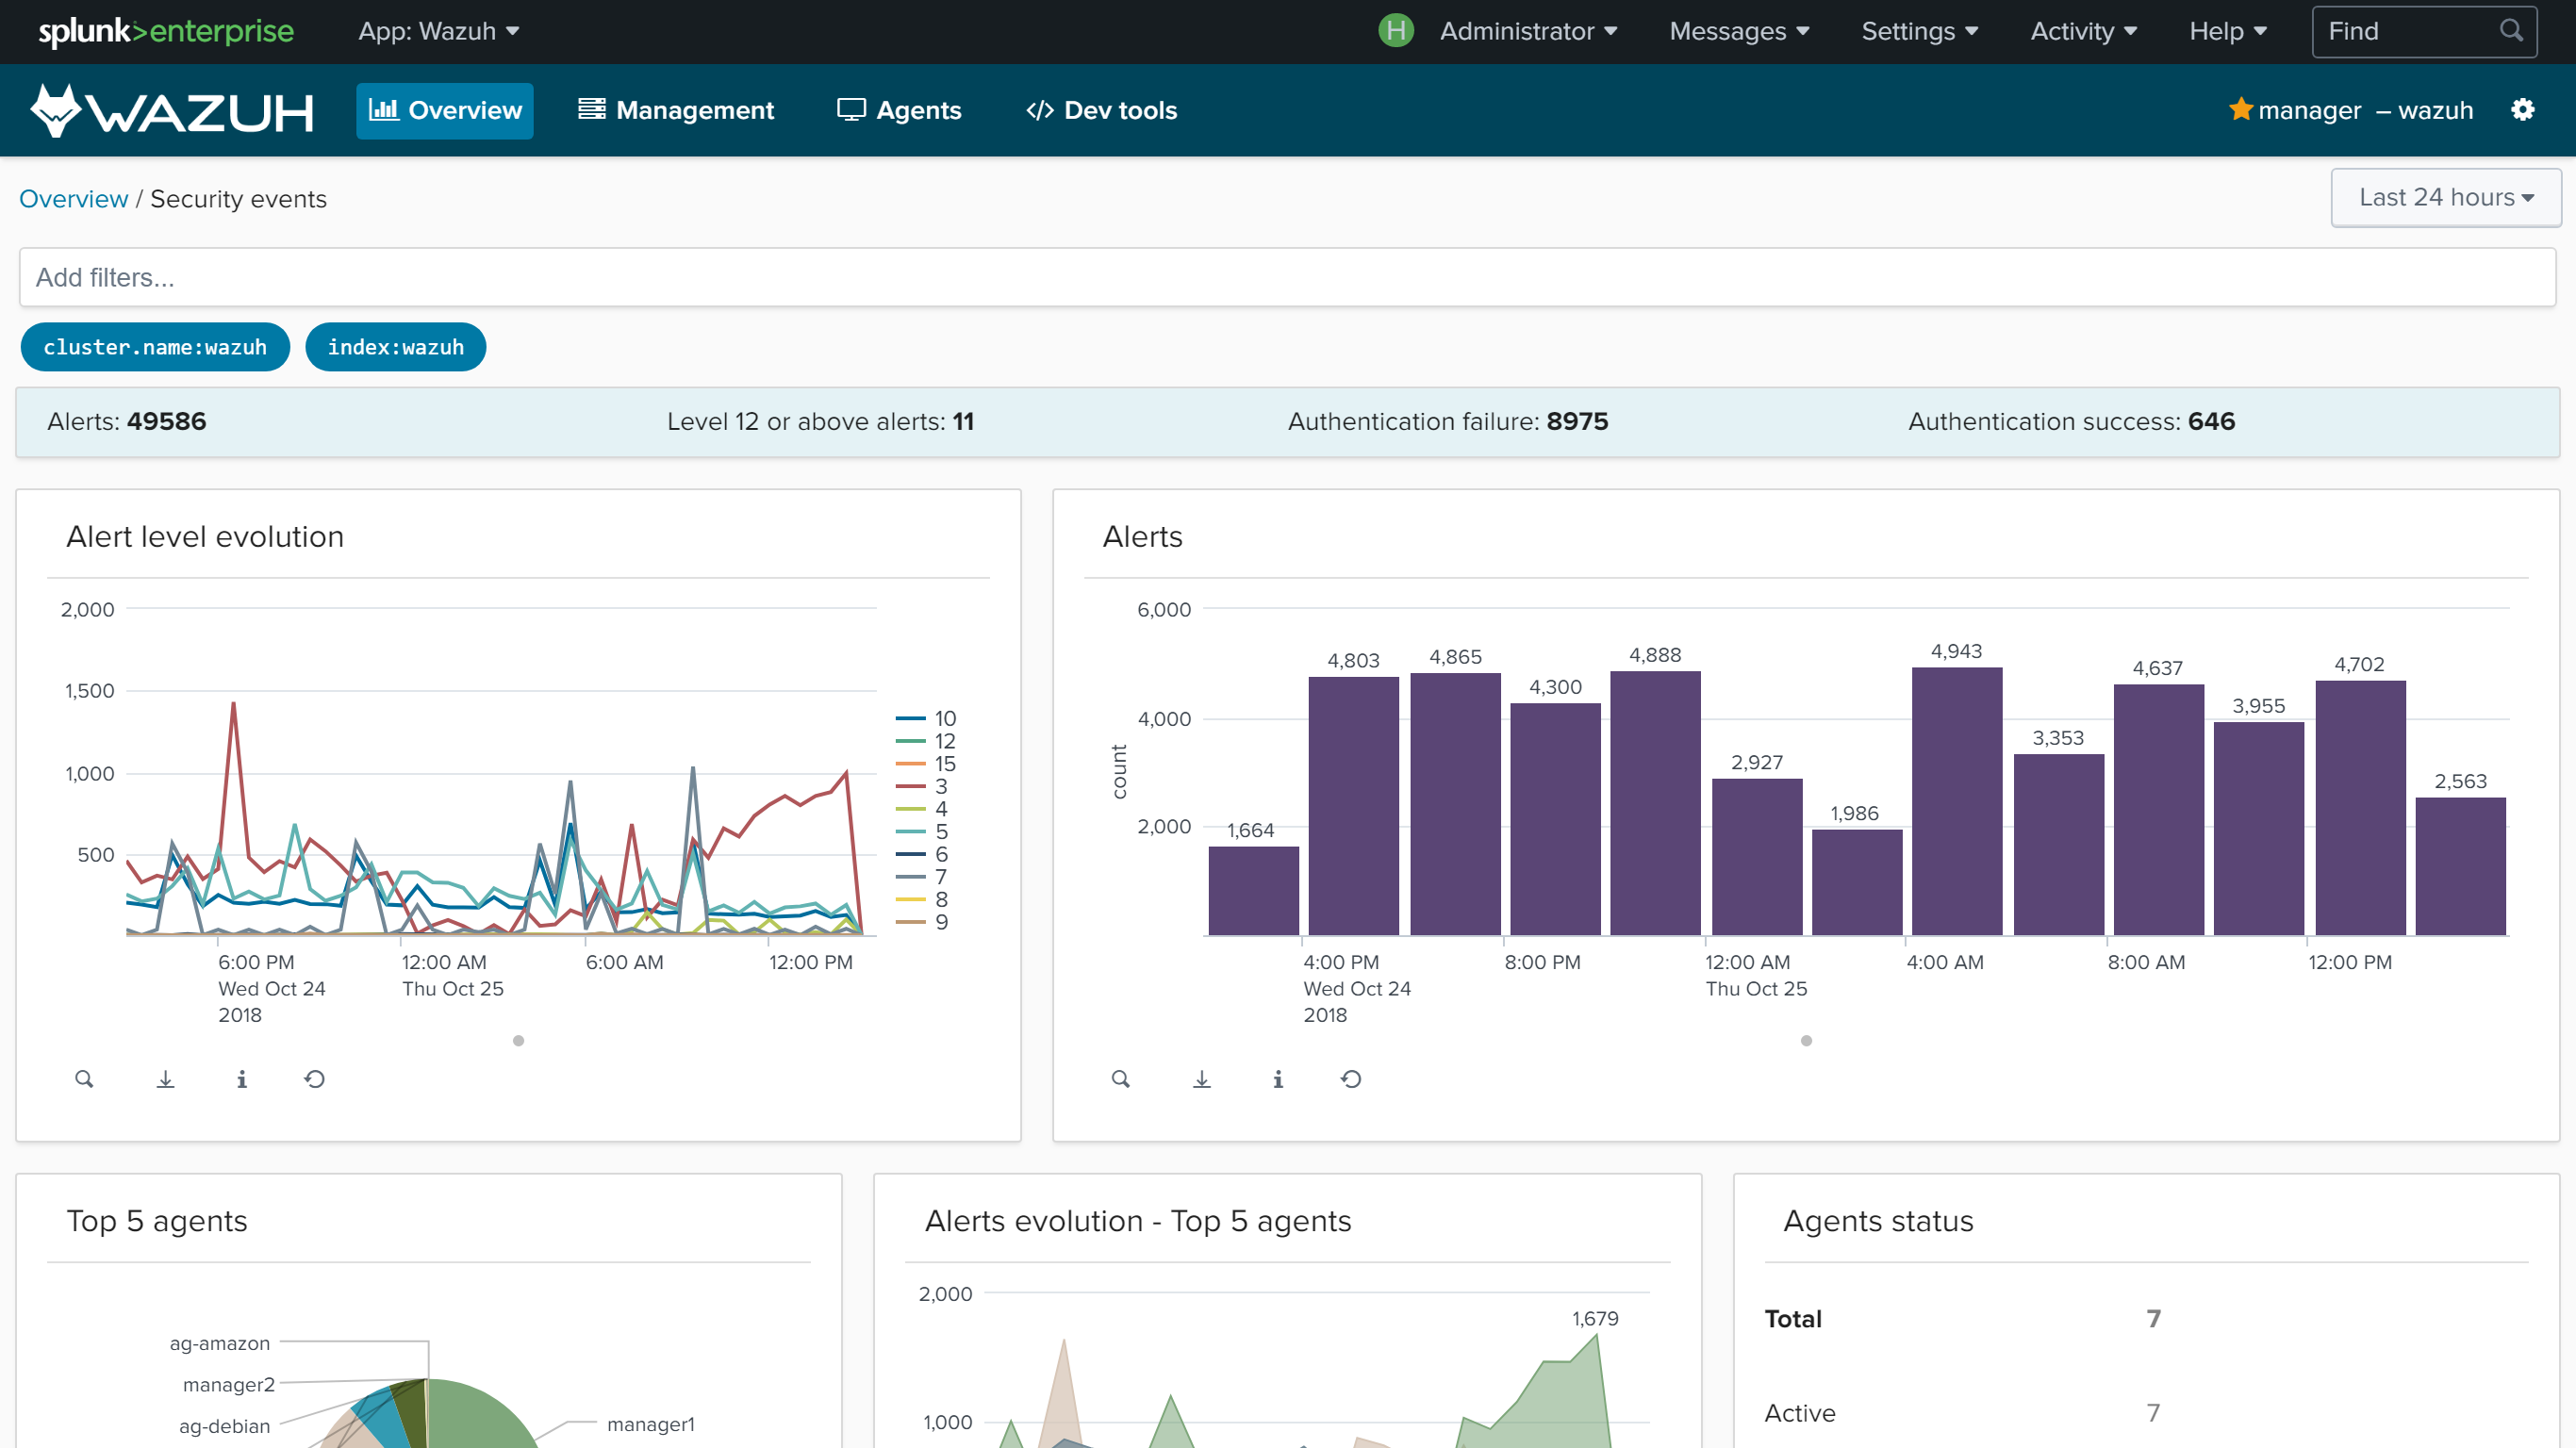
Wazuh app for Splunk offers a UI to visualize Wazuh alerts and Wazuh API data. Wazuh helps you to gain deeper security visibility into your infrastructure by monitoring hosts at an operating system and application level.
Installation
Download the latest Wazuh app for Splunk:
# curl -o SplunkAppForWazuh.tar.gz https://packages.wazuh.com/3.x/splunkapp/wazuhapp-splunk-3.10.2_8.0.0.tar.gz
Install the Wazuh app for Splunk:
CLI mode:
# /opt/splunk/bin/splunk install app SplunkAppForWazuh.tar.gz
# /opt/splunk/bin/splunk restart
Web GUI:
Apps -> Manage apps -> Install app from file
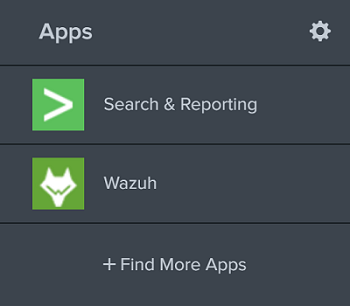
Open Splunk in your desired browser and click on the Wazuh app icon:
The app will redirect you to the Settings tab, where fill the form with your Wazuh API credentials. Use the URL and port from your Wazuh API server.
By default, the API port is
55000. The default username and password isfoo:bar. It's possible to check the connection by pressing the Check connection button on each API entry. A successful message appears on the bottom right corner if the app can establish a connection.Note
You can get more information about how to set up the credentials at Securing the Wazuh API.

Now that you've finished installing Wazuh app for Splunk, you can install and setup Splunk forwarders on the Splunk forwarder section.
Installing the Wazuh App in a Splunk cluster
Note
We can install the App in each search-head by hand, but if we have hundreds or even thousands of search-heads, it will be better to install it automatically. For this purpose, we are using the deployer, a machine that installs the App in every search-head at the same time and automatically.
After installing the App following the Official installation guide in our deployer machine, we follow this steps:
// Copy the app into the splunk cluster folder:
# cp -r installation_path/SplunkAppForWazuh /opt/splunk/etc/shcluster/apps

// Create the file that listens the outputs from the Wazuh API:
# touch /opt/splunk/etc/shcluster/apps/SplunkAppForWazuh/default/outputs.conf
Then, fill the outputs.conf file with the next lines:
[indexer_discovery:cluster1]
pass4SymmKey = changeme
master_uri = https://<master_ip>:<management_port>

[tcpout:cluster1_tcp]
indexerDiscovery = cluster1

[tcpout]
defaultGroup = cluster1_tcp
Note
We use indexerDiscovery to connect to peer nodes. Click here to check more info about indexerDiscovery.
Note
<master_ip> references to the indexers master ip.
Warning
The https is required by default and the default port is the 8089.
Apply the changes:
# /opt/splunk/bin/splunk apply shcluster-bundle -target https://<NODE_IP>:<management_port> -auth <user>:<password>
Now, we should have the /opt/splunk/etc/apps/SplunkAppForWazuh in every search head.
Update the Wazuh App
To update, we must delete the app from the deployer, and reinstall it by following the previous steps.
# rm -rf /opt/splunk/etc/shcluster/apps/SplunkAppForWazuh
Then, we synchronize with the option -force and will be deleted from the search heads:
# /opt/splunk/bin/splunk apply shcluster-bundle -force true -target https://<NODE_IP>:<management_port> -auth <user>:<password> -f