Search Guard
Search Guard can be used to secure your Elasticsearch cluster by working with different industry standard authentication techniques, like Kerberos, LDAP / Active Directory, JSON web tokens, TLS certificates and Proxy authentication / SSO.
Regardless of what authentication method you use, the basic flow is as follows:
A user wants to access an Elasticsearch cluster, for example by issuing a simple query.
Search Guard retrieves the user’s credentials from the request
How the credentials are retrieved depends on the authentication method. For example, they can be extracted from HTTP Basic Authentication headers, from a JSON web token or from a Kerberos ticket.
Search Guard authenticates the credentials against the configured authentication backend(s).
Search Guard authorizes the user by retrieving a list of the user’s roles from the configured authorization backend
Roles retrieved from authorization backends are called backend roles.
For example, roles can be fetched from LDAP/AD, from a JSON web token or from the Search Guard internal user database.
Search Guard maps the user and backend roles to Search Guard roles.
Search Guard determines the permissions associated with the Search Guard role and decides whether the action the user wants to perform is allowed or not.
If your are using document and field level security, you can also apply more fine grained permissions based on documents and individual fields.
Setting up Search Guard for Logstash
Our default configuration is not using authentication for Logstash so we need to configure it properly. Edit your Logstash configuration file (located at /etc/logstash/conf.d/01-wazuh.conf):
Stop Logstash service:
# systemctl stop logstash
Look for the output section and replace it with the following content:
output {
    elasticsearch {
        hosts => ["ELASTICSEARCH_HOST:9200"]
        index => "wazuh-alerts-3.x-%{+YYYY.MM.dd}"
        document_type => "wazuh"
        user => logstash
        password => logstash
        ssl => true
        ssl_certificate_verification => false
    }
}
Restart Logstash.
# systemctl restart logstash
Warning
This configuration must be applied for all your Logstash configurations, replace specific fields such as hosts or index depending on your Logstash location and requirements.
Setting up Search Guard for Elasticsearch
Currently, it's not supported to use X-Pack security at the same time. If your environment is currently using any X-Pack security feature, you must disable it before continue reading this guide.
For Elasticsearch you need to edit the file /etc/elasticsearch/elasticsearch.yml in all your nodes and add the next line:
xpack.security.enabled: false
Now restart Elasticsearch service:
# systemctl restart elasticsearch
Search Guard must fit the Elasticsearch version like any other component from the Elastic stack. Versioning is a bit different for Search Guard, please check your version at Search Guard versions.
The versioning syntaxis for Search Guard is as follow:
com.floragunn:search-guard-6:<elastic_version>-<searchguard_version>
This documentation is designed for our latest supported version, it's 6.5.4 so our right version is:
com.floragunn:search-guard-6:6.5.4-24.0
Since Search Guard is a plugin, we must install it such other Elasticsearch plugins:
sudo -u elasticsearch \
/usr/share/elasticsearch/bin/elasticsearch-plugin install \
-b com.floragunn:search-guard-6:6.5.4-24.0
Search Guard comes with a demo configuration and it's useful as starting point so let's install the demo configuration:
$ cd /usr/share/elasticsearch/plugins/search-guard-6/tools/
$ chmod a+x install_demo_configuration.sh
# ./install_demo_configuration.sh
Install demo certificates? [y/N] y
Initialize Search Guard? [y/N] y
Enable cluster mode? [y/N] y
Restart Elasticsearch service:
# systemctl restart elasticsearch
You can check if it's working as expected using the next request (Search Guard needs about two minutes to create its internal indices so be patient):
$ curl -k -u admin:admin https://<ELASTICSEARCH_HOST>:9200/_searchguard/authinfo?pretty
{
"user" : "User [name=admin, roles=[admin], requestedTenant=null]",
"user_name" : "admin",
"user_requested_tenant" : null,
"remote_address" : "10.0.0.4:46378",
"backend_roles" : [
    "admin"
],
"custom_attribute_names" : [
    "attr.internal.attribute1",
    "attr.internal.attribute2",
    "attr.internal.attribute3"
],
"sg_roles" : [
    "sg_all_access",
    "sg_own_index"
],
"sg_tenants" : {
    "admin_tenant" : true,
    "admin" : true
},
"principal" : null,
"peer_certificates" : "0",
"sso_logout_url" : null
}
Setting up Search Guard roles
Search Guard works using core roles. Core roles are used by Search Guard user roles. Finally, user roles are used by Search Guard users.
- Roles file
/usr/share/elasticsearch/plugins/search-guard-6/sgconfig/sg_roles.yml
Core roles used under the hood by Search Guard
- Role mapping
/usr/share/elasticsearch/plugins/search-guard-6/sgconfig/sg_roles_mapping.yml
Roles used by the Search Guard users. These roles can group multiple core roles.
- Internal users
/usr/share/elasticsearch/plugins/search-guard-6/sgconfig/sg_internal_users.yml
These are the users that all the components will use. Each component uses a different user with its own roles.
Logstash role
Logstash has its own predefined user and its own predefined role. Since Wazuh creates custom Elasticsearch indices using the wazuh-alerts-3.x-* prefix you must add that index prefix to the Logstash role.
Edit the Logstash role, located at /usr/share/elasticsearch/plugins/search-guard-6/sgconfig/sg_roles.yml
sg_logstash:
    cluster:
        - CLUSTER_MONITOR
        - CLUSTER_COMPOSITE_OPS
        - indices:admin/template/get
        - indices:admin/template/put
    indices:
        'logstash-*':
            '*':
                - CRUD
                - CREATE_INDEX
        '*beat*':
            '*':
                - CRUD
                - CREATE_INDEX
        'wazuh-alerts-3?x-*':
            '*':
                - CRUD
                - CREATE_INDEX
Note
Dots are replaced by ? for Search Guard roles, so 3?x actually means 3.x.
Apply the changes:
# /usr/share/elasticsearch/plugins/search-guard-6/tools/sgadmin.sh \
-cd /usr/share/elasticsearch/plugins/search-guard-6/sgconfig -icl -key \
/etc/elasticsearch/kirk-key.pem -cert /etc/elasticsearch/kirk.pem -cacert \
/etc/elasticsearch/root-ca.pem -h <ELASTICSEARCH_HOST> -nhnv
Warning
In production environments flag -nhnv is not recommended because it ignores certificate issues.
Restart Elasticsearch and Logstash services:
# systemctl restart elasticsearch
# systemctl restart logstash
At this point you have your Elasticsearch cluster secured using user:password authentication and encrypted communication. This means any Logstash pointing to some Elasticsearch node must be authenticated. Also, any request to the Elasticsearch API must use https plus user:password authentication.
See roles permissions for details.
Setting up Search Guard for Kibana
Currently, it's not supported to use X-Pack security at the same time. If your environment is currently using any X-Pack security feature, you must disable it before continue reading this guide.
For Kibana you need to edit the file /etc/kibana/kibana.yml and add the next line:
xpack.security.enabled: false
Now restart Kibana service:
# systemctl restart kibana
Kibana needs the Search Guard plugin too. Plugin versioning works like Elasticsearch plugins versioning, this means you must fit exactly your Kibana version.
Install the plugin as usual:
$ sudo -u kibana NODE_OPTIONS="--max-old-space-size=3072" /usr/share/kibana/bin/kibana-plugin install https://search.maven.org/remotecontent?filepath=com/floragunn/search-guard-kibana-plugin/6.5.4-17/search-guard-kibana-plugin-6.5.4-17.zip
Edit the Kibana configuration file, it's located at /etc/kibana/kibana.yml, add the following lines:
# Elasticsearch URL
elasticsearch.url: "https://<ELASTICSEARCH_HOST>:9200"

# Credentials
elasticsearch.username: "admin"
elasticsearch.password: "admin"

# Disable SSL verification because we use self-signed demo certificates
elasticsearch.ssl.verificationMode: none

# Whitelist the Search Guard Multi Tenancy Header
elasticsearch.requestHeadersWhitelist: [ "Authorization" , "sgtenant" ]
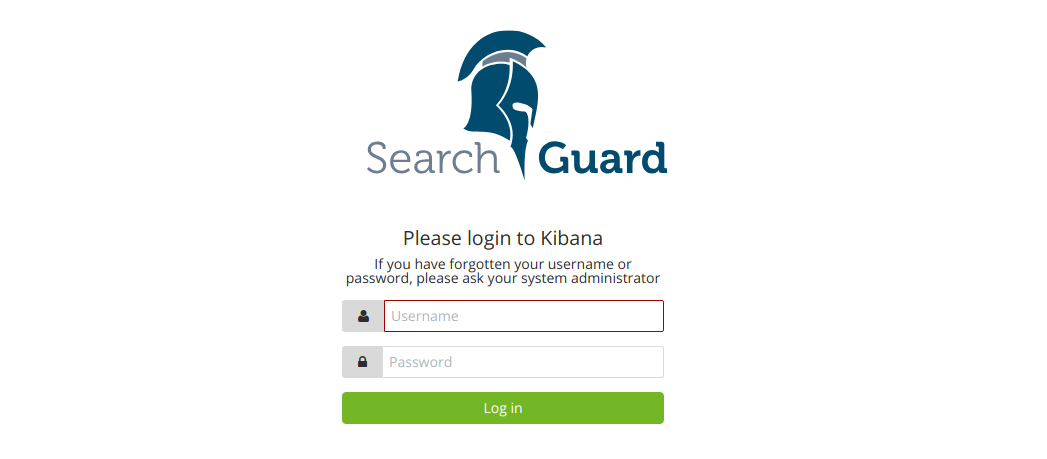
Now you can access your Kibana UI as usual and it will prompt for a login. You can access it using the already existing one user named admin.
Next steps we'll learn how to define new Kibana UI users and how to define specific roles for all of them depending on their needs.
See Kibana Search Guard plugin for details.
Kibana UI and the Wazuh app
The Wazuh app needs to manage .wazuh and .wazuh-version indices in order to work properly. The index .wazuh-version is used by the server side. The index .wazuh stores Wazuh API entries.
Warning
Follow the next steps at only one master node from your Elasticsearch cluster.
Wazuh app user
Create a new Search Guard core role in /usr/share/elasticsearch/plugins/search-guard-6/sgconfig/sg_roles.yml
sg_wazuh_admin:
  cluster:
    - indices:data/read/mget
    - indices:data/read/msearch
    - indices:data/read/search
    - indices:data/read/field_caps
    - CLUSTER_COMPOSITE_OPS
  indices:
    '?kiban*':
      '*':
        - MANAGE
        - INDEX
        - READ
        - DELETE
    '?wazuh':
      '*':
        - MANAGE
        - INDEX
        - READ
        - DELETE
    '?wazuh-version':
      '*':
        - MANAGE
        - INDEX
        - READ
        - DELETE

    'wazuh-alerts-3?x-*':
      '*':
        - indices:admin/mappings/fields/get
        - indices:admin/validate/query
        - indices:data/read/search
        - indices:data/read/msearch
        - indices:data/read/field_stats
        - indices:data/read/field_caps
        - READ
        - SEARCH

    'wazuh-monitoring*':
      '*':
        - indices:admin/mappings/fields/get
        - indices:admin/validate/query
        - indices:data/read/search
        - indices:data/read/msearch
        - indices:data/read/field_stats
        - indices:data/read/field_caps
        - READ
        - SEARCH
Create a hash for your password
bash /usr/share/elasticsearch/plugins/search-guard-6/tools/hash.sh -p yourpassword
Create a new user in /usr/share/elasticsearch/plugins/search-guard-6/sgconfig/sg_internal_users.yml using the hash from step 2.
wazuhadmin:
  hash: $2a$12$VcCDgh2NDk07JGN0rjGbM.Ad41qVR/YFJcgHp0UGns5JDymv..TOG
  roles:
    - wazuhadmin_role
Set the role mapping for Search Guard roles in /usr/share/elasticsearch/plugins/search-guard-6/sgconfig/sg_roles_mapping.yml
sg_wazuh_admin:
  backendroles:
    - wazuhadmin_role
Apply the changes:
# /usr/share/elasticsearch/plugins/search-guard-6/tools/sgadmin.sh \
-cd /usr/share/elasticsearch/plugins/search-guard-6/sgconfig -icl -key \
/etc/elasticsearch/kirk-key.pem -cert /etc/elasticsearch/kirk.pem -cacert \
/etc/elasticsearch/root-ca.pem -h <ELASTICSEARCH_HOST> -nhnv
Brief summary for Kibana
Now you have two Kibana users:
The Kibana server uses the predefined admin user from Search Guard (/etc/kibana/kibana.yml).
The Kibana UI wazuhadmin user can see all and modify .wazuh index.
How it goes in the Wazuh app?
The main difference is that you now must log in before entering Kibana. Also keep in mind that if the user is not allowed for certain indices, it can't use them on Kibana.