Launch the EC2 instances
Here we will launch the Wazuh Server, the Elastic Server, and the Linux Agent as CentOS 7 EC2 instances.
Launch a Wazuh Server instance
From your EC2 Dashboard, click on [Launch Instance].
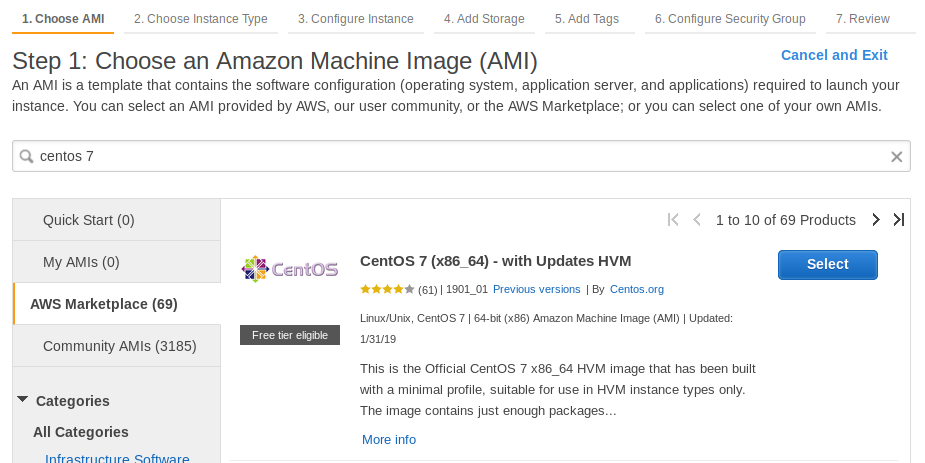
On the left, click on "AWS Marketplace".
Type "centos 7" into the search field and hit <Enter>.
Find the image below and click on [Select] next to it.
Click on [Continue].
Select the General purpose t2.micro image and click on [Next: Configure Instance Details]
For Network, choose your VPC, and for the Primary IP of eth0, put in "172.30.0.10".
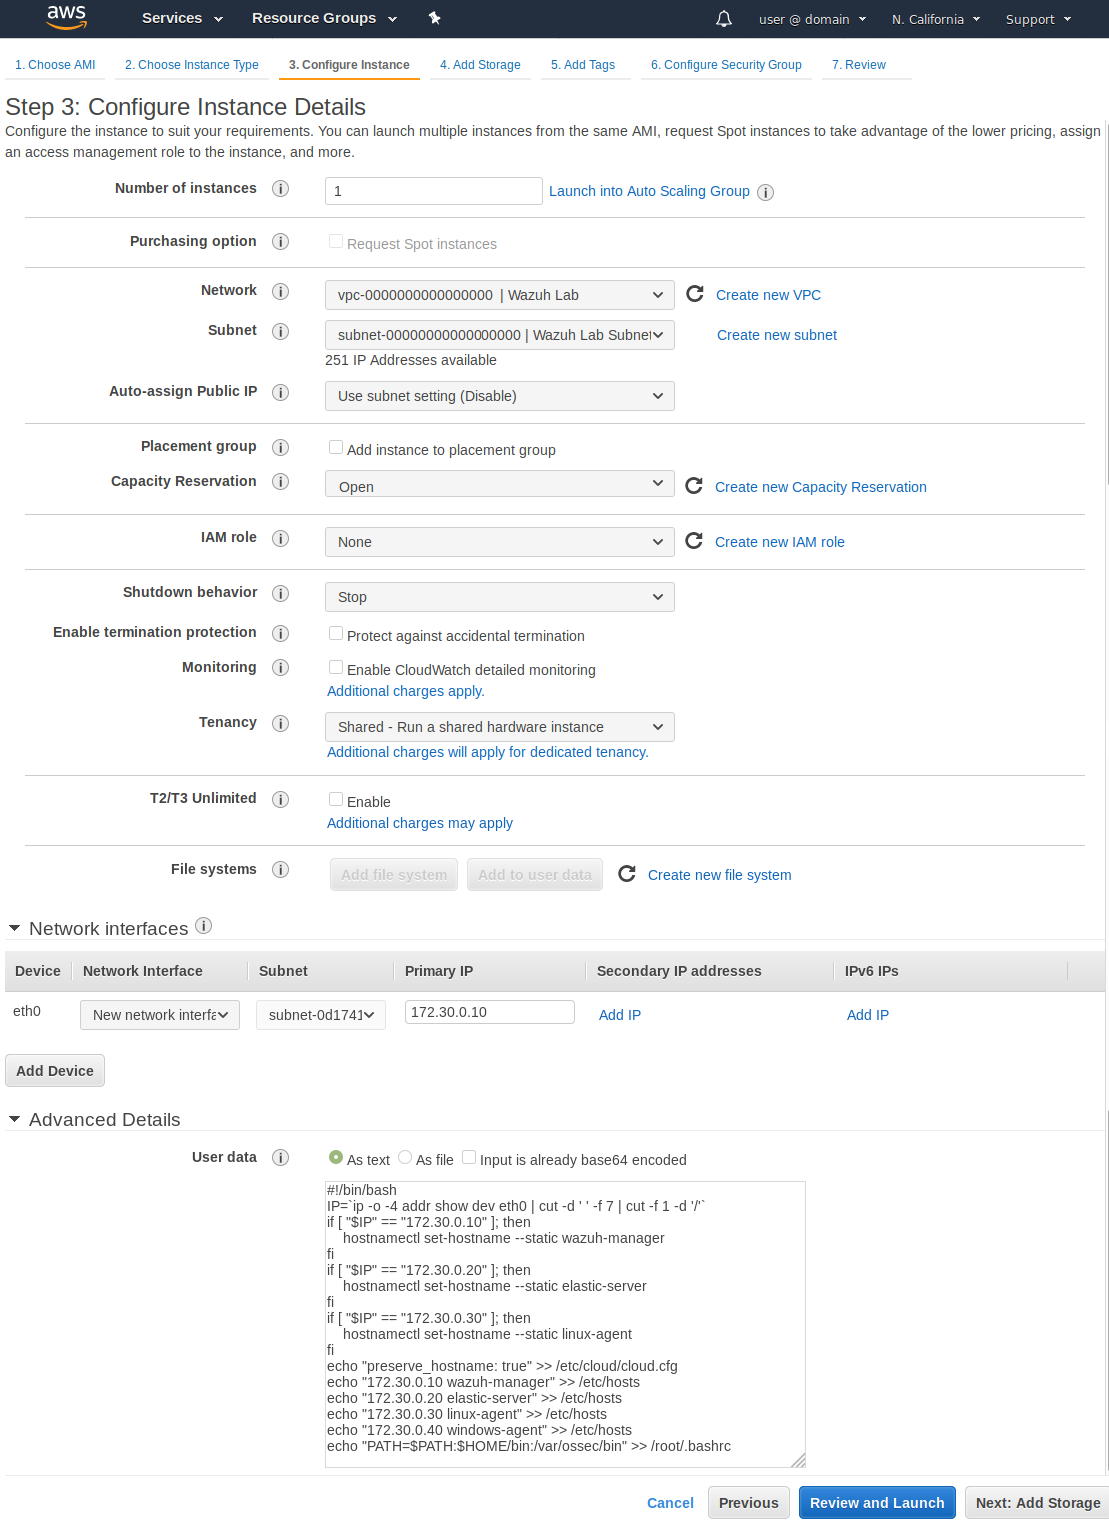
Expand the Advanced Details section and paste the following launch script text into the window.
#!/bin/bash
IP=`ip -o -4 addr show dev eth0 | cut -d ' ' -f 7 | cut -f 1 -d '/'`
if [ "$IP" == "172.30.0.10" ]; then
    hostnamectl set-hostname --static wazuh-manager
fi
if [ "$IP" == "172.30.0.20" ]; then
    hostnamectl set-hostname --static elastic-server
fi
if [ "$IP" == "172.30.0.30" ]; then
    hostnamectl set-hostname --static linux-agent
fi
echo "preserve_hostname: true" >> /etc/cloud/cloud.cfg
echo "172.30.0.10 wazuh-manager" >> /etc/hosts
echo "172.30.0.20 elastic-server" >> /etc/hosts
echo "172.30.0.30 linux-agent" >> /etc/hosts
echo "172.30.0.40 windows-agent" >> /etc/hosts
echo "PATH=$PATH:$HOME/bin:/var/ossec/bin" >> /root/.bashrc
Click on [Next: Add Storage]
Choose a recommended Size of 20GB. As low as 8GB should work on this instance if you are careful.
Choose a Volume Type of "General Purpose SSD"
Checkmark Delete on Termination.

Click on [Next: Add Tags] and then on [Add Tag].

Click on [Next: Configure Security Group]
Choose Select an existing security group and then select only the Wazuh Linux security group.
Click on [Review and Launch] and on [Launch].
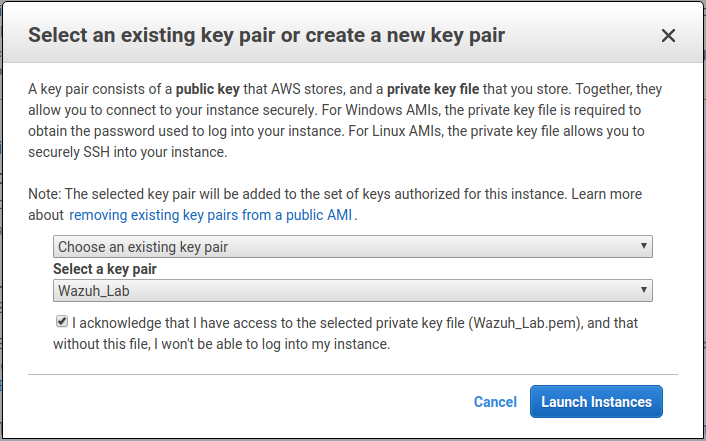
Select the "Wazuh_Lab" key pair, check the acknowledgment box and click on [Launch Instances]
Click on [View Instances] to confirm your new instance is on its way up.
Launch a Linux Agent instance
Repeat the process for "Launch a Wazuh Server instance" with the following exceptions:
Select the General purpose t2.micro image
Set the Primary IP to 172.30.0.30.
Leave the Storage Size at the default 8GB unless you plan to make extra disk space demands on this instance.
Set the Name Tag to "Linux Agent".
Launch an Elastic Server instance
Repeat the process for "Launch a Wazuh Server instance" changing the following:
Choose a recommended instance type of General Purpose t2.xlarge. An instance as small as a t2.large should still work but it will not be as responsive.
Set the Primary IP to 172.30.0.20.
Choose a recommended Storage Size of 100GB. As low as 8GB should generally be adequate if you are careful with disk space management and don't leave the lab running for a long time.
Set the Name Tag to "Elastic Server".
Launch a Windows Agent instance
Repeat the process for "Launch a Wazuh Server instance" with the following exceptions:
When choosing an image (AMI) click on Quick Start and Select "Microsoft Windows Server 2016 Base"
Choose an instance type of General Purpose t2.small.
Set the Primary IP to 172.30.0.40.
Do not put any launch script into the User data box.
Do not change the Storage Size to smaller than the default of 30GB. Larger is fine if you wish.
Set the Name Tag to "Windows Agent".
Pick the "Wazuh Windows" security group instead of the "Wazuh Linux" one.