Registration service with host verification
Using verification with an SSL key certificate ensures that the connection between the right Wazuh agent and the right Wazuh manager is established.
Available options to verify the hosts
There are two options to register the Wazuh agent using host verification. Please note, that both, the Wazuh agent verification as well as the Wazuh manager verification can be used in the registration process:
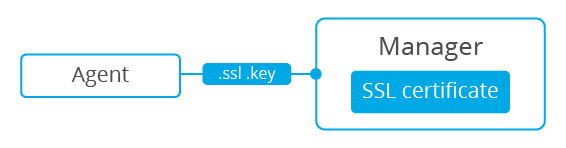
To verify the Wazuh manager using SSL, create an SSL certificate and sign it using the Certificate of Authority (CA) created in the previous section. This will allow the Wazuh agents to ensure that they are connected to the correct Wazuh manager during the registration service.
Creating and signing a certificate on the Wazuh manager
Follow these steps in the Wazuh manager's host:
Create the configuration file
req.conf, replacing<manager_IP>with the hostname or the IP address of the Wazuh server where the Wazuh agents are going to be registered. The configuration file could be as follows:[req] distinguished_name = req_distinguished_name req_extensions = req_ext prompt = no [req_distinguished_name] C = US CN = <manager_IP> [req_ext] subjectAltName = @alt_names [alt_names] DNS.1 = wazuh DNS.2 = wazuh.com
Note
The
subjectAltNameextension is optional but necessary to allow the registration of Wazuh agents with a SAN certificate. In this case, the Wazuh server DNS arewazuhandwazuh.com.Issue and sign the certificate for the Wazuh manager:
# openssl req -new -nodes -newkey rsa:4096 -keyout sslmanager.key -out sslmanager.csr -config req.conf
# openssl x509 -req -days 365 -in sslmanager.csr -CA rootCA.pem -CAkey rootCA.key -out sslmanager.cert -CAcreateserial -extfile req.conf -extensions req_ext
Note
The
-extfileand-extensionsoptions are required to copy the subject and the extensions fromsslmanager.csrtosslmanager.cert. This allows the registration of the Wazuh agents with a SAN certificate.Copy the certificate and the key to the
/var/ossec/etcfolder:# cp sslmanager.cert sslmanager.key /var/ossec/etc
Restart the Wazuh manager:
# systemctl restart wazuh-manager# service wazuh-manager restart
The Wazuh agent registration using CA and enabling the communication with the Wazuh manager
Copy the CA file (.pem) to the Wazuh agent's host. In this example, the CA file is rootCA.pem.
Choose the tab corresponding to the wazuh agent's host operating system:
Open a terminal in the Linux/Unix Wazuh agent's host as a root user.
Copy the CA (
.pemfile) previously created on the Wazuh manager to the/var/ossec/etcfolder:# cp rootCA.pem /var/ossec/etc
To register the Wazuh agent, run the
agent-authutility providing the Wazuh manager’s IP address and location of the CA:# /var/ossec/bin/agent-auth -m <manager_IP> -v /var/ossec/etc/rootCA.pem
If the new Wazuh agent’s name is not provided, it is set automatically using hostname. To specify the Wazuh agent's name add
-A <agent_name>to the command above.Note
Note that this method must include the
-v optionthat indicates the location of the CA. If this option is not included, a warning message will be displayed and the connection will be established without verifying the Wazuh manager.To enable the communication with the Wazuh manager, edit the Wazuh agent's configuration file placed at
/var/ossec/etc/ossec.conf.In the
<client><server>section,MANAGER_IPhas to be replaced with the Wazuh server's IP address or the DNS name:<client> <server> <address>MANAGER_IP</address> ... </server> </client>
Restart the Wazuh agent:
# systemctl restart wazuh-agent# service wazuh-agent restart# /var/ossec/bin/ossec-control restart
The Wazuh agent registration can be adjusted by using different agent-auth options.
Open a Powershell or CMD session in the Windows Wazuh agent's host and start a CMD or a Powershell as an Administrator.
The Wazuh agent's installation directory depends on the architecture of the host:
C:\Program Files (x86)\ossec-agentforx86_64hosts.
C:\Program Files\ossec-agentforx86hosts.Note
This guide supposes that the Wazuh agent is installed in a
x86_64host. The installation path will be:C:\Program Files (x86)\ossec-agent.
Copy the CA (
.pemfile) previously created on the Wazuh manager to theC:\Program Files (x86)\ossec-agentfolder:# cp rootCA.pem C:\Program Files (x86)\ossec-agent
To register the Wazuh agent, run the
agent-authutility providing the Wazuh manager’s IP address and location of the CA:# C:\Program Files (x86)\ossec-agent\agent-auth.exe -m <manager_IP> -v C:\Program Files (x86)\ossec-agent\rootCA.pem
If the new Wazuh agent’s name is not provided, it is set automatically using hostname. To specify the Wazuh agent's name add
-A <agent_name>to the command above.Note
Note that this method must include the
-v optionthat indicates the location of the CA. If this option is not included, a warning message will be displayed and the connection will be established without verifying the Wazuh manager.To enable the communication with the Wazuh manager, edit the Wazuh agent's configuration file placed at
C:\Program Files (x86)\ossec-agent\ossec.conf.In the
<client><server>section,MANAGER_IPhas to be replaced with the Wazuh server's IP address or the DNS name:<client> <server> <address>MANAGER_IP</address> ... </server> </client>
Restart the Wazuh agent:
# Restart-Service -Name wazuh# net stop wazuh # net start wazuh
The Wazuh agent registration can be adjusted by using different agent-auth options.
Open a terminal in the MacOS X Wazuh agent's host as a root user.
Copy the CA (
.pemfile) previously created on the Wazuh manager to the/Library/Ossec/etcfolder:# cp rootCA.pem /Library/Ossec/etc
To register the Wazuh agent, run the
agent-authutility providing the Wazuh manager’s IP address and location of the CA:# /Library/Ossec/bin/agent-auth -m <manager_IP> -v /Library/Ossec/etc/rootCA.pem
If the new Wazuh agent’s name is not provided, it is set automatically using hostname. To specify the Wazuh agent's name add
-A <agent_name>to the command above.Note
Note that this method must include the
-v optionthat indicates the location of the CA. If this option is not included, a warning message will be displayed and the connection will be established without verifying the Wazuh manager.To enable the communication with the Wazuh manager, edit the Wazuh agent's configuration file placed at
/Library/Ossec/etc/ossec.conf.In the
<client><server>section,MANAGER_IPhas to be replaced with the Wazuh server's IP address or the DNS name:<client> <server> <address>MANAGER_IP</address> ... </server> </client>
Restart the Wazuh agent:
# /Library/Ossec/bin/ossec-control restart
The Wazuh agent registration can be adjusted by using different agent-auth options.
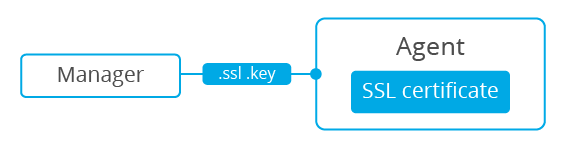
To verify the Wazuh agent using an SSL, create an SSL certificate for the Wazuh agent and sign it using Certificate of Authority (CA) created in the previous section. This will allow the Wazuh manager to ensure that the correct Wazuh agent is beeing connected during the registration service.
Creating and signing the Wazuh agent's certificate and enabling the host verification option on the Wazuh manager
This example shows the creation of the certificate for the Wazuh agents without specifying their hostname or IP address. This will allow to share the same certificate among all selected Wazuh agents. The signed certificate will verify the Wazuh agent. Registration service for Wazuh agents where the certificate is not present will be refused.
Issue and sign the certificate for the Wazuh agent by executing the following commands in the location of CA files. Remember not to enter the
common namefield:# openssl req -new -nodes -newkey rsa:4096 -keyout sslagent.key -out sslagent.csr -batch # openssl x509 -req -days 365 -in sslagent.csr -CA rootCA.pem -CAkey rootCA.key -out sslagent.cert -CAcreateserial
Copy the CA (
.pemfile) to the/var/ossec/etcfolder:# cp rootCA.pem /var/ossec/etc
Modify the
/var/ossec/etc/ossec.conffile to enable the host verification. Uncomment the<auth><ssl_agent_ca>section and add the path to theCAfile.<auth> ... <ssl_agent_ca>/var/ossec/etc/rootCA.pem</ssl_agent_ca> ... </client>
Restart the Wazuh manager:
# systemctl restart wazuh-manager# service wazuh-manager restart
This example shows the creation of the certificate for the Wazuh agent binding its IP address as seen by the Wazuh manager.
Issue and sign the certificate for the Wazuh agent by executing the following commands in the location of
CAfiles. In thecommon namefield replace<agent_IP>with the Wazuh agent's hostname or IP address.# openssl req -new -nodes -newkey rsa:4096 -keyout sslagent.key -out sslagent.csr -subj '/C=US/CN=<agent_IP>' # openssl x509 -req -days 365 -in sslagent.csr -CA rootCA.pem -CAkey rootCA.key -out sslagent.cert -CAcreateserial
Copy the CA (.pem file) to the
/var/ossec/etcfolder:# cp rootCA.pem /var/ossec/etc
Modify the
/var/ossec/etc/ossec.conffile to enable the host verification. Uncomment the<auth><ssl_agent_ca>section and add the path to theCAfile. Set the field<ssl_verify_host>toyes:<auth> ... <ssl_agent_ca>/var/ossec/etc/rootCA.pem</ssl_agent_ca> <ssl_verify_host>yes</ssl_verify_host> ... </client>
Restart the Wazuh manager:
# systemctl restart wazuh-manager# service wazuh-manager restart
The Wazuh agent registration using the certificate and the key and enabling the communication with the Wazuh manager
Copy the newly created certificate (.cert file) and key (.key file) to the Wazuh agent. In this example, the certificate file is sslagent.cert and the key is sslagent.key.
Choose the tab corresponding to the wazuh agent's host operating system:
Open a terminal in the Linux/Unix Wazuh agent's host as a root user.
Copy the certificate (
.certfile) and its key (.keyfile), previously created on the Wazuh manager, to the/var/ossec/etcfolder:# cp sslagent.cert sslagent.key /var/ossec/etc
To register the Wazuh agent, run the
agent-authutility which automatically adds the Wazuh agent to the Wazuh manager:# /var/ossec/bin/agent-auth -m <manager_IP> -x /var/ossec/etc/sslagent.cert -k /var/ossec/etc/sslagent.key
If the new Wazuh agent’s name is not provided, it is set automatically using hostname. To specify the Wazuh agent's name add
-A <agent_name>to the command above.To enable the communication with the Wazuh manager, edit the Wazuh agent's configuration file placed at
/var/ossec/etc/ossec.conf.In the
<client><server>section,MANAGER_IPhas to be replaced with the Wazuh server's IP address or the DNS name:<client> <server> <address>MANAGER_IP</address> ... </server> </client>
Restart the Wazuh agent:
# systemctl restart wazuh-agent# service wazuh-agent restart# /var/ossec/bin/ossec-control restart
The Wazuh agent registration can be adjusted by using different agent-auth options.
Open a Powershell or CMD session in the Windows Wazuh agent's host and start a CMD or a Powershell as an Administrator.
The Wazuh agent's installation directory depends on the architecture of the host:
C:\Program Files (x86)\ossec-agentforx86_64hosts.
C:\Program Files\ossec-agentforx86hosts.Note
This guide supposes that the Wazuh agent is installed in a
x86_64host. The installation path will be:C:\Program Files (x86)\ossec-agent.
Copy the certificate (
.certfile) and its key (.keyfile), previously created on the Wazuh manager, to theC:\Program Files (x86)\ossec-agentfolder:# cp sslagent.cert sslagent.key C:\Program Files (x86)\ossec-agent
To register the Wazuh agent, run the
agent-authutility which automatically adds the Wazuh agent to the Wazuh manager:# C:\Program Files (x86)\ossec-agent\agent-auth.exe -m <manager_IP> -x C:\Program Files (x86)\ossec-agent\sslagent.cert -k C:\Program Files (x86)\ossec-agent\sslagent.key
If the new Wazuh agent’s name is not provided, it is set automatically using hostname. To specify the Wazuh agent's name add
-A <agent_name>to the command above.To enable the communication with the Wazuh manager, edit the Wazuh agent's configuration file placed at
C:\Program Files (x86)\ossec-agent\ossec.conf.In the
<client><server>section,MANAGER_IPhas to be replaced with the Wazuh server's IP address or the DNS name:<client> <server> <address>MANAGER_IP</address> ... </server> </client>
Restart the Wazuh agent:
# Restart-Service -Name wazuh# net stop wazuh # net start wazuh
Open a terminal in the MacOS X Wazuh agent's host as a root user.
Copy the certificate (
.certfile) and its key (.keyfile), previously created on the Wazuh manager, to the/Library/Ossec/etcfolder:# cp sslagent.cert sslagent.key /Library/Ossec/etc
To register the Wazuh agent, run the
agent-authutility which automatically adds the Wazuh agent to the Wazuh manager:# /Library/Ossec/bin/agent-auth -m <manager_IP> -x /Library/Ossec/etc/sslagent.cert -k /Library/Ossec/etc/sslagent.key
If the new Wazuh agent’s name is not provided, it is set automatically using hostname. To specify the Wazuh agent's name add
-A <agent_name>to the command above.To enable the communication with the Wauh manager, edit the Wazuh agent's configuration file placed at
/Library/Ossec/etc/ossec.conf.In the
<client><server>section,MANAGER_IPhas to be replaced with the Wazuh server's IP address or the DNS name:<client> <server> <address>MANAGER_IP</address> ... </server> </client>
Restart the Wazuh agent:
# /Library/Ossec/bin/ossec-control restart
The Wazuh agent registration can be adjusted by using different agent-auth options.