Install Splunk in an all-in-one architecture
This document will guide you through the installation process for an all-in-one Wazuh Splunk server.
Note
You need root user privileges to run all the commands described below.
These are the two main components in this type of multi-tier server:
The indexer runs the Splunk engine. It reads forwarded data, parses, indexes and stores it as events that contain alert data generated by the Wazuh manager and sent by the Forwarder instance.
The forwarder reads local data from the Wazuh manager and the Wazuh API instance and sends this data to the indexer.
Note
Splunk is not open source software, and it requires a registered user and license in order to work. You can also use a free trial license.
This guide installs and configures Splunk 8.2. If you intend to configure another version of Splunk, such as 8.1, change the Splunk version number in the requests for the configuration files and the Wazuh app for Splunk. For example:
# curl -so /opt/splunk/etc/system/local/indexes.conf https://raw.githubusercontent.com/wazuh/wazuh-splunk/v4.4.5-8.2/setup/indexer/indexes.conf
Becomes
# curl -so /opt/splunk/etc/system/local/indexes.conf https://raw.githubusercontent.com/wazuh/wazuh-splunk/v4.4.5-8.1/setup/indexer/indexes.conf
Warning
This section will install Splunk using the all-in-one deployment schema typically suitable for testing. Other installation options are:
The multi-instance cluster deployment schema.
Install and configure Splunk indexer
This component receives the data flow streamed by a forwarder and stores it in a Splunk index.
Download the Splunk package from its official website. The versions of Splunk compatible with Wazuh and the Wazuh app for Splunk can be found here.
Install the Splunk package:
For RPM based distributions:
# yum install splunk-enterprise-package.rpm
For Debian/Ubuntu distributions:
# dpkg --install splunk-enterprise-package.deb
Configure
inputs.confandindexes.conf:Create
indexes.conf:# curl -so /opt/splunk/etc/system/local/indexes.conf https://raw.githubusercontent.com/wazuh/wazuh-splunk/v4.4.5-8.2/setup/indexer/indexes.conf
Create
inputs.conf:# curl -so /opt/splunk/etc/system/local/inputs.conf https://raw.githubusercontent.com/wazuh/wazuh-splunk/v4.4.5-8.2/setup/indexer/inputs.conf
Ensure Splunk is installed in
/opt/splunkand start the service:# /opt/splunk/bin/splunk start
Note
This command will make a Splunk General Terms appear that will have to be accepted, and then, will ask for a series of information such as:
Administrator name
Password
Set up data forwarding
Edit
/opt/splunk/etc/system/local/inputs.confand add the block below:[SSL] serverCert = $SPLUNK_HOME/etc/auth/server.pem sslPassword = password
Where:
serverCertis the path to the Splunk default server certificate.$SPLUNK_HOMEis the Splunk installation directory. The default directory is/opt/splunk.sslPasswordis the password of the certificate. The default is “password”.
Restart the Splunk service:
# /opt/splunk/bin/splunk restart
Optional. If you additionally want the Splunk service to start at boot time, please execute the following command:
# /opt/splunk/bin/splunk enable boot-start
Open Splunk in your preferred browser.
Navigate to Settings > Data > Forwarding and receiving.
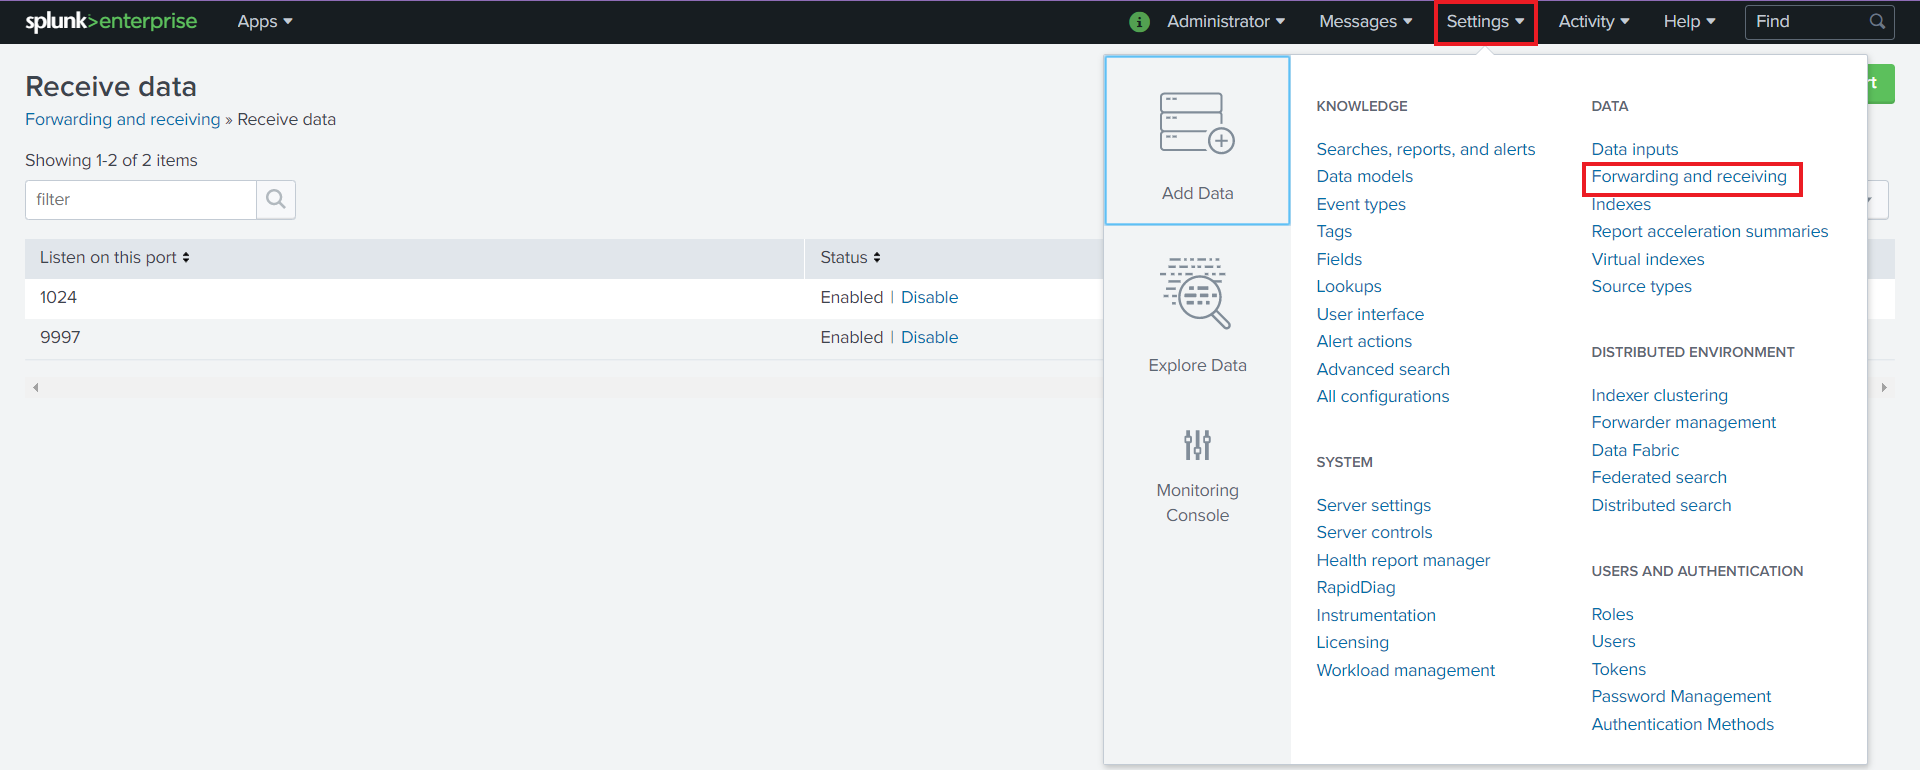
Select “Configure receiving”
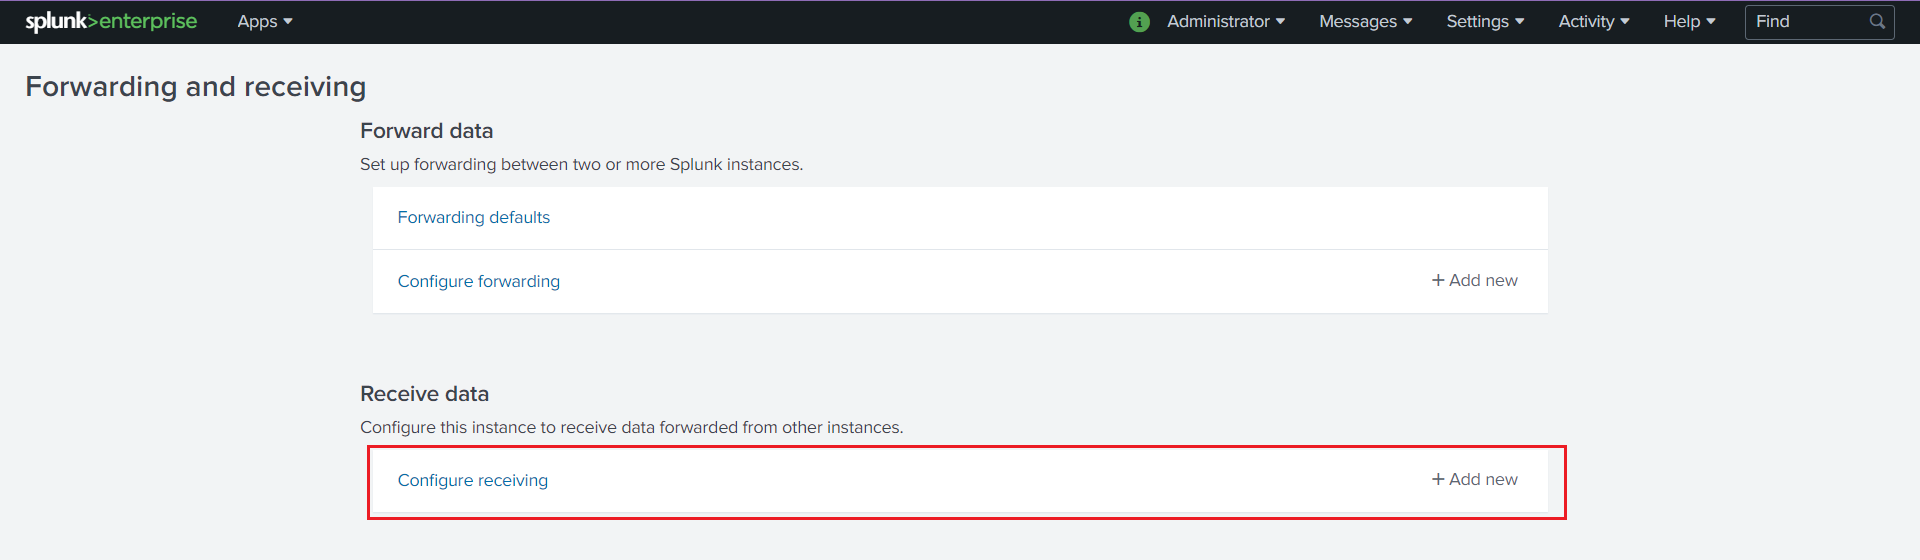
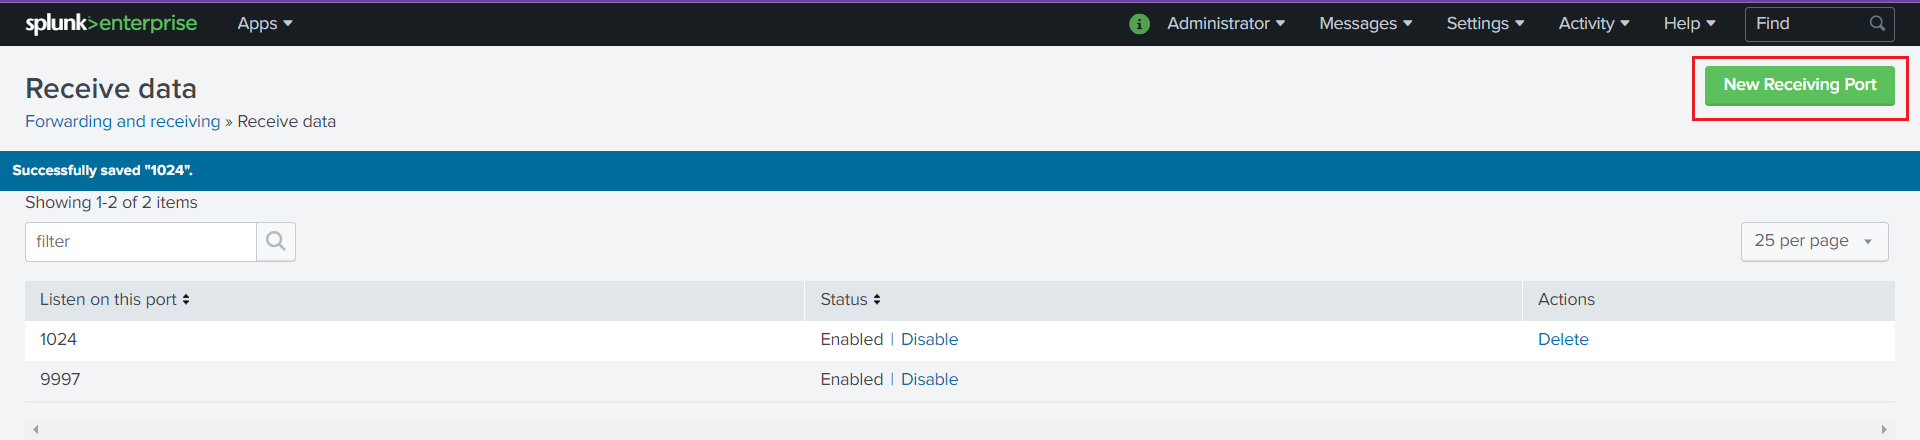
Add an unused port as a new receiving port and save it.
Restart the Splunk service.
# /opt/splunk/bin/splunk restart
Optional. If you additionally want the Splunk service to start at boot time, please execute the following command:
# /opt/splunk/bin/splunk enable boot-start
Install and configure Splunk forwarder
A Splunk forwarder is required in order to send alerts to the Splunk indexer.
Depending on the type of architecture that you’re installing, the Splunk forwarder is configured differently.
Download the Splunk forwarder package from the official website. The versions of Splunk forwarder compatible with Wazuh and the Wazuh app for Splunk can be found here.
Install the Splunk forwarder package on the Wazuh manager:
# yum install splunkforwarder-package.rpm
# dpkg --install splunkforwarder-package.deb
Configuration
This section explains how to configure the Splunk forwarder to send alerts to the Splunk indexer component.
props.conf: In order to consume data inputs, Splunk needs to specify what kind of format it will handle. The props.conf file specifies the data format Splunk can handle.inputs.conf: The Splunk forwarder needs this file to read data from an input. In this case, the Wazuh alerts file.
Creating the configuration files
Download and insert the
props.conftemplate:# curl -so /opt/splunkforwarder/etc/system/local/props.conf https://raw.githubusercontent.com/wazuh/wazuh-splunk/v4.4.5-8.2/setup/forwarder/props.conf
Download and insert the
inputs.conftemplate:# curl -so /opt/splunkforwarder/etc/system/local/inputs.conf https://raw.githubusercontent.com/wazuh/wazuh-splunk/v4.4.5-8.2/setup/forwarder/inputs.conf
Set the Wazuh manager hostname:
# sed -i "s:MANAGER_HOSTNAME:$(hostname):g" /opt/splunkforwarder/etc/system/local/inputs.conf
Set up data forwarding
Create the file outputs.conf:
# touch /opt/splunkforwarder/etc/system/local/outputs.conf
Fill it with the content below:
   [tcpout]
   defaultGroup = default-autolb-group

   [tcpout:default-autolb-group]
   server = <INDEXER_IP>:9997
   clientCert = /opt/splunkforwarder/etc/auth/server.pem
   sslRootCAPath = /opt/splunkforwarder/etc/auth/ca.pem
   sslPassword = password

   [tcpout-server://<INDEXER_IP>:9997]
<INDEXER_IP>is the IP address of the Splunk indexer.
Start the Splunk forwarder service:
# /opt/splunkforwarder/bin/splunk start
Note
This command will make a Splunk forwarder General Terms appear that will have to be accepted, and then, will ask for a series of information such as:
Administrator name
Password
Warning
If you get an error message about port 8089 already being in use, you can change it to use a different one.
After installing the Splunk forwarder, incoming data should appear in the designated Indexer.
Optional. If you want the Splunk forwarder service to start at boot time, please execute the following command:
# /opt/splunkforwarder/bin/splunk enable boot-start
Start the Splunk forwarder:
# /opt/splunkforwarder/bin/splunk start
Note
This command will make a Splunk forwarder General Terms appear that will have to be accepted, and then, will ask for a series of information such as:
Administrator name
Password
Warning
If you get an error message about port
8089already being in use, you will be prompted to change it to use a different one.Point the Splunk forwarder output to Wazuh Splunk indexer with the following command:
# /opt/splunkforwarder/bin/splunk add forward-server <INDEXER_IP>:<INDEXER_PORT>
This command will prompt for the Splunk indexer username and password.
<INDEXER_IP>is the IP address of the Splunk Indexer.<INDEXER_PORT>is the port of the Splunk indexer earlier configured in receiving. The default value is 9997.
Restart the Splunk Forwarder service:
# /opt/splunkforwarder/bin/splunk restart
Warning
If you get an error message about port
8089already being in use, you can change it to use a different one.After installing the Splunk Forwarder, incoming data should appear in the designated Indexer.
Optional. If you additionally want the Splunk forwarder service to start at boot time, please execute the following command:
# /opt/splunkforwarder/bin/splunk enable boot-start
Now that you’ve finished installing Splunk using the all-in-one architecture, you can proceed with the next step and install the Wazuh app for Splunk.
Additional links
You can find useful Splunk CLI commands in the official documentation.