Create and map internal users (RBAC)
Wazuh Role-based access control (RBAC) allows access to Wazuh resources based on the roles and policies assigned to the users. It is an easy-to-use administration system that enables to manage users’ or entities’ permissions to the system resources.
Note
Role-based access control can also be configured by REST API requests. To learn more about using the Wazuh API to configure RBAC, see our documentation here.
In the following sections, we learn how to create internal users and map them with Wazuh in the Wazuh app for Splunk.
Prerequisites
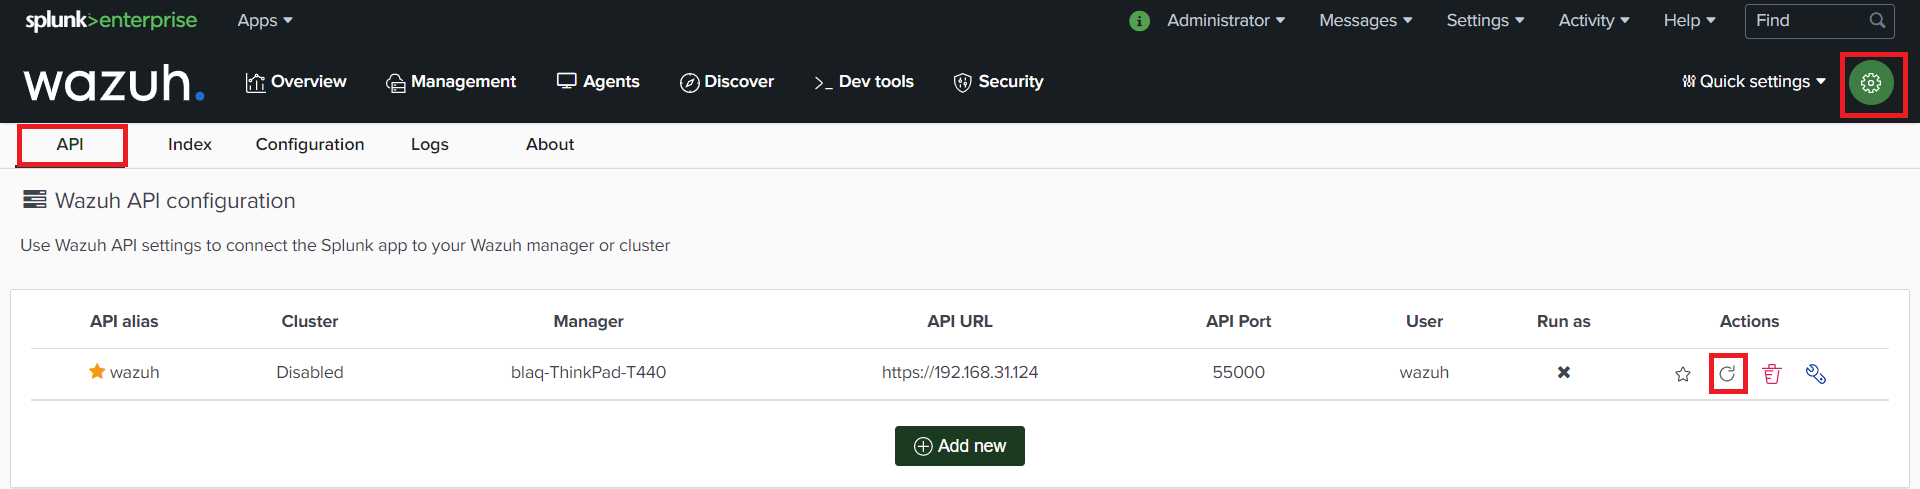
Before any user role mapping can be done, the Wazuh API connection inside the Splunk app must be configured with the wazuh-wui credentials. To do this follow the steps below:
Open Splunk in your desired browser and log in with the username and password created when the Splunk package was installed. Click on the Wazuh app icon.
Click on the “Settings” tab. Fill out the form with your wazuh-wui API credentials. Use the URL and port from your Wazuh API server.
By default, the Wazuh API port is
55000. The default wazuh-wui username and password iswazuh-wui:wazuh-wui. Ensure that the Run as option is checked. Once the API has been added, it is possible to check the connection by pressing the Check connection button on each Wazuh API entry. A successful message appears on the bottom right corner if the connection is established.Note
If the Run as option is not checked when adding he wazuh-wui API credentials, RBAC cannot be configured.
Ensure that the “wazuh” user API credentials have already been added to the API configuration.
You can get more information about how to set up the credentials at Securing the Wazuh API section.
Creating and setting a Wazuh admin user
Log in to Splunk from your preferred browser.
Select the Wazuh app for Splunk.
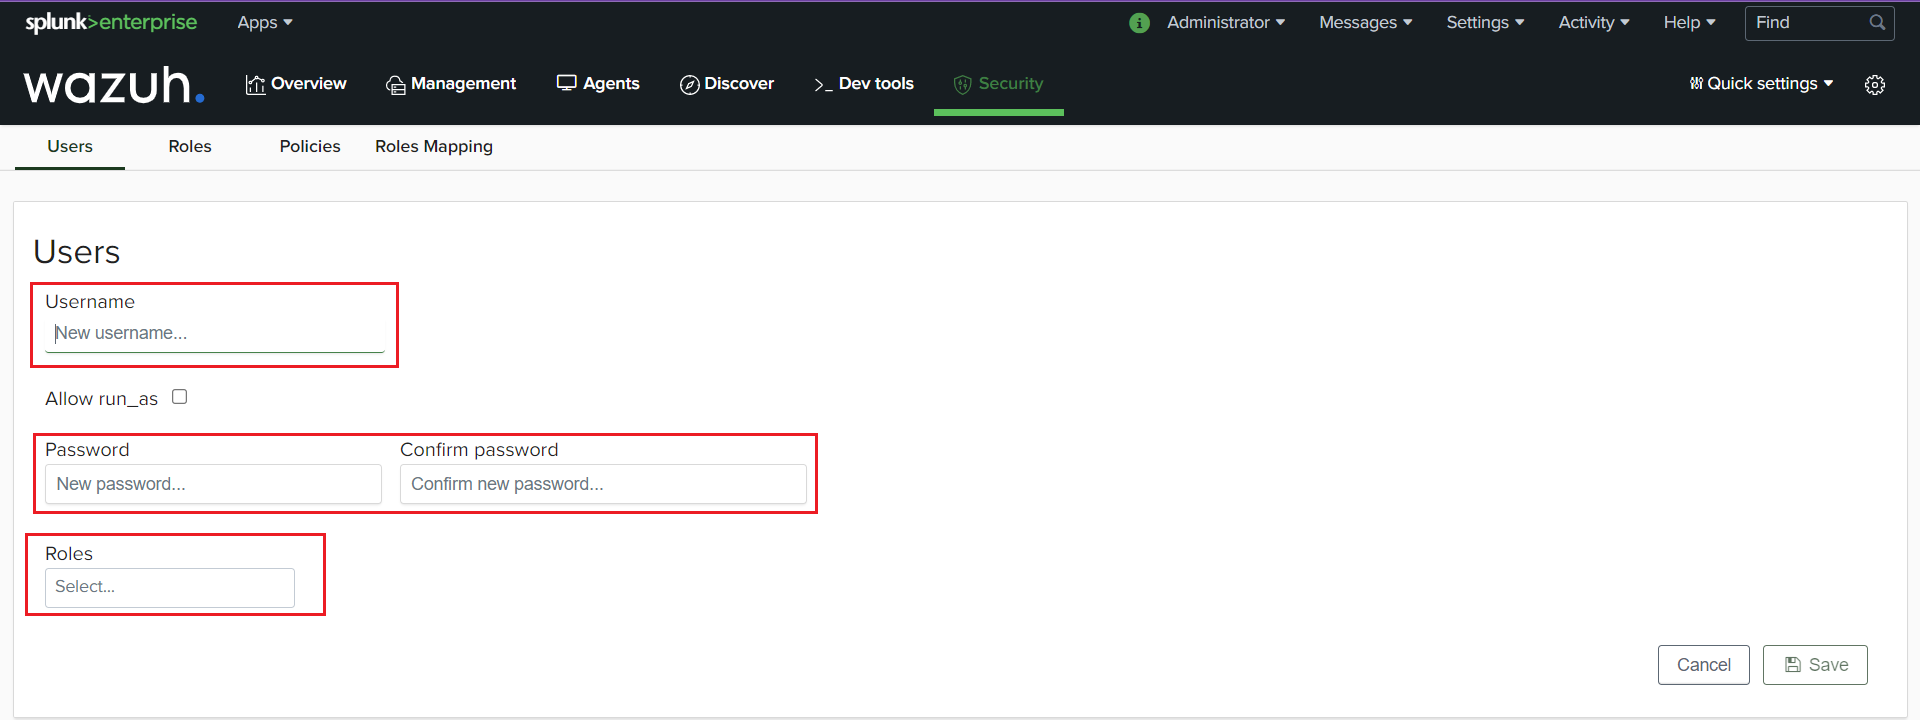
Go to the “Security” tab. Select “Users” then “Add new user”.

Specify the username and password, then select the “administrator” role for the user and save.

Creating and setting a Wazuh read-only user
Log in to Splunk from your preferred browser.
Select the Wazuh app for Splunk.
Go to the “Security” tab. Select “Users” then “Add new user”.
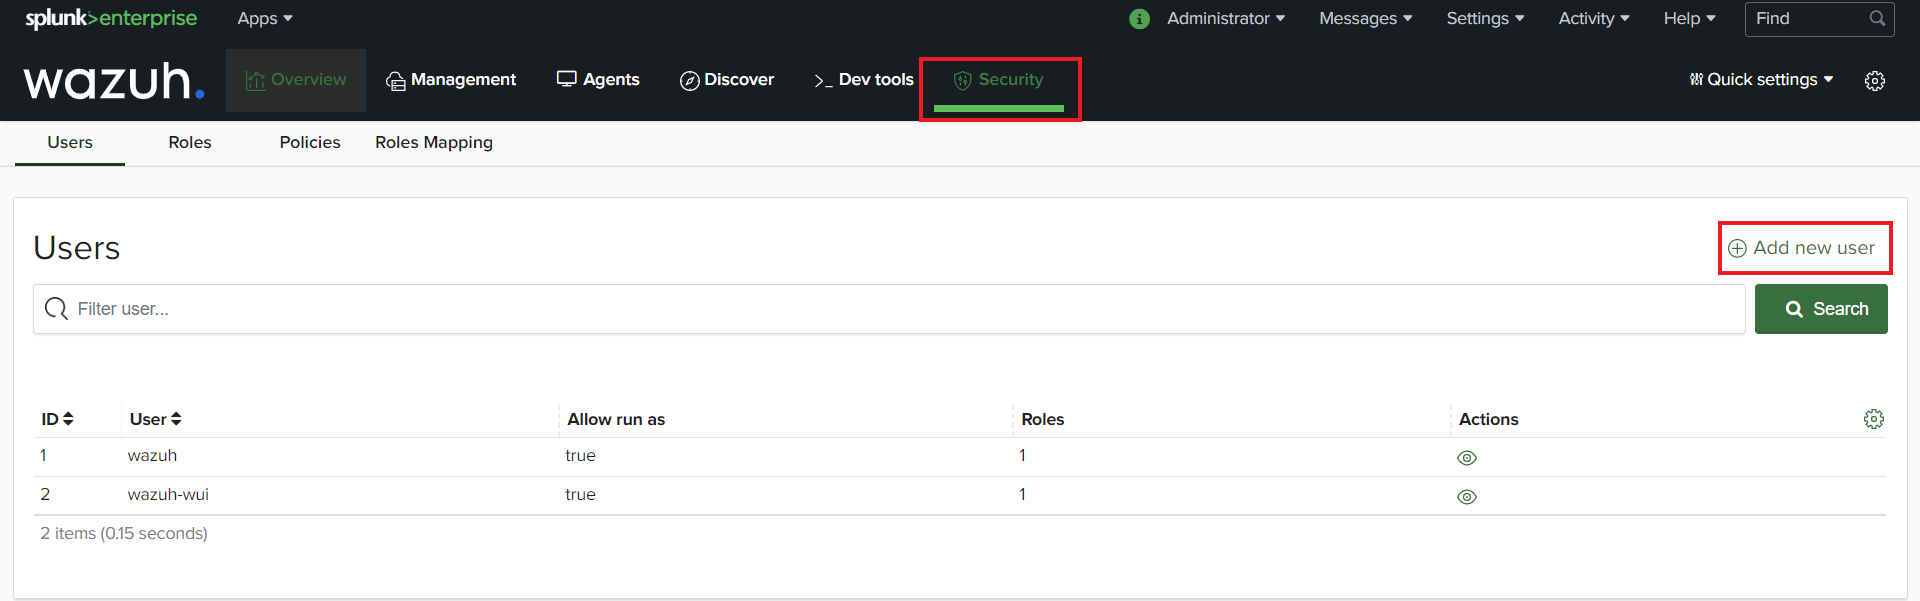
Specify the username and password, then select the “readonly” role for the user and save.
Creating roles
Log in to Splunk from your preferred browser.
Select the Wazuh app for Splunk.
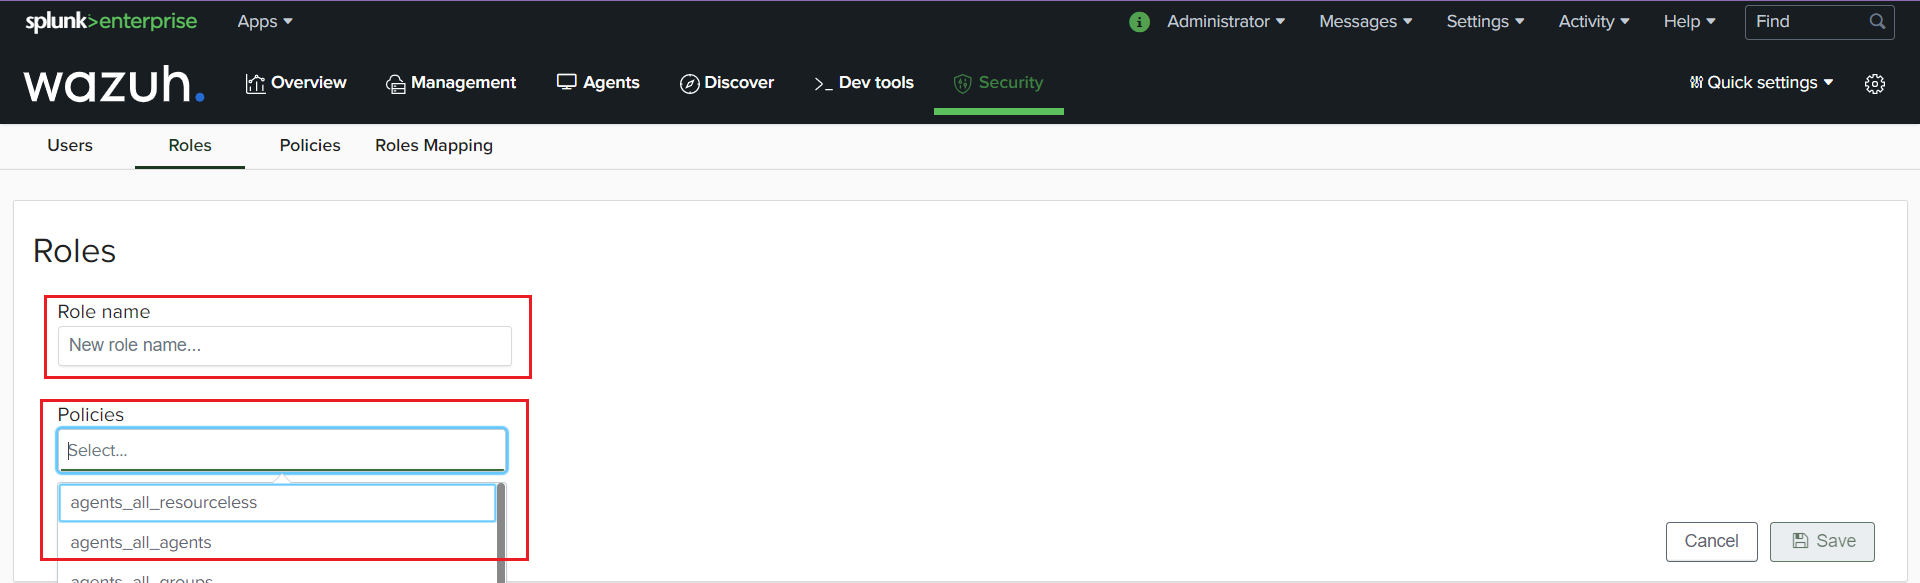
Go to the “Security” tab. Select “Roles” then “Add new role”.

Specify the role name and select the policies you want to apply to the role. Then save.
Creating policies
Log in to Splunk from your preferred browser.
Select the Wazuh app for Splunk.
Go to the “Security” tab. Select “Policies” then “Add new policy”.

Specify the policy name, then select the actions that should apply to the policy.
Proceed to select the resource and resource identifier the policy will apply to.Then select an effect of the policy.
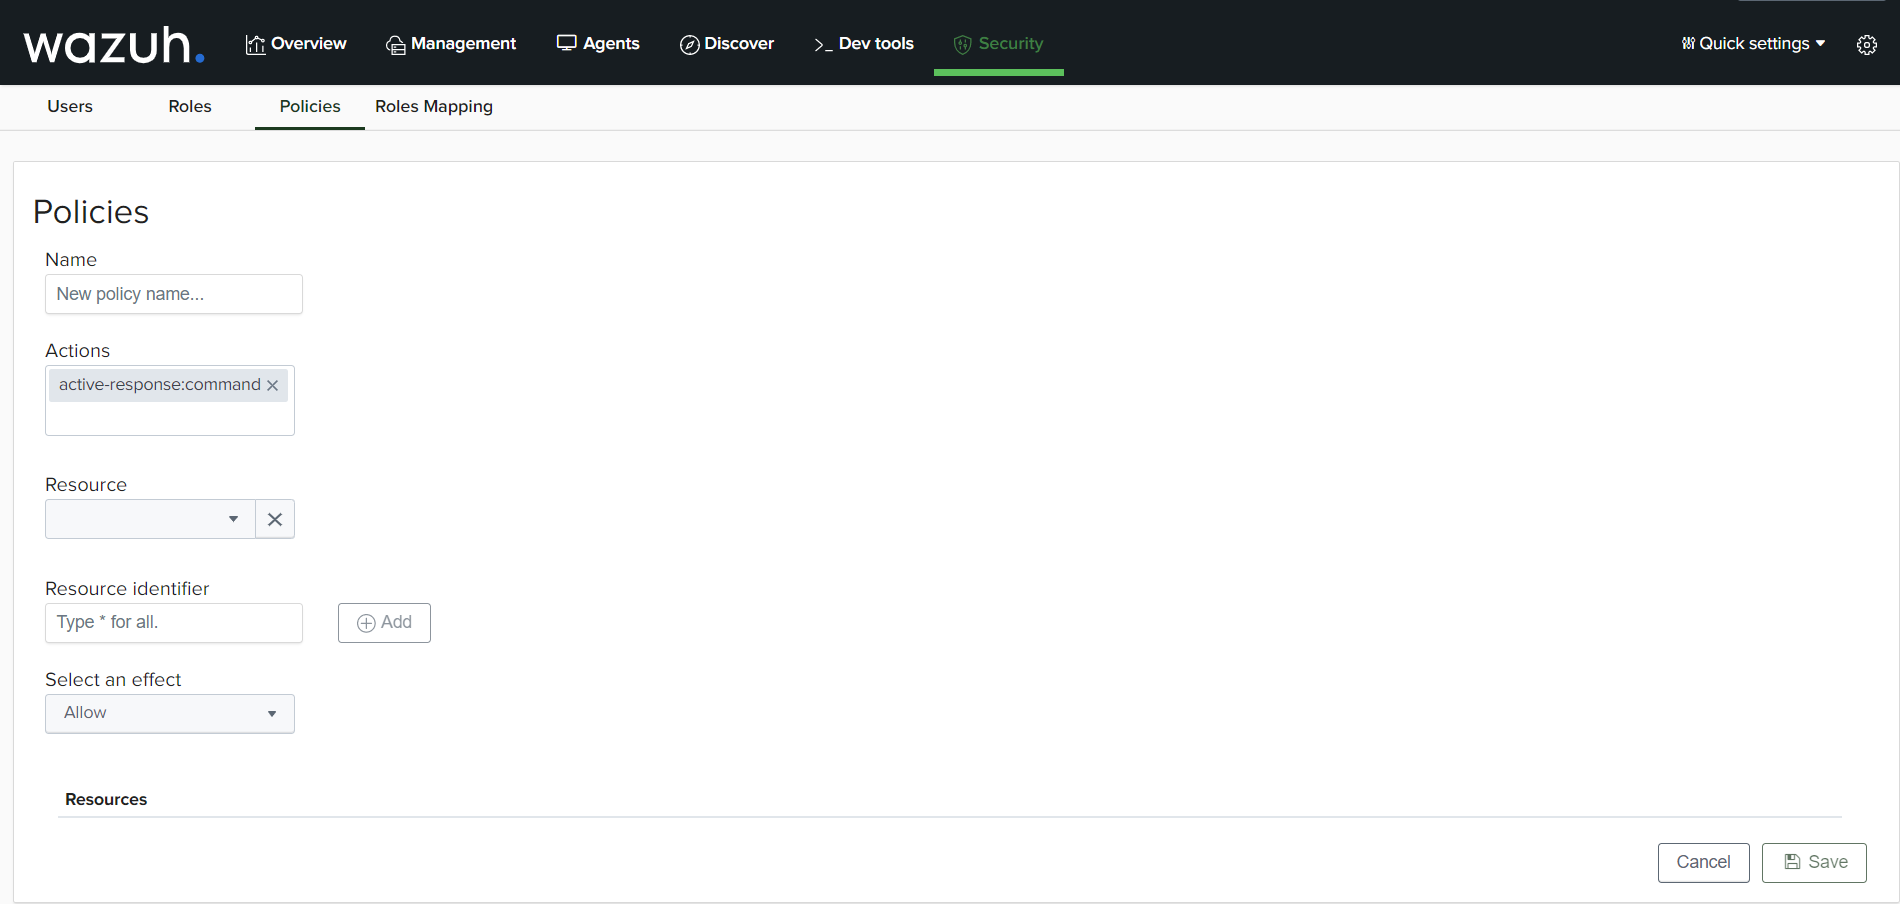
Proceed to save the policy.
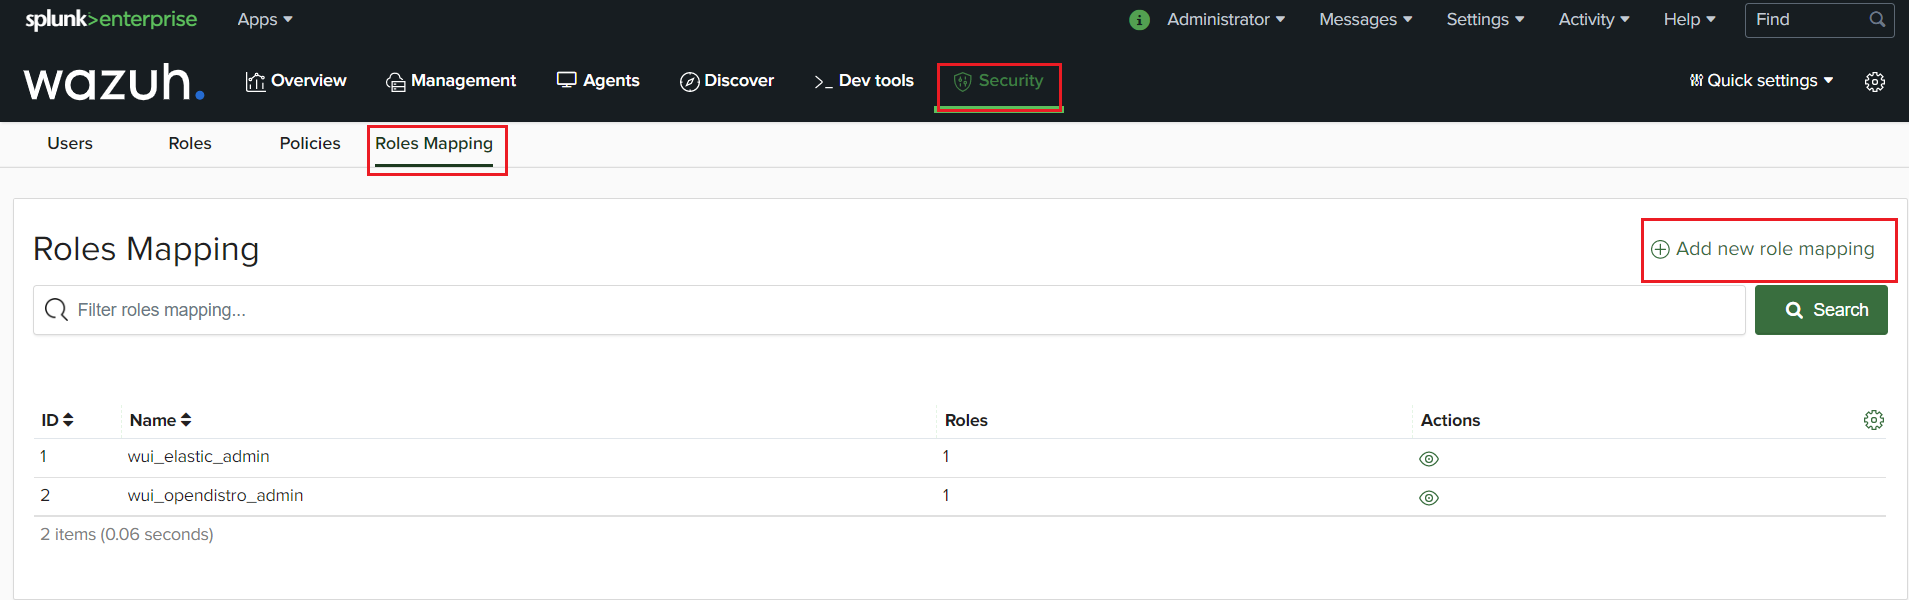
Mapping roles to users
Log in to Splunk from your preferred browser.
Select the Wazuh app for Splunk.
Go to the “Security” tab. Select “Roles Mapping” then “Add new role mapping”.
Complete the empty fields with the requested information:
Role mapping name: Assign a name to the role mapping.
Roles: The roles to be mapped to a user.
Internal users: The internal users to map a role to.
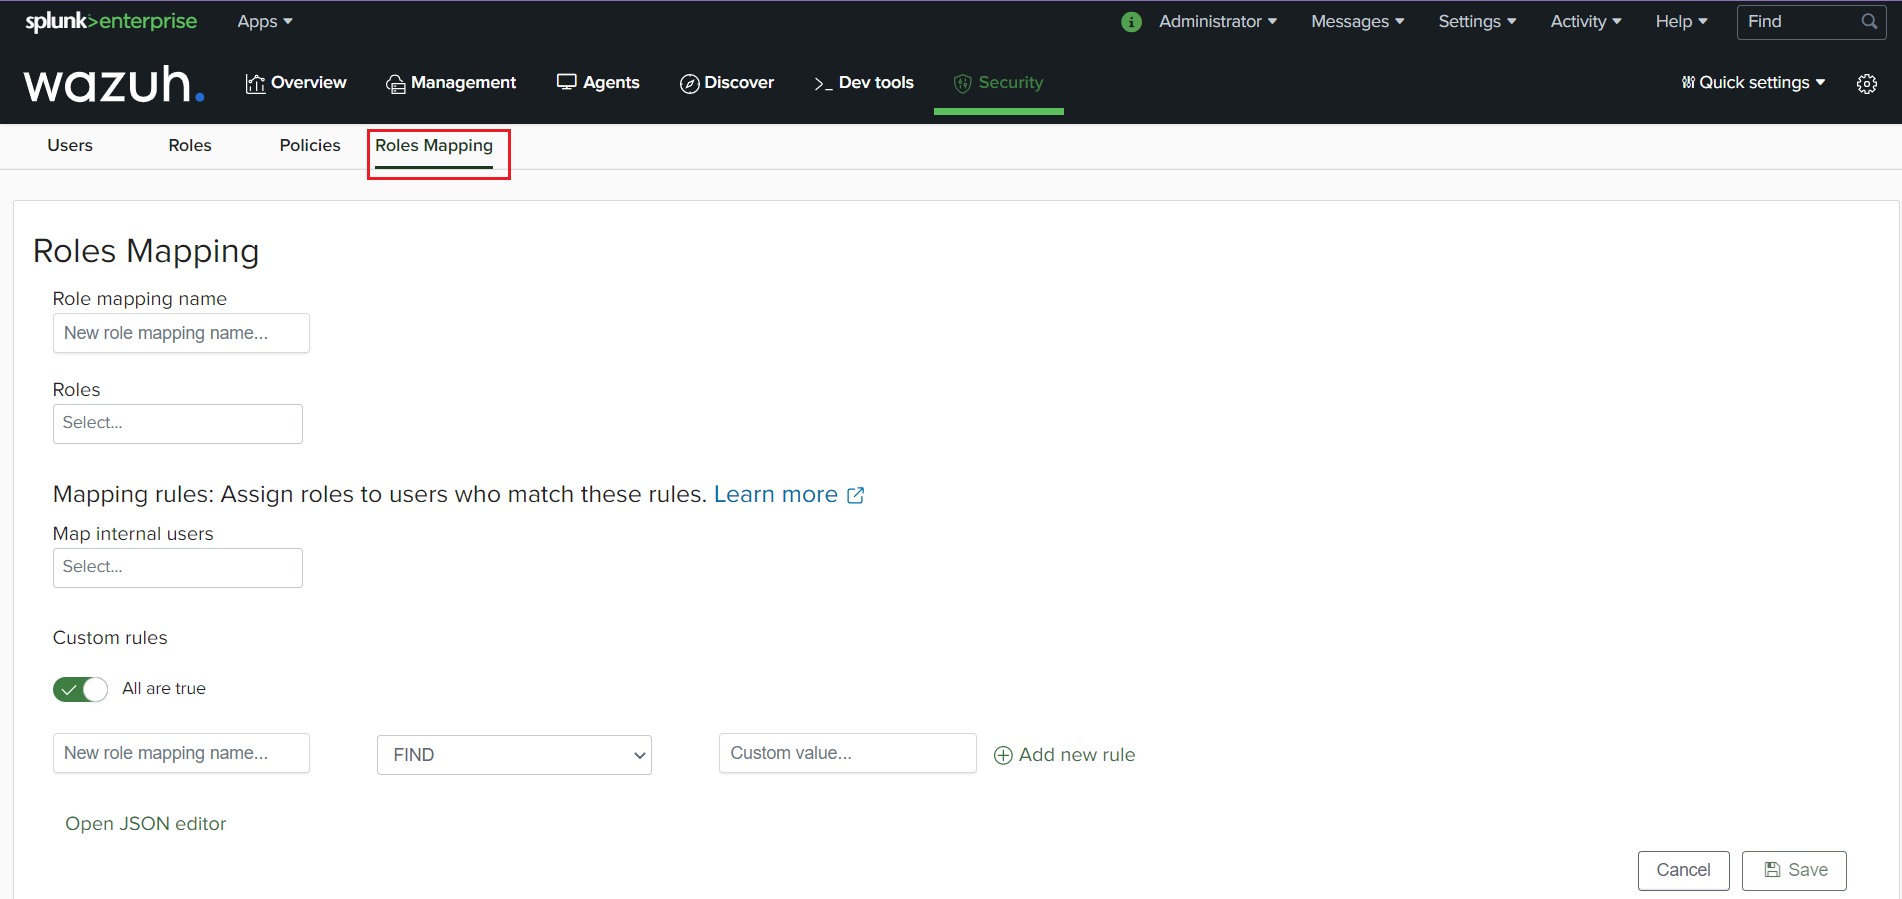
Click Save to finish the action.