Importing the client key to the Wazuh agent
Configure the Wazuh agent with the client key that you received from the Wazuh manager. The Wazuh agent uses this key to authenticate and communicate with the Wazuh manager.
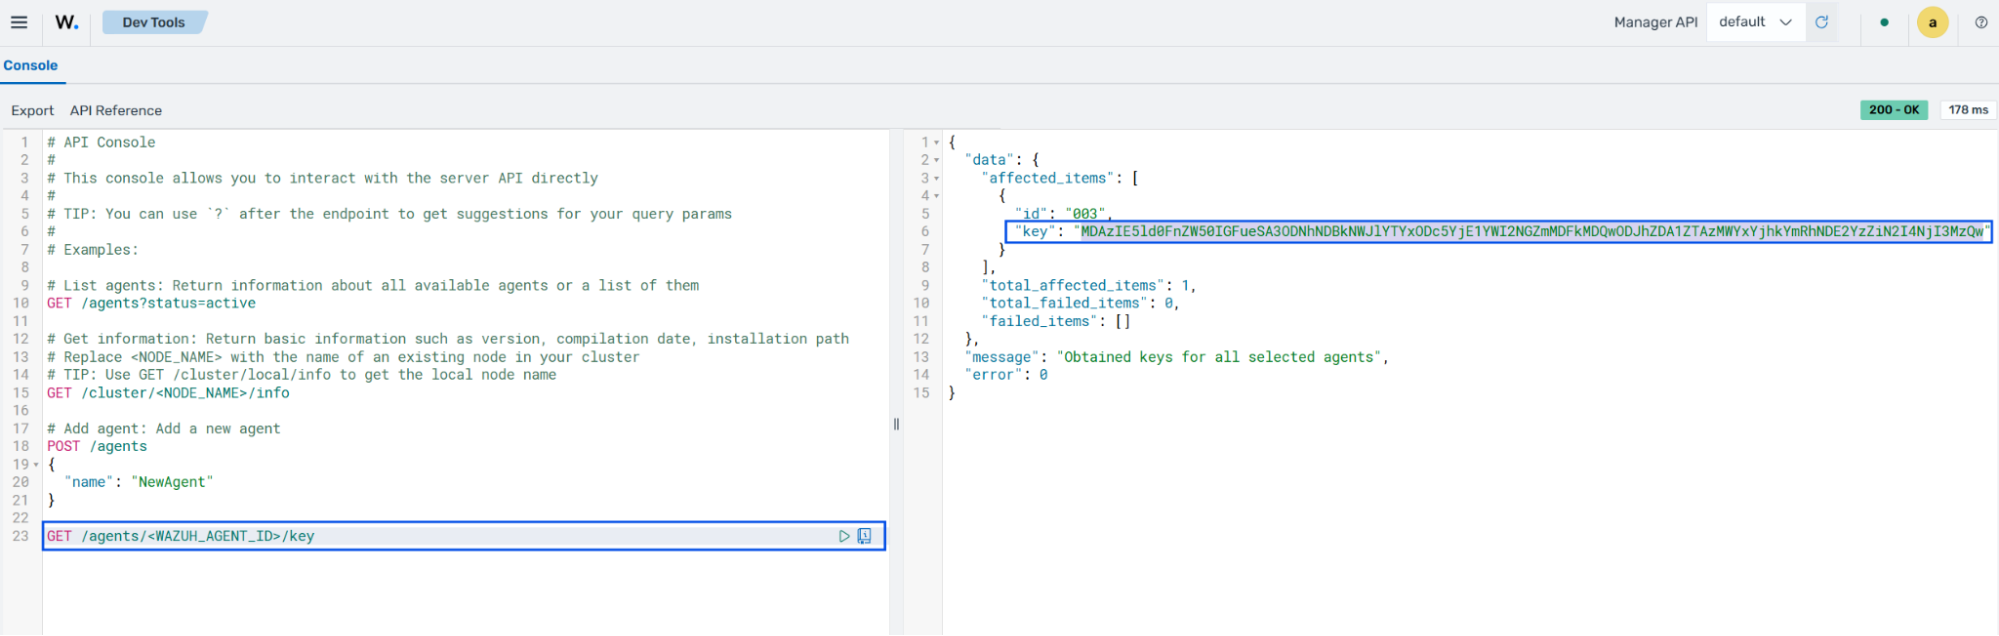
You can retrieve the client key by using the GET /agents/{agent_id}/key endpoint in Server management > Dev Tools on the Wazuh dashboard. Replace <WAZUH_AGENT_ID> with the Wazuh agent ID.
The following sections show how to import the client key on different operating systems:
Linux/Unix
Follow the steps below to import the client key to a Linux/Unix endpoint:
From the Wazuh agent, launch the terminal, obtain root access, and import the client key. Replace
<KEY>with the client key received from the Wazuh manager:# /var/ossec/bin/manage_agents -i <KEY>
The output looks like this:
  Agent information:
  ID:001
  Name:agent_1
  IP Address:any
  Confirm adding it?(y/n): y
  Added.
Add the Wazuh manager IP address or fully qualified domain name (FQDN) to the Wazuh agent configuration file at
/var/ossec/etc/ossec.conf. Replace<WAZUH_MANAGER_IP>with the Wazuh manager IP address or FQDN.<client> <manager> <address><WAZUH_MANAGER_IP></address> ... </manager> </client>
Restart the Wazuh agent to make the changes effective:
# systemctl restart wazuh-agent
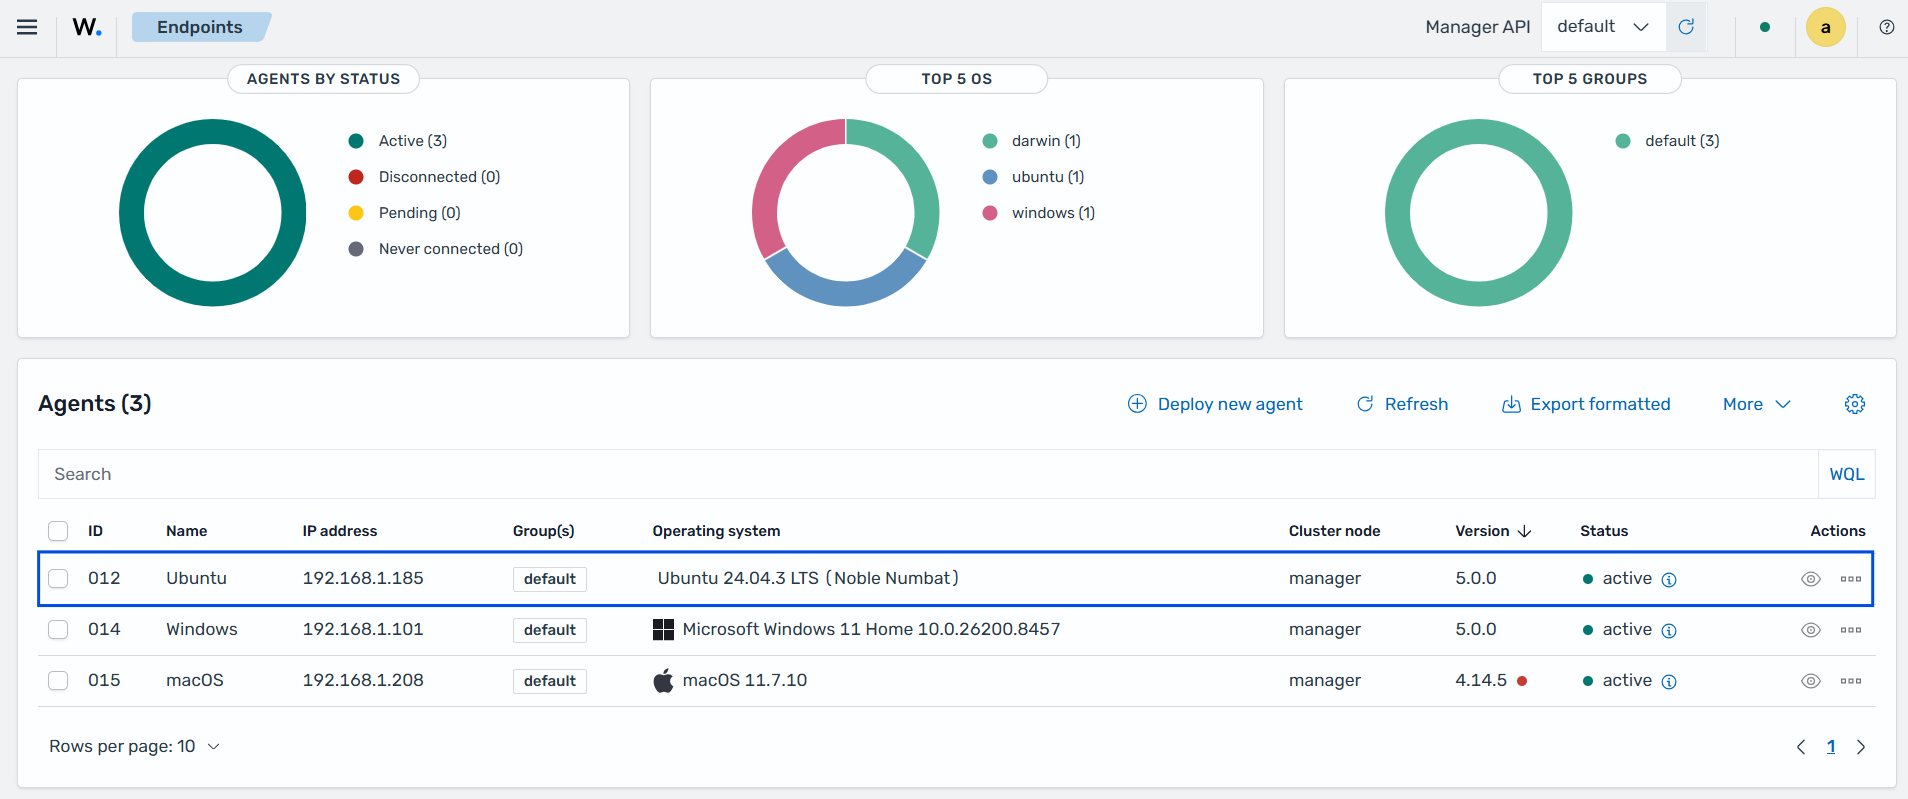
Click on the upper-left menu icon and navigate to Agents management > Summary on the Wazuh dashboard to check for the newly enrolled Wazuh agent and its connection status. If the enrollment was successful, you will have an interface similar to the image below.
Windows
Follow the steps below to import the client key to a Windows endpoint.
From the Wazuh agent, launch the CMD or PowerShell as an administrator and import the client key. Replace
<KEY>with the client key received from the Wazuh manager:For 64-bit systems:
> "C:\Program Files (x86)\ossec-agent\manage_agents.exe" -i <KEY>
For 32-bit systems:
> "C:\Program Files\ossec-agent\manage_agents.exe" -i <KEY>
The output should look like this:
  Agent information:
  ID:001
  Name:agent_1
  IP Address:any
  Confirm adding it?(y/n): y
  Added.
Add the Wazuh manager IP address or fully qualified domain name (FQDN) to the Wazuh agent configuration file in
C:\Program Files (x86)\ossec-agent\ossec.conf. Replace<WAZUH_MANAGER_IP>with the IP address or FQDN of the Wazuh manager.<client> <manager> <address><WAZUH_MANAGER_IP></address> ... </manager> </client>
Restart the Wazuh agent to make the changes effective.
> Restart-Service -Name wazuh
> net stop wazuh
> net start wazuh
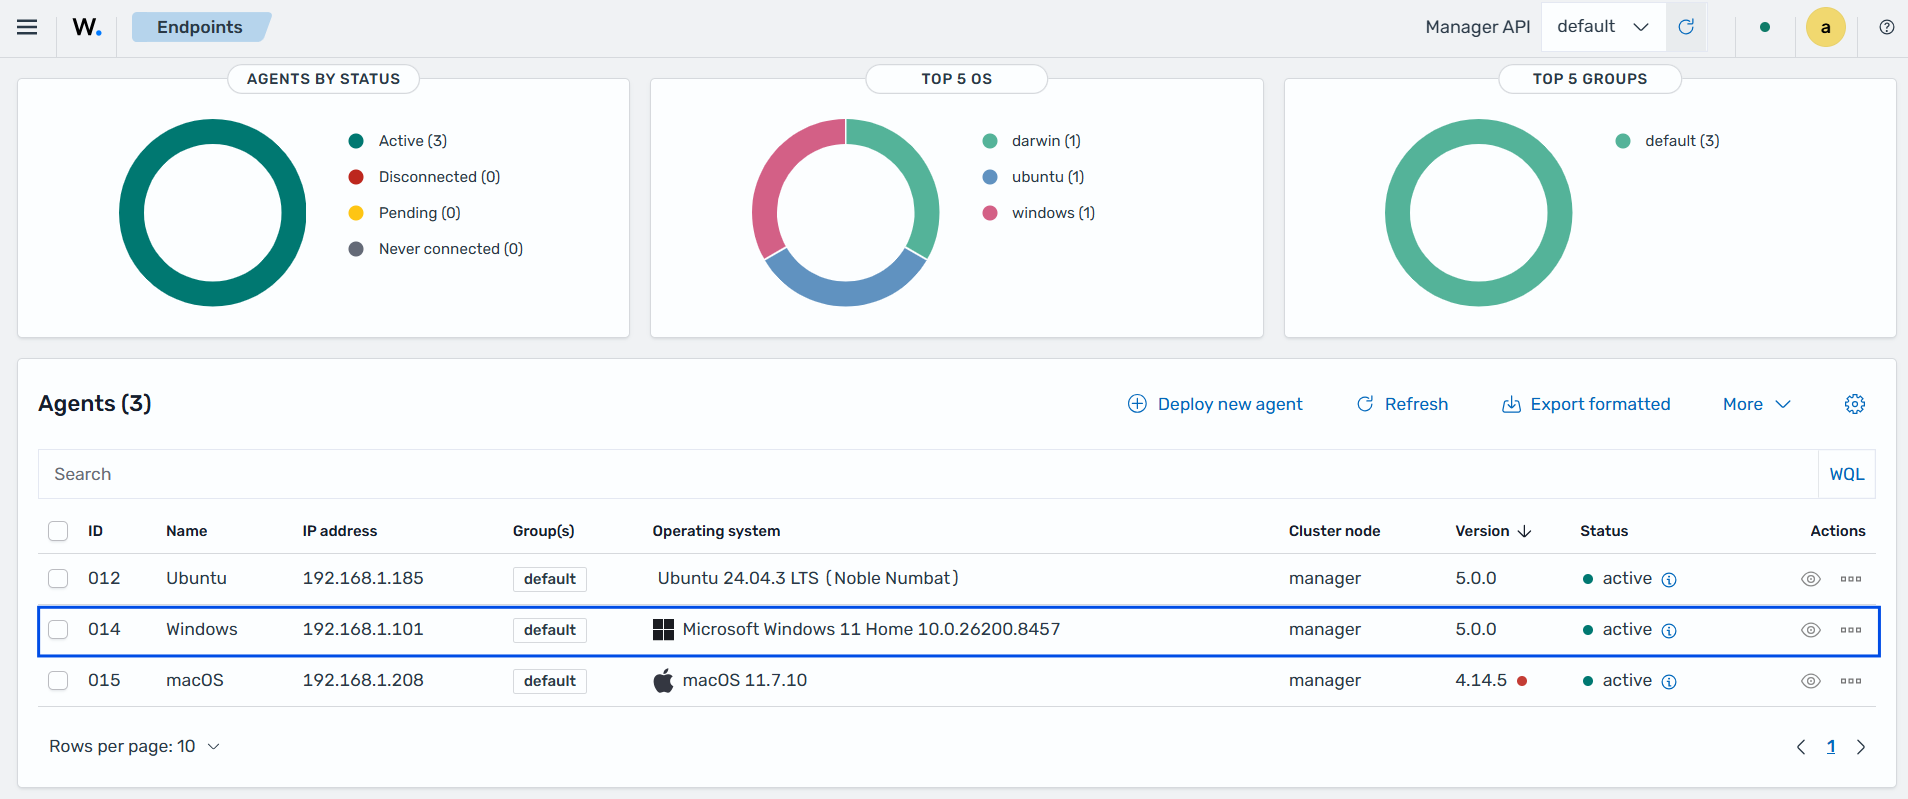
Click on the upper-left menu icon and navigate to Agents management > Summary on the Wazuh dashboard to check for the newly enrolled Wazuh agent and its connection status. If the enrollment was successful, you will have an interface similar to the image below.
macOS
Follow the steps below to import the client key to a macOS endpoint:
Launch the terminal, obtain root access, and import the client key. Replace
<KEY>with the client key received from the Wazuh manager:# /Library/Ossec/bin/manage_agents -i <KEY>
The output should look like this:
  Agent information:
  ID:001
  Name:agent_1
  IP Address:any
  Confirm adding it?(y/n): y
  Added.
Add the Wazuh manager IP address or fully qualified domain name (FQDN) to the Wazuh agent configuration file in
/Library/Ossec/etc/ossec.conf. Replace<WAZUH_MANAGER_IP>with the IP address or FQDN of the Wazuh manager.<client> <manager> <address><WAZUH_MANAGER_IP></address> ... </manager> </client>
Restart the Wazuh agent to make the changes effective:
# /Library/Ossec/bin/wazuh-control restart
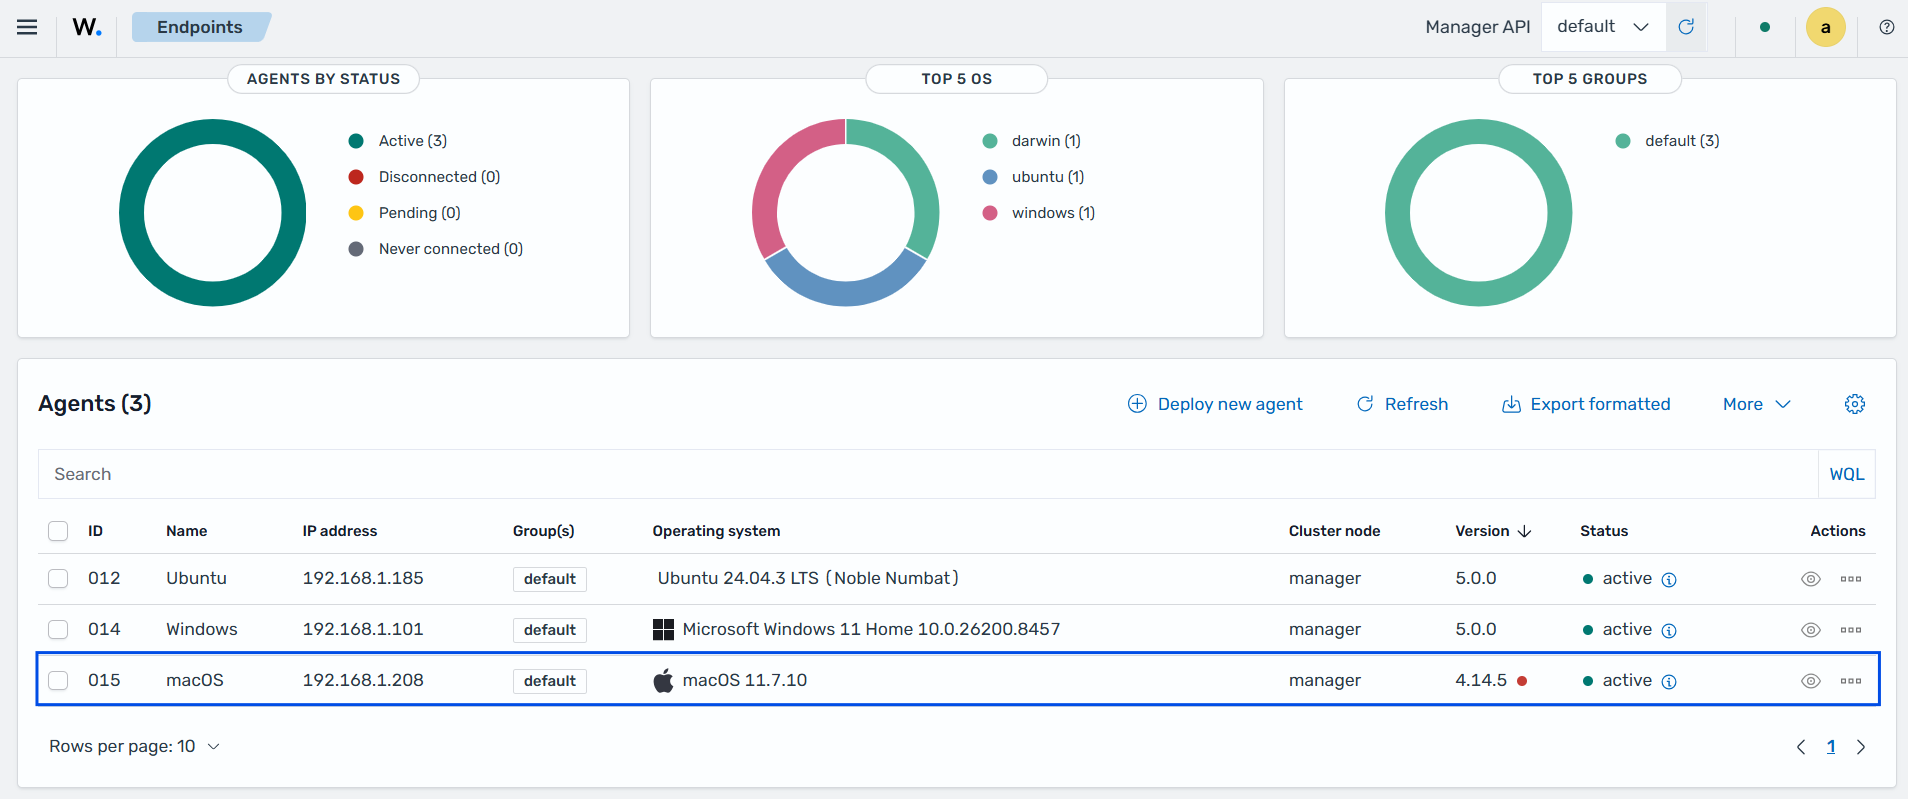
Click on the upper-left menu icon and navigate to Agents management > Summary on the Wazuh dashboard to check for the newly enrolled Wazuh agent and its connection status. If the enrollment was successful, you will have an interface similar to the image below.