Blocking a known malicious actor
In this use case, we demonstrate how to block malicious IP addresses from accessing web resources on a web server monitored by a Wazuh agent. You set up Apache web servers on Ubuntu and Windows endpoints, and try to access them from a RHEL endpoint, which acts as the attacker.
A Key-Value Database (KVDB) is used to hold the IP addresses of malicious IP addresses. The RHEL endpoint plays the role of the malicious actor here; therefore, you add its IP address to the reputation database. Then, configure Wazuh to block the RHEL endpoint from accessing the Apache web server using the out-of-the-box block-ip Active Response script. This discourages attackers from continuing their malicious activities.
In this use case, you use the Wazuh KVDB and Active Response capabilities.
Infrastructure
Endpoint |
Description |
|---|---|
RHEL 9.0 |
Attacker endpoint connecting to the victim's web server, on which you use the Wazuh KVDB capability to flag its IP address as malicious. |
Ubuntu 24.04 |
Victim endpoint running an Apache 2.4.58 web server. Here, you use the Wazuh Active Response module to automatically block connections from the attacker endpoint. |
Windows 11 |
Victim endpoint running an Apache 2.4.54 web server. Here, you use the Wazuh Active Response module to automatically block connections from the attacker endpoint. |
Configuration
Ubuntu endpoint
Perform the following steps to install an Apache web server and monitor its logs with the Wazuh agent.
Update local packages and install the Apache web server:
$ sudo apt update
$ sudo apt install apache2
If the firewall is enabled, modify the firewall to allow external access to web ports. Skip this step if the firewall is disabled:
$ sudo ufw status
$ sudo ufw app list
$ sudo ufw allow 'Apache'
Check the status of the Apache service to verify that the web server is running:
$ sudo systemctl status apache2
Use the
curlcommand or openhttp://<UBUNTU_IP>in a browser to view the Apache landing page and verify the installation:$ curl http://<UBUNTU_IP>
Add the following to the
/var/ossec/etc/ossec.conffile to configure the Wazuh agent and monitor the Apache access logs:<ossec_config> <localfile> <log_format>syslog</log_format> <location>/var/log/apache2/access.log</location> </localfile> </ossec_config>
Restart the Wazuh agent to apply the changes:
$ sudo systemctl restart wazuh-agent
Windows endpoint
Perform the following steps to install and configure an Apache web server and a Wazuh agent to monitor Apache server events.
Install the latest Visual C++ Redistributable package.
Download the Apache web server Win64 ZIP installation file. This is a precompiled binary for Windows operating systems.
Unzip the contents of the Apache web server ZIP file and copy the extracted
Apache24folder to theC:drive.Navigate to the
C:\Apache24\bin\folder and run the following command in a PowerShell terminal with administrator privileges:> .\httpd.exe
The first time you run the Apache binary, a Windows Defender Firewall notification pops up.
Click Allow Access. This allows the Apache HTTP server to communicate on your private or public networks depending on your network settings. It creates an inbound rule in your firewall to allow incoming traffic on port 80.
Open
http://<WINDOWS_IP>in a browser to view the Apache landing page and verify the installation. Also, verify that the attacker endpoint can reach this URL.Add the following to
C:\Program Files (x86)\ossec-agent\ossec.confto configure the Wazuh agent and monitor the Apache access logs:<ossec_config> <localfile> <log_format>syslog</log_format> <location>C:\Apache24\logs\access_log</location> </localfile> </ossec_config>
Restart the Wazuh agent in a PowerShell terminal with administrator privileges to apply the changes:
> Restart-Service -Name wazuh
Wazuh dashboard
Perform the following steps on the Wazuh dashboard to add the IP address of the RHEL endpoint to a KVDB, and then configure custom decoders, rules, a detector, and Active Response.
Decoders
Navigate to Ruleset management > Decoders.
Select the Draft space, then select Actions > Create.
Create an integration with the title
custom_httpusing the Create integration button if you haven't created one before. Select Network Activity as the Category and set a preferred name as the Author.Enter the decoder below and click the Create decoder button.
name: "decoder/core-wazuh-message/0"
metadata:
  author: "Wazuh, Inc."
  date: "2026-06-10T19:32:11Z"
  description: "Base decoder to process Wazuh message format, parses location part\
    \ and enriches the events that comes from a Wazuh agent with the host information."
  documentation: ""
  modified: "2026-06-10T19:32:11Z"
  references:
  - "https://documentation.wazuh.com/"
  supports: []
  title: "Wazuh message decoder"
normalize:
- map:
  - _tmp_json: "parse_json($event.original)"
enabled: true
Select the Draft space, then select Actions > Create. Select the
custom_httpintegration, then enter the decoder below and click the Create decoder button.--- name: "decoder/apache-access/0" metadata: author: "Wazuh, Inc." date: "2026-07-09T13:25:54Z" description: "Decoder for Apache HTTP Server access logs." documentation: "" modified: "2026-07-10T13:49:08Z" references: - "https://httpd.apache.org/docs/2.4/logs.html" supports: [] title: "Apache HTTP Server access logs decoder" parents: - "decoder/core-wazuh-message/0" parse|event.original: - "<destination.domain> <source.address> - <user.name> [<event.start/ANSIC>] \"<~/literal/->?<_http_request>\"\ \ <http.response.status_code> <http.response.body.bytes>?<~/literal/-> \"<http.request.referrer>\"\ \ \"<user_agent.original>\"" - "<destination.domain> <source.address> - <user.name> [<event.start/HTTPDATE>] \"\ <~/literal/->?<_http_request>\" <http.response.status_code> <http.response.body.bytes>?<~/literal/->\ \ \"<http.request.referrer>\" \"<user_agent.original>\"" - "<source.address> - <user.name> [<event.start/HTTPDATE>] \"<_http_request>\" <http.response.status_code>\ \ <_ignore/literal/->?<http.response.body.bytes>(? \"<http.request.referrer>\" \"\ <user_agent.original>\")" - "<source.address> - <user.name> [<event.start/HTTPDATE>] \"-\" <http.response.status_code>\ \ -" - "<source.address> - - [<event.start/ANSIC>] \"-\" <http.response.status_code> -" - "<source.address> - - [<event.start/ANSIC>] \"<~/literal/->?<_http_request>\" <http.response.status_code>\ \ <http.response.body.bytes>?<~/literal/-> \"<http.request.referrer>\" \"<user_agent.original>\"" - "<source.address> - <user.name> [<event.start/ANSIC>] \"<~/literal/->?<_http_request>\"\ \ <http.response.status_code> <http.response.body.bytes>?<~/literal/-> \"<http.request.referrer>\"\ \ \"<user_agent.original>\"" - "[<event.start/ANSIC>] <source.address> <network.protocol> <tls.cipher> \"<_http_request>\"\ \ <http.response.body.bytes>?<~/literal/->" - "[<event.start/HTTPDATE>] <source.address> <network.protocol> <tls.cipher> \"<_http_request>\"\ \ <http.response.body.bytes>?<~/literal/->" - "<source.address> - - [<event.start/HTTPDATE>] \"<~/literal/->?<_http_request>\"\ \ <http.response.status_code> <http.response.body.bytes>?<~/literal/-> \"<http.request.referrer>\"\ \ \"<user_agent.original>\" \"-\"" - "<source.address> - <user.name> [<event.start/HTTPDATE>] \"<~/literal/->?<_http_request>\"\ \ <http.response.status_code> <http.response.body.bytes>?<~/literal/-> \"<http.request.referrer>\"\ \ \"<user_agent.original>\" X-Forwarded-For=\"<?_forwarded_for>\"" - "<source.address> - <user.name> [<event.start/HTTPDATE>] \"<~/literal/->?<_http_request>\"\ \ <http.response.status_code> <http.response.body.bytes>?<~/literal/-> \"<http.request.referrer>\"\ \ \"<user_agent.original>" normalize: - map: - event.category: "array_append(web)" - event.type: "array_append(access)" - event.action: "http-request" - event.dataset: "apache-access" - event.kind: "event" - service.type: "apache" - source.ip: "$source.address" - _tls: "split($network.protocol, 'v')" - _tls_1: "$_tls.1" - _client_ip: "split($_forwarded_for, ',')" - client.ip: "$_client_ip.0" - network.forwarded_ip: "$_client_ip.0" - tls.version_protocol: "$_tls.0" - tls.cipher: "$tls.cipher" - threat.indicator.description: "kvdb_get('malicious_IPs', $source.ip)" parse|_http_request: - "<http.request.method> <url.original> HTTP/<http.version>" - check: - _tls_1: "regex_match(\\\\d+\\\\.\\\\d+)" map: - tls.version: "$_tls_1" - check: - _tls_1: "regex_not_match(\\\\d+\\\\.\\\\d+)" map: - tls.version: "concat_any($_tls_1, '.0')" - check: "int_less($http.response.status_code, 400)" map: - event.outcome: "success" - check: "int_greater_or_equal($http.response.status_code, 400)" map: - event.outcome: "failure" - check: - source.ip: "not_exists()" map: - source.domain: "parse_fqdn($source.address)" - map: - url.extension: "regex_extract($url.original, '.*\\\\.([a-zA-Z0-9]+)(?:\\\\?|$)')" - url.path: "$url.original" - url.query: "regex_extract($url.original, '\\\\?(.*)')" - url.domain: "$destination.domain" enabled: true
Select the Draft space, then select Actions > Create. Select the
custom_httpintegration, then enter the decoder below and click the Create decoder button.--- name: "decoder/active-response-block-ip/0" metadata: author: "Custom" date: "2026-07-11T02:03:54Z" description: "Decoder for active-response block-ip script logs." documentation: "" modified: "2026-07-11T02:27:29Z" references: - "" supports: [] title: "Active response block-ip decoder" parents: - "decoder/core-wazuh-message/0" parse|event.original: - "<_raw_timestamp> active-response/bin/block-ip: [<log.level>] Method=<_method> Action=<_action>\ \ Details=IP <source.ip> successfully blocked" - "<_raw_timestamp> active-response/bin/block-ip.exe: [<log.level>] Method=<_method> Action=<_action>\ \ Details=IP <source.ip> successfully blocked" normalize: - map: - event.start: "parse_date($_raw_timestamp, '%Y/%m/%d %H:%M:%S')" - event.category: "array_append(network)" - event.type: "array_append(denied)" - event.action: "block-ip" - event.dataset: "active-response-block-ip" - event.kind: "alert" - event.module: "active-response" - service.type: "active-response" - network.protocol: "$_method" - check: - _action: "success" map: - event.outcome: "success" - check: - _action: "regex_not_match(success)" map: - event.outcome: "failure" enabled: true
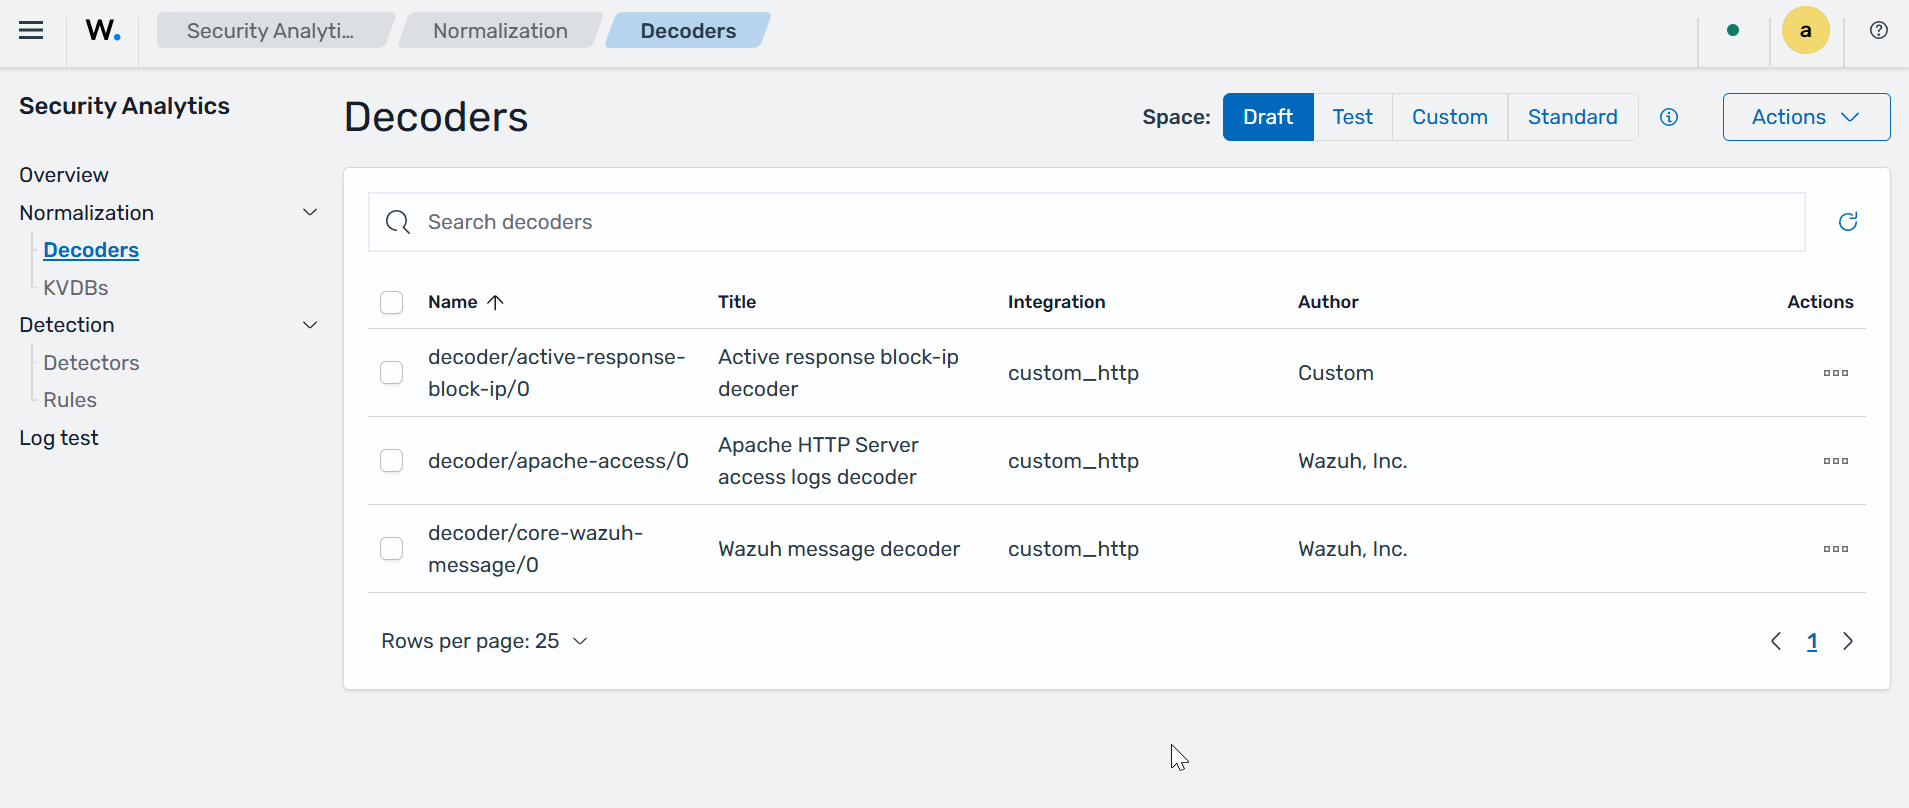
KVDBs
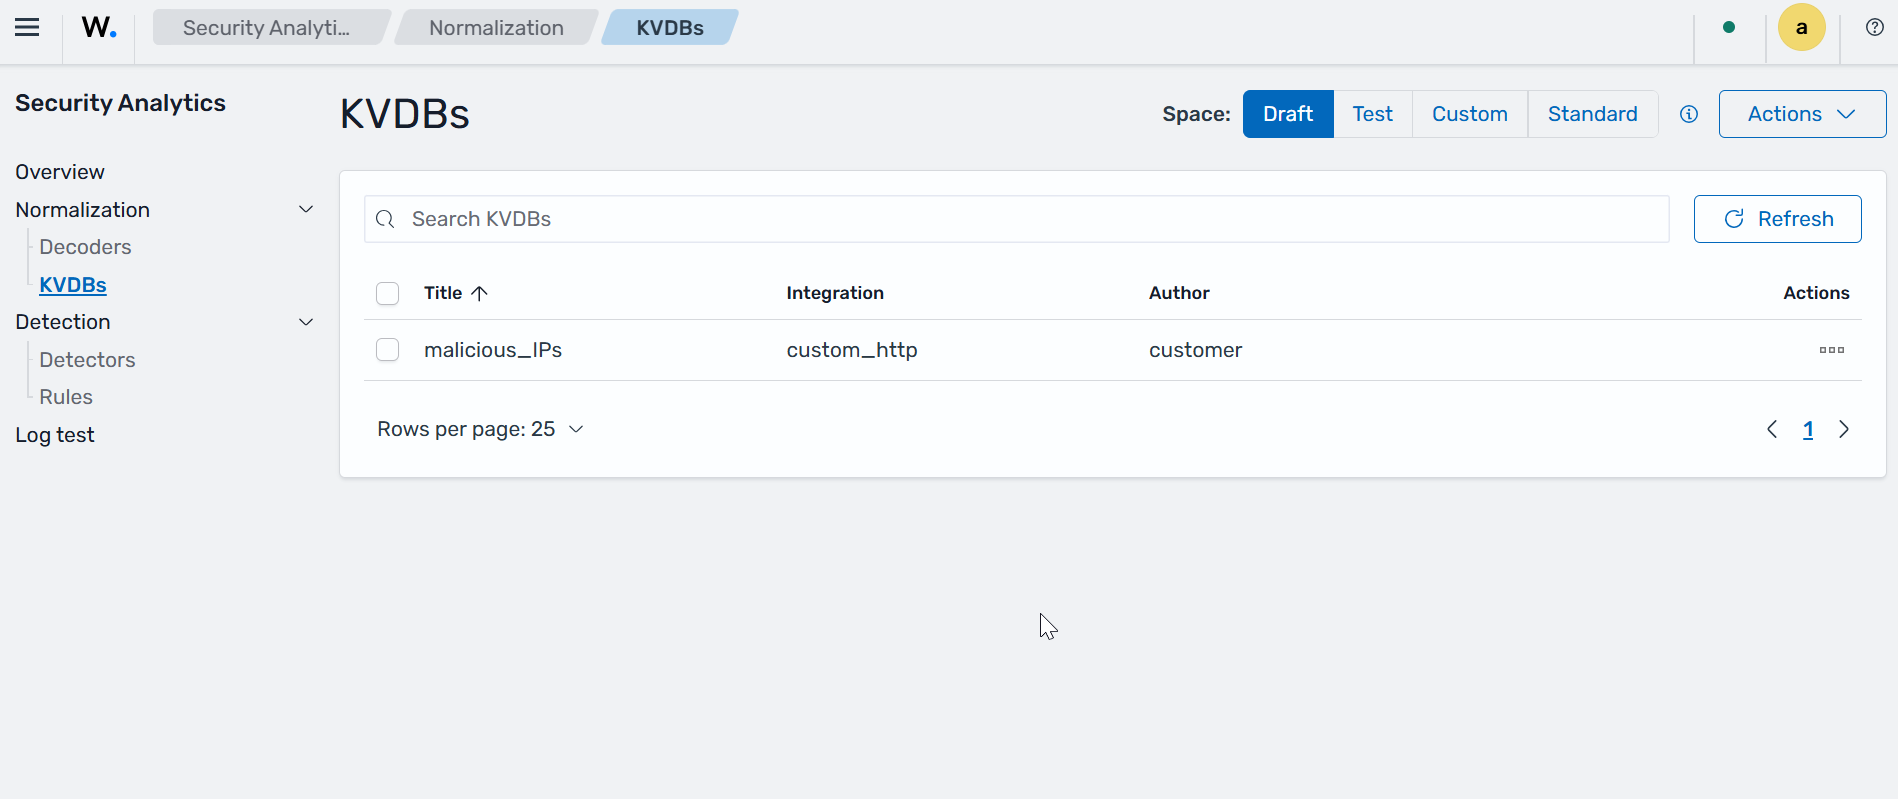
Navigate to Ruleset management > KVDBs. Ensure you are in the Draft space, click Actions, and select Create. Fill in the following parameters:
Field
Value
Integrationcustom_httpTitlemalicious_IPsAuthorcustomerDescriptionA list of malicious IPsClick Add under the Content section, then add the
<RHEL_IP>as Key andmaliciousas Value.Click Create KVDB.
Rules
Navigate to Ruleset management > Rules. Select the Draft space, then select Actions > Create.
Switch to the YAML editor, select the
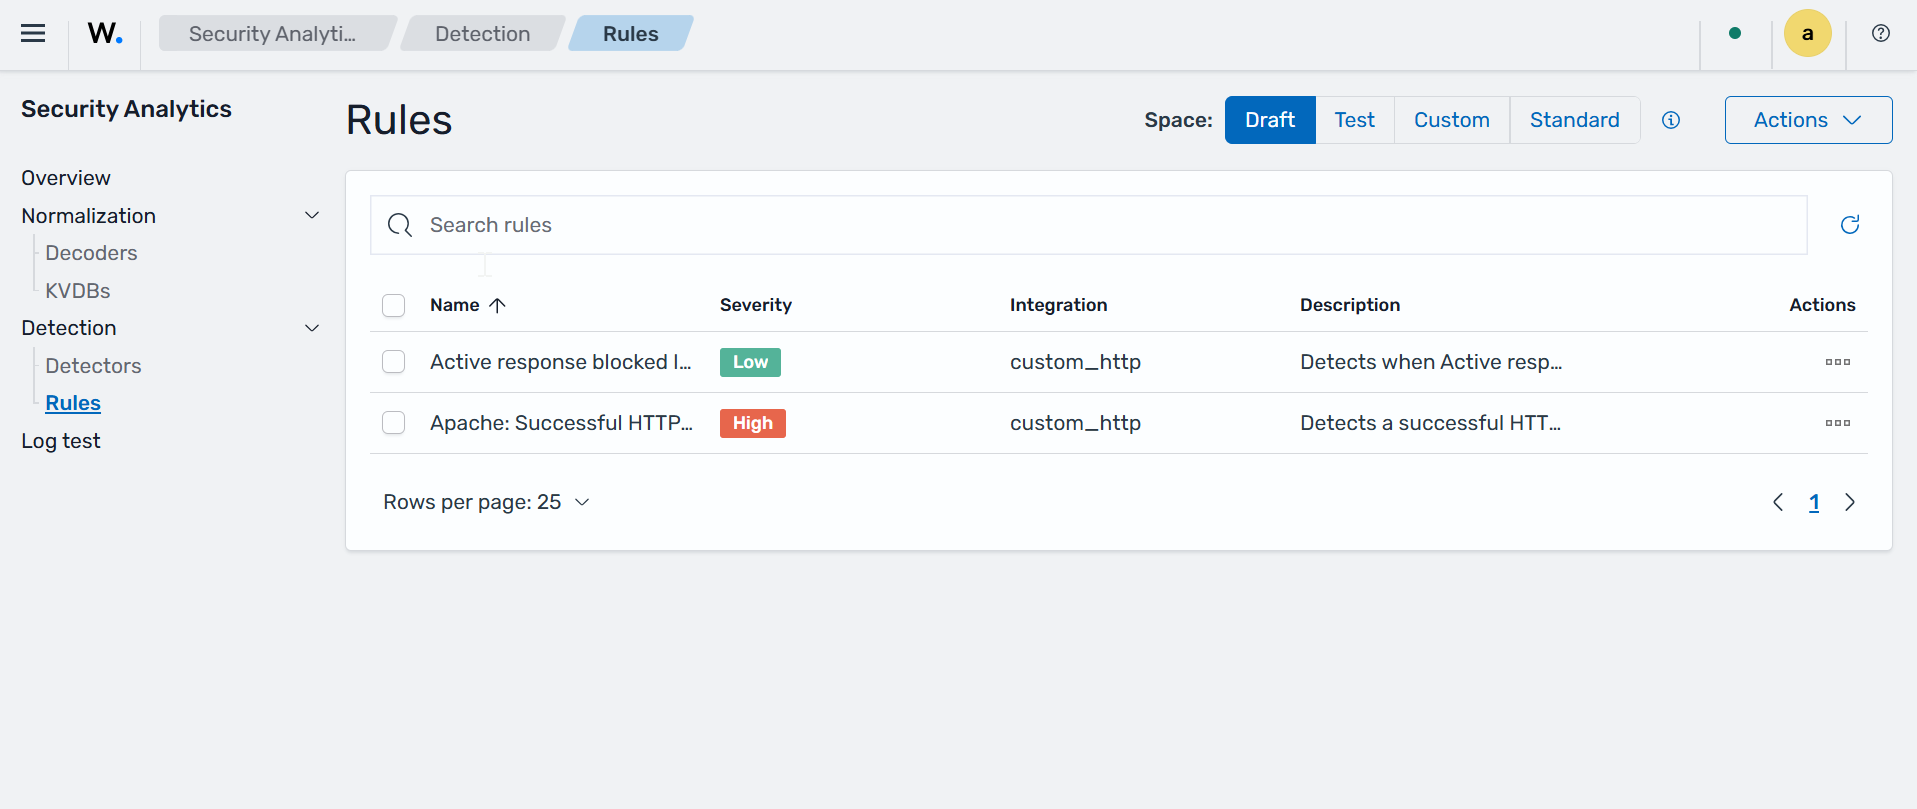
custom_httpintegration, then enter the rule below and click the Create rule button.logsource: product: custom_http tags: [] falsepositives: - Normal web traffic level: high status: stable enabled: true detection: condition: selection selection: event.dataset: - apache-access event.outcome: - success threat.indicator.description|all: - malicious metadata: title: 'Apache: Successful HTTP connection from malicious IP' author: Custom description: >- Detects a successful HTTP request/response cycle on the Apache web server, where the response status code is below 400 and the source IP is contained in the malicious IP KVDB. references: - '' documentation: '' supports: - '' modified: '2026-07-10T14:24:11Z'
Repeat step 1. Switch to the YAML editor, select the
custom_httpintegration, then enter the rule below and click the Create rule button:logsource: product: custom_http tags: [] falsepositives: [] level: low status: stable enabled: true detection: condition: Selection_1 Selection_1: event.dataset|all: - active-response-block-ip event.outcome|all: - success metadata: title: Active response blocked IP - {{source.ip}} author: custom description: >- Detects when Active response successfully blocks an IP. references: - '' documentation: '' supports: - '' modified: '2026-07-11T03:24:01Z'
Navigate to Ruleset management > Overview > Actions > Edit. Select the
decoder/core-wazuh-message/0decoder under the Root Decoder field, then click Save.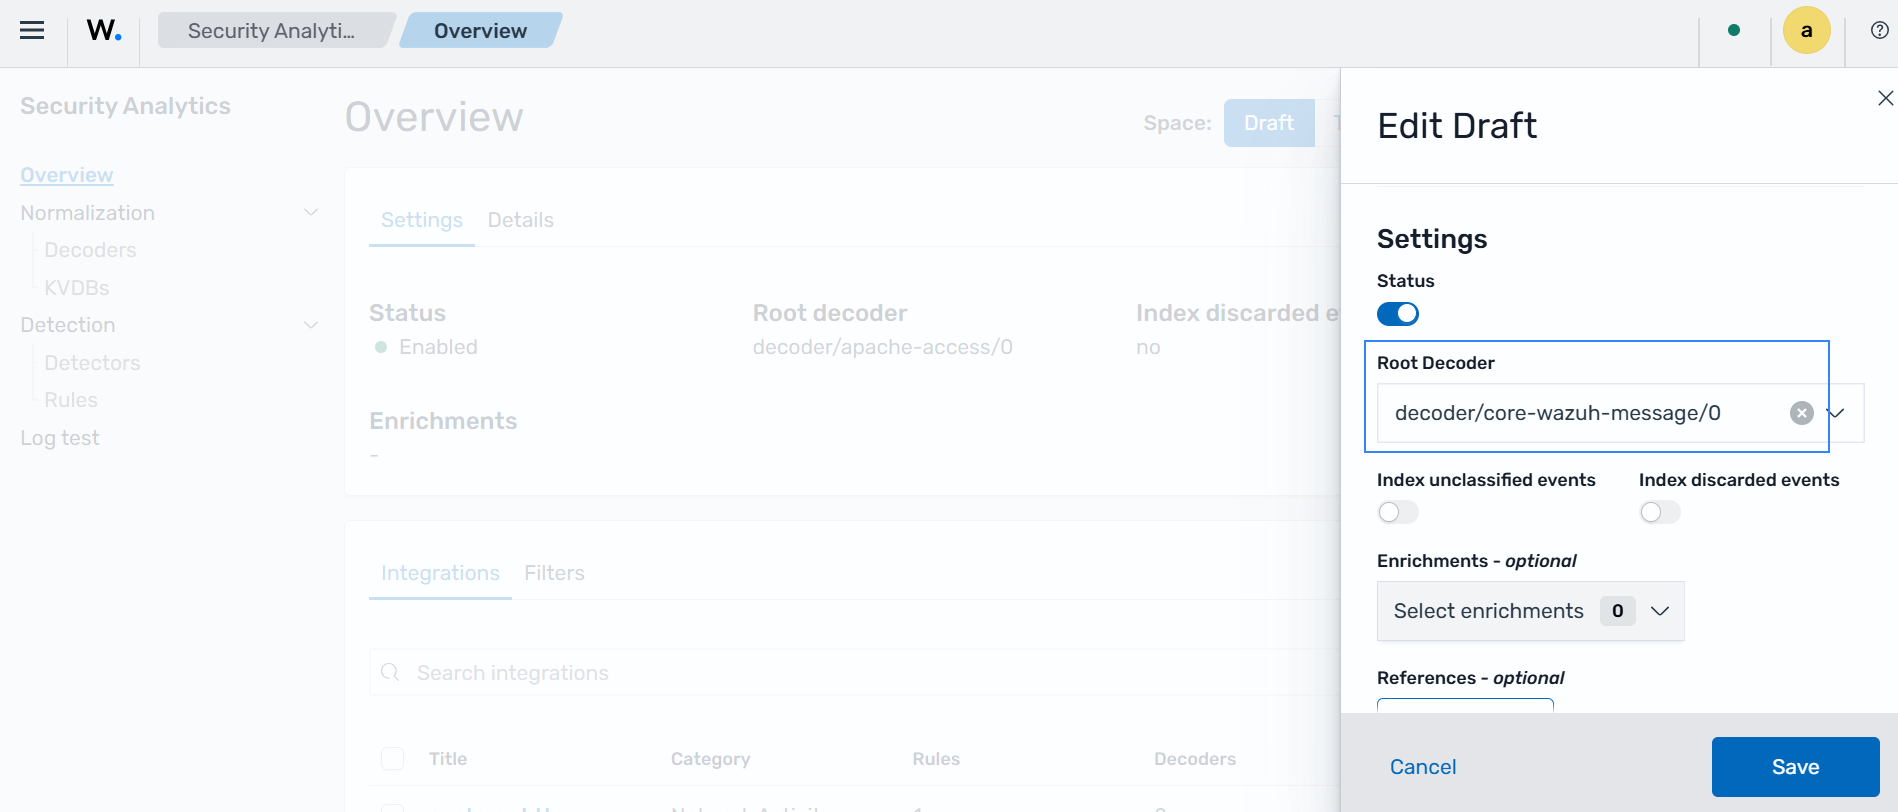
Navigate to Ruleset management > Overview, then click Actions > Promote. Type the confirmation message when prompted, and click Promote. This promotes the created assets from the Draft user space to the Test user space.
Select the Test space, then click Actions > Promote. Type the confirmation message when prompted, and click Promote. This promotes the created assets from the Test user space to the Custom user space.
Detector
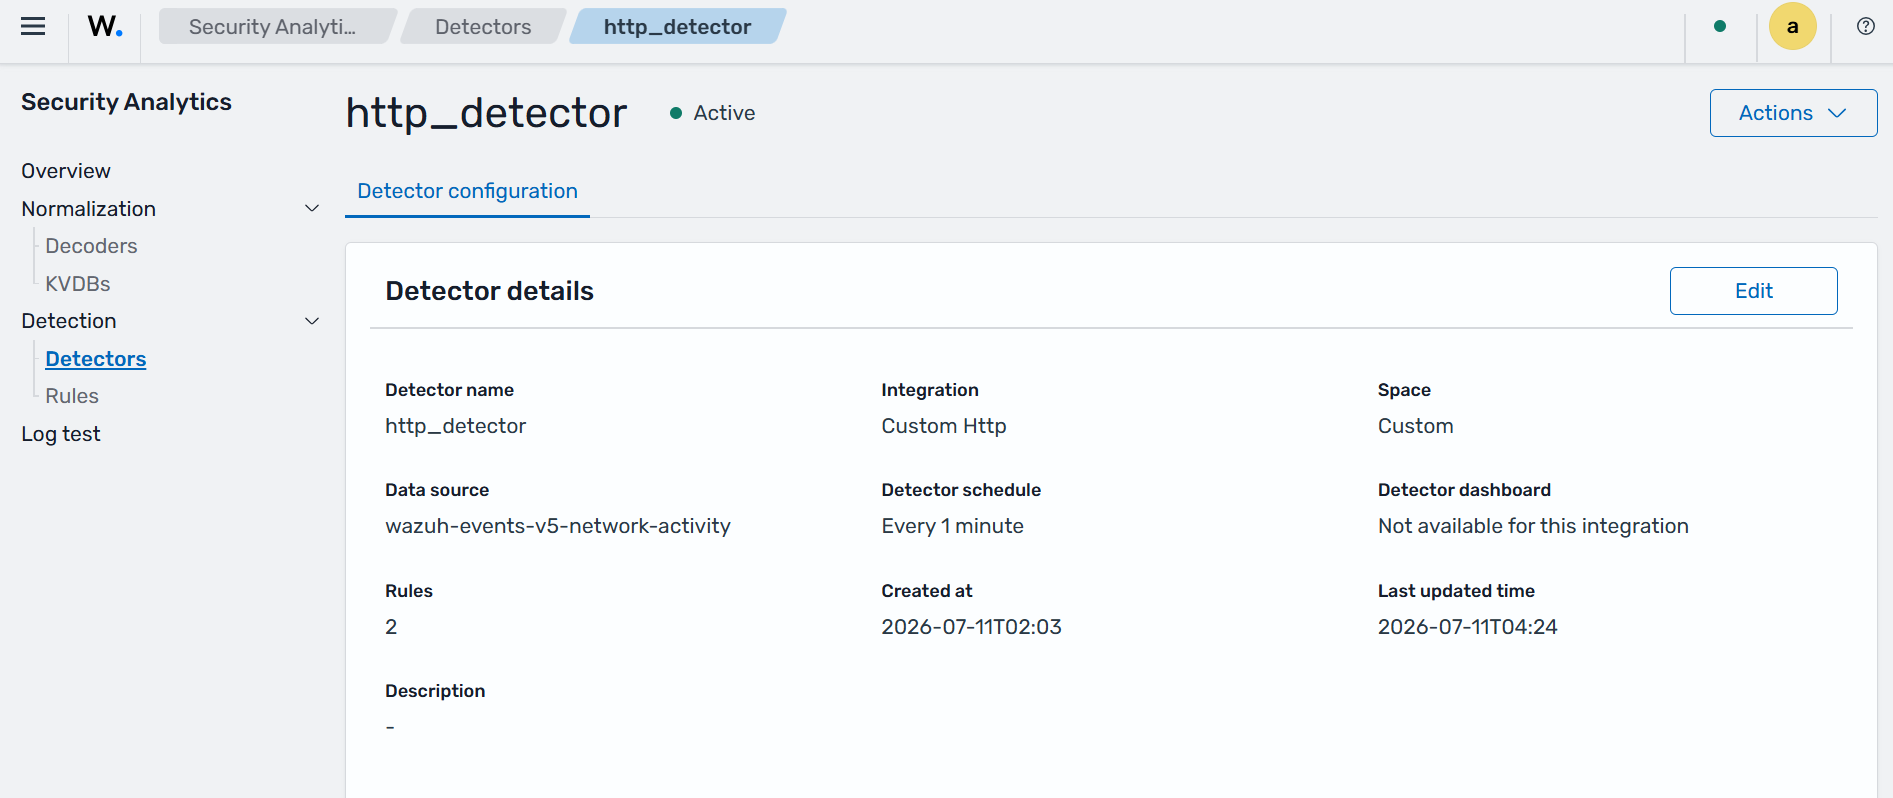
Navigate to Ruleset management > Detectors, then click Create detector.
Set the value of the Name field to
http_detector, then click the Data source drop-down and selectwazuh-events-v5-network-activityas the indexes/aliases.Change the space to Custom in the Rules section, then select
custom_httpfrom the Integration drop-down.Click Create detector.
Active response
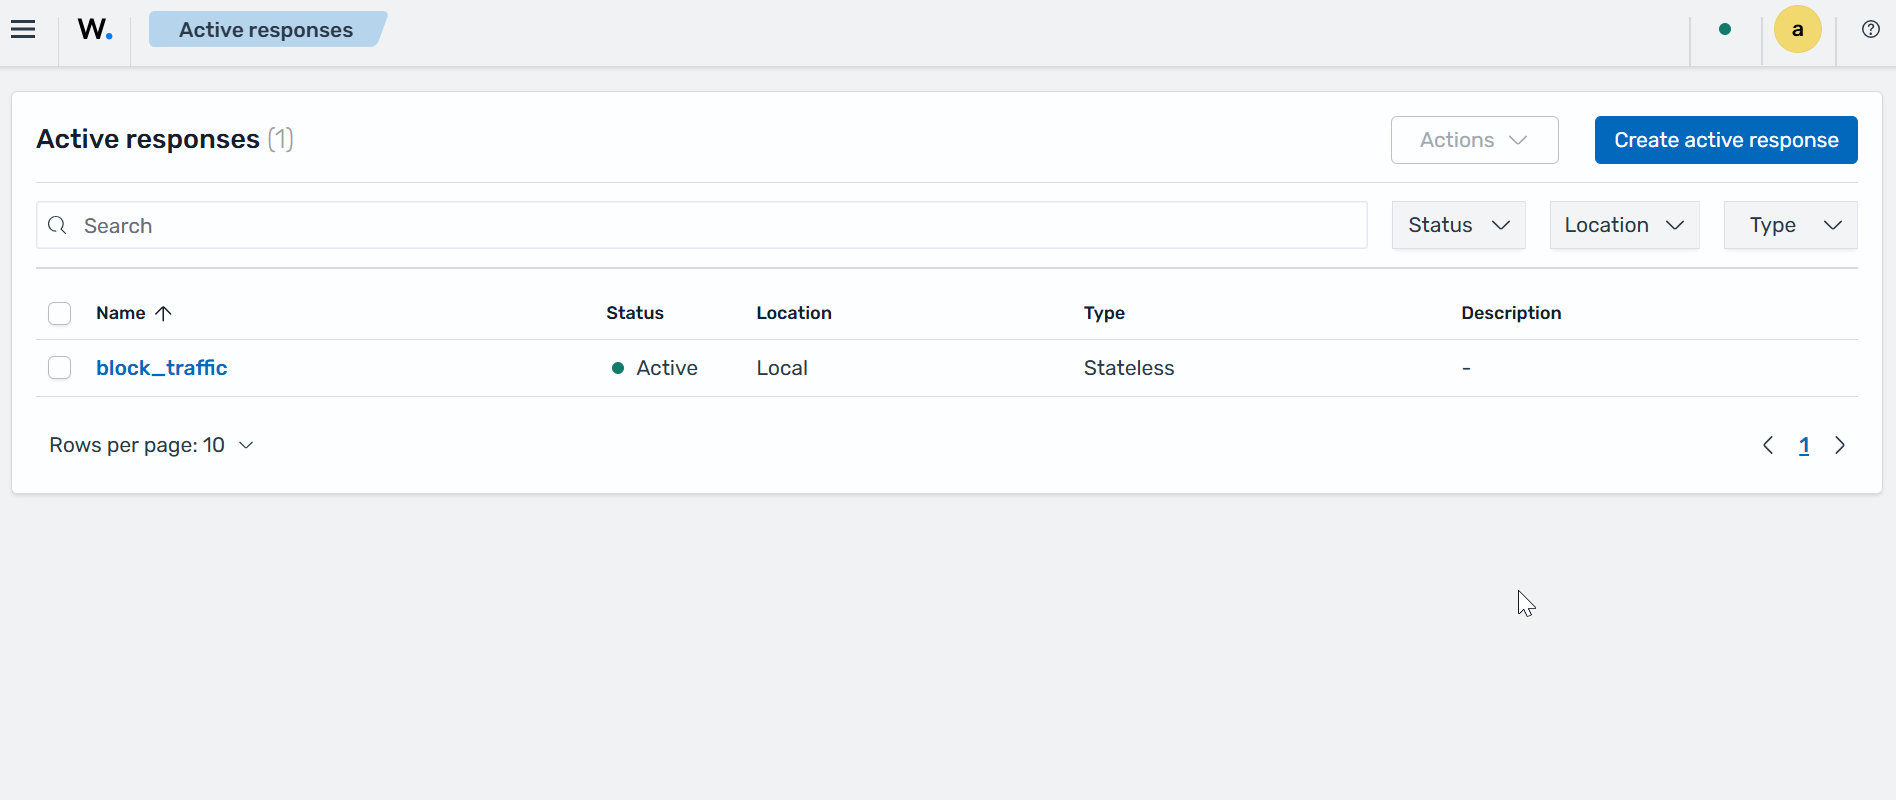
Navigate to Explore > Active Responses, then click Create active response. Fill in the following parameters:
Field
Value
Nameblock_trafficDescriptionAdds a referenced IP address to the firewall's blocklistExecutableblock-ipClick Create to create the Active Response.
Before you create the monitor, run
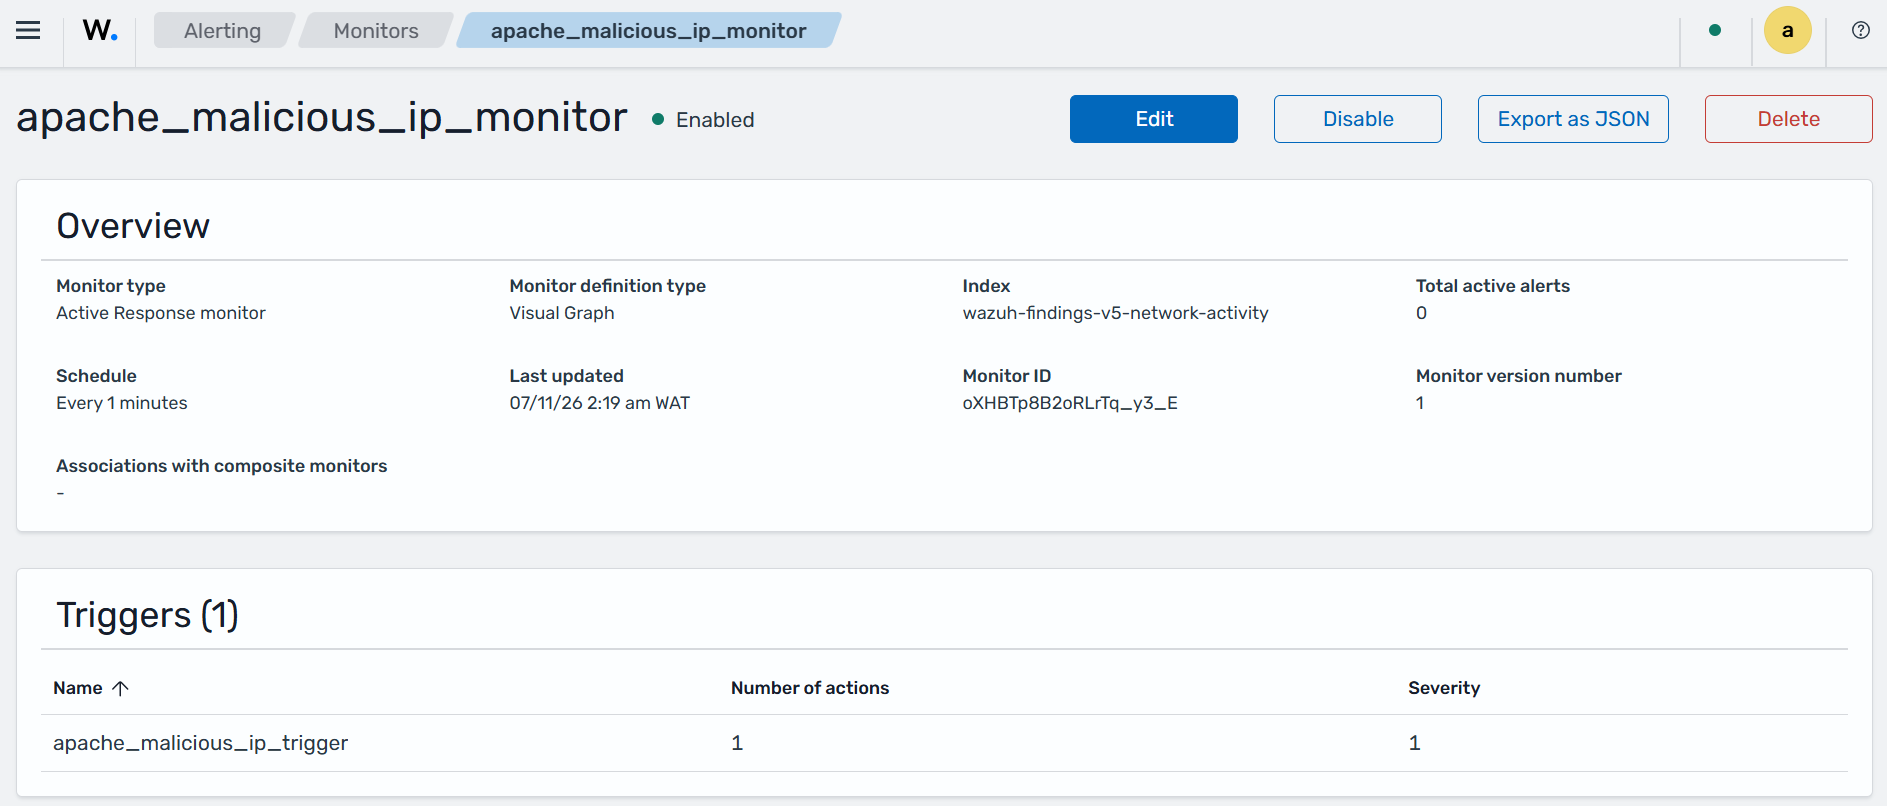
curl http://<WEBSERVER_IP>once from the RHEL endpoint and check that acustom_httpfinding appears in Threat Hunting. The Field list offersservice.typeonly after such a finding exists. Navigate to Explore > Alerting. Switch to the Monitors tab, then select Create Monitor. Fill in the following parameters:Field
Value
Monitor nameapache_malicious_ip_monitorMonitor typeActive responseMonitor defining methodVisual editorFrequencyBy intervalRun every1 Minute(s)Indexwazuh-findings-v5-network-activityQuery nameapache_malicious_ip_queryFieldservice.type is apacheIn the Triggers section, click Add trigger and fill in the following parameters:
Field
Value
Trigger nameapache_malicious_ip_triggerSeverity level1 (Highest)Specify queries or tagsapache_malicious_ip_queryIn the Actions subsection, click Add active response and fill in the following parameters:
Field
Value
Action nameapache_malicious_ip_actionActive responseblock_trafficClick Create to create the monitor.
Attack emulation
Access any of the web servers from the RHEL endpoint using the corresponding IP address. Replace <WEBSERVER_IP> with the appropriate value and execute the following command from the attacker endpoint:
$ curl http://<WEBSERVER_IP>
The first connections from the attacker endpoint to the victim's web servers succeed. Within about two minutes, the Active Response monitor runs and the Wazuh Active Response module blocks any further connection from the attacker endpoint to the web servers.
Visualize the findings
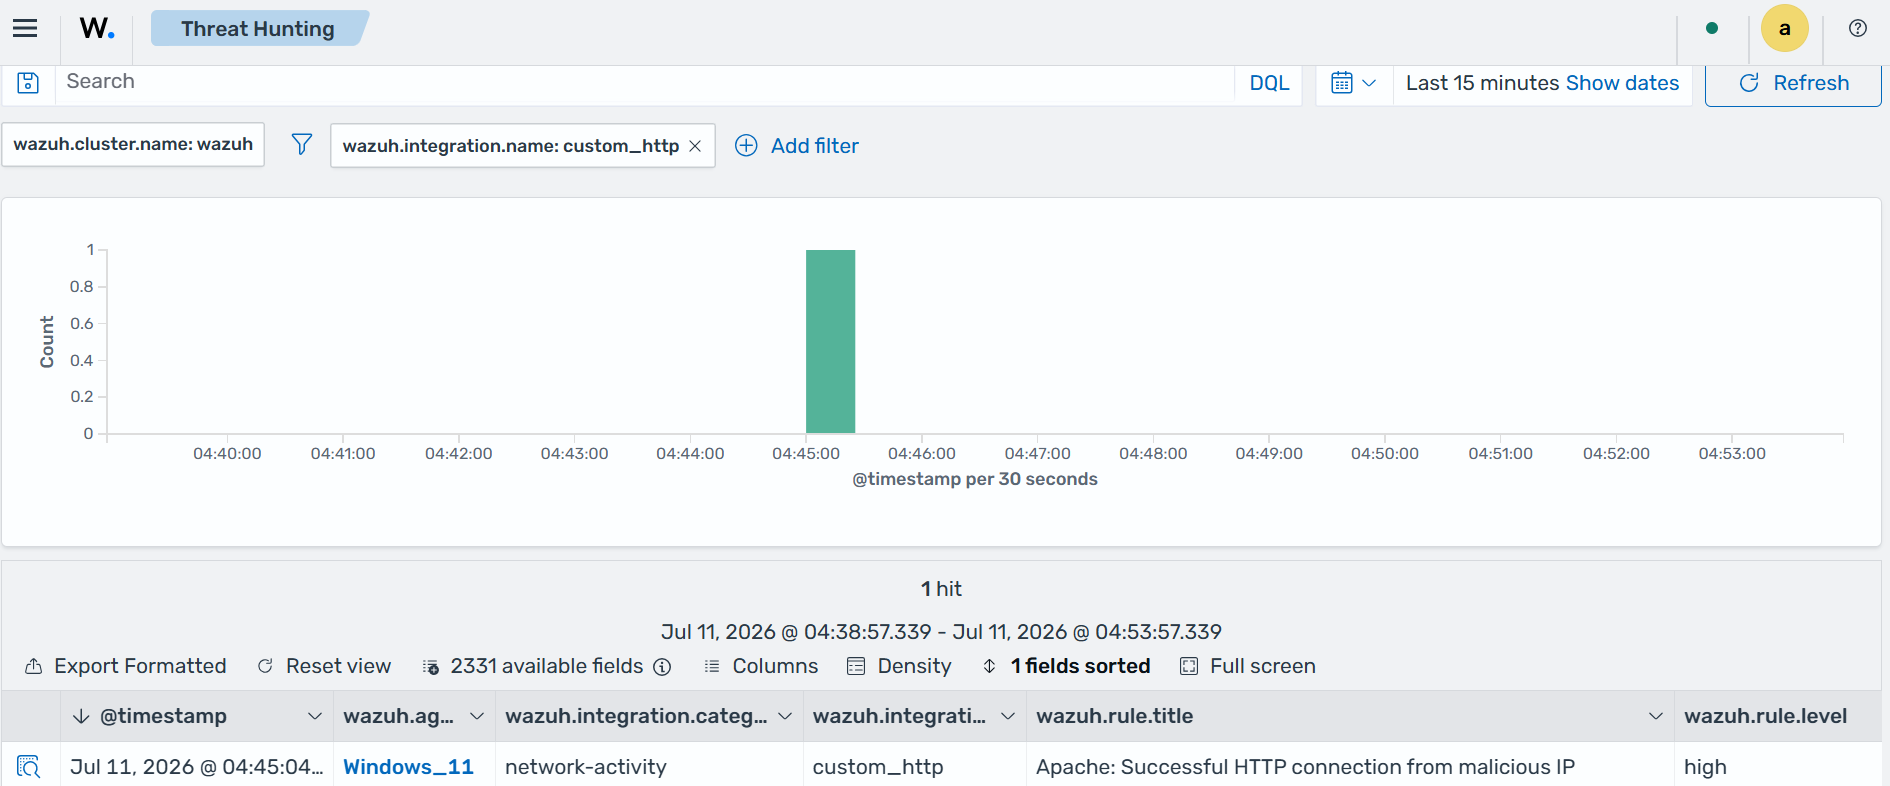
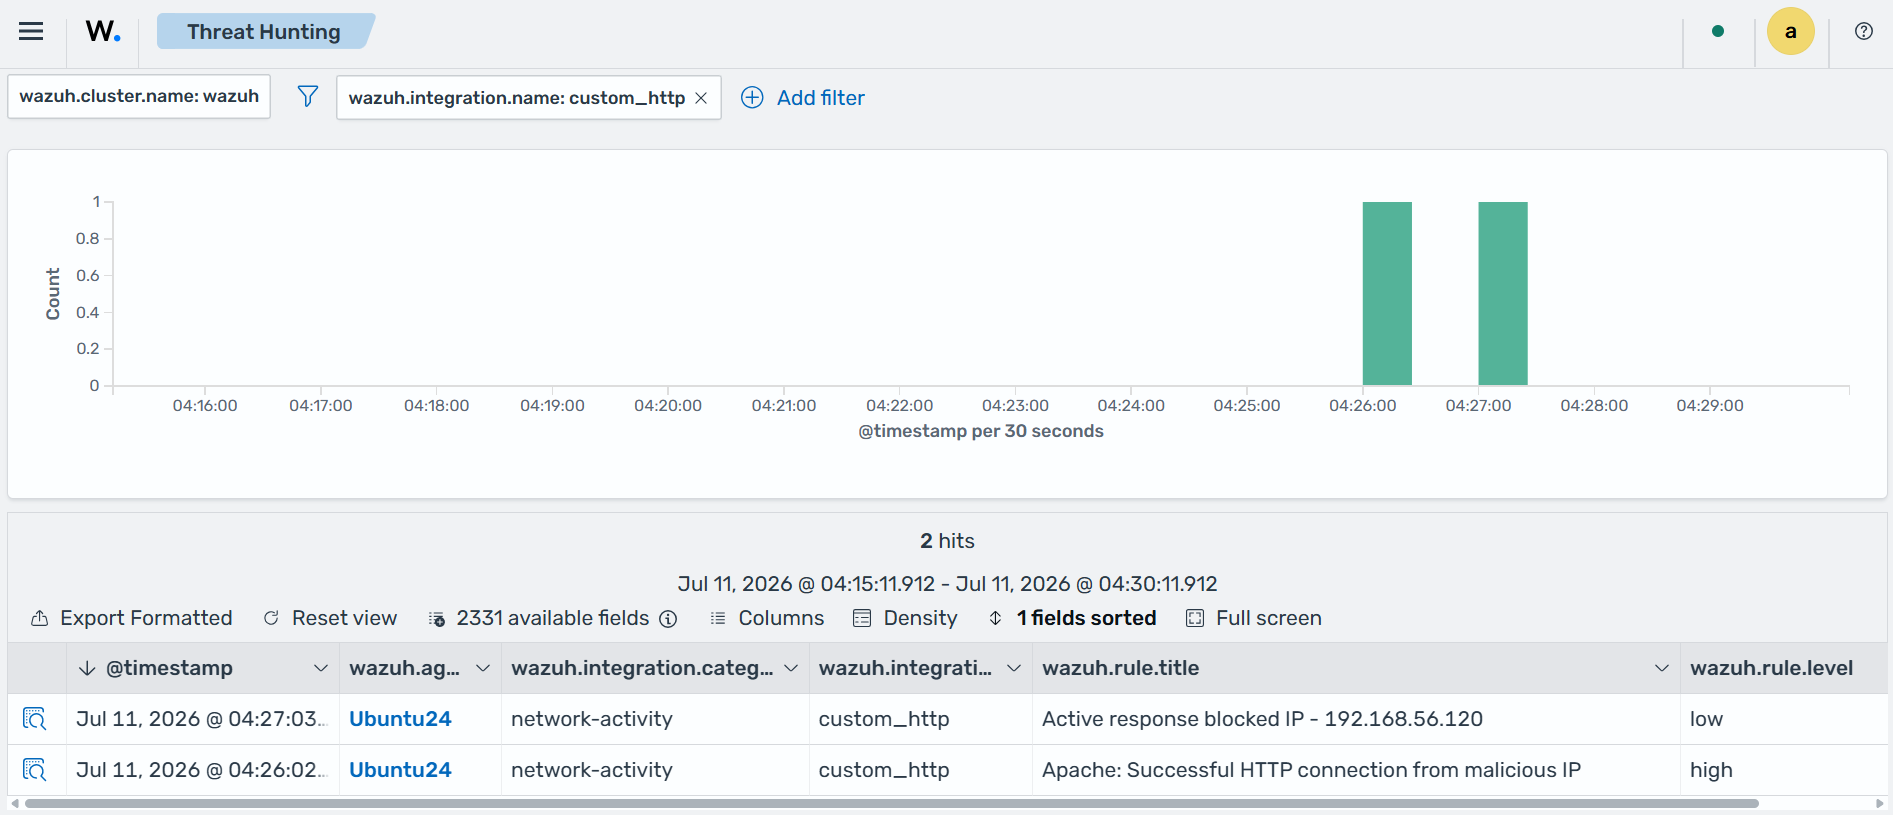
You can visualize the findings in the Wazuh dashboard. To do this, go to Threat intelligence > Threat Hunting, select Findings, and add the following filter in the search bar: wazuh.integration.name: custom_http.
Ubuntu:
Windows: