Blocking web attacks with active response
In this use case, we simulate a Cross-Site Scripting (XSS) attack against a web server running on an Ubuntu endpoint. Wazuh detects the attack and evaluates the resulting finding against the configured Alerting monitor. When the finding meets the monitor conditions, Wazuh runs the block-ip script on the Ubuntu endpoint to block the attacker's IP address.
Infrastructure
Endpoint |
Description |
|---|---|
RHEL 9.0 |
This is the attacker endpoint that performs a cross-site scripting attack. |
Ubuntu 24.04 |
This is the victim endpoint that receives the simulated cross-site scripting attack. This endpoint requires an installed Wazuh agent enrolled with the Wazuh manager. |
Configuration
Ubuntu endpoint
Perform the following steps to install an Apache web server and monitor its logs with the Wazuh agent.
Update local packages and install the Apache web server:
$ sudo apt update
$ sudo apt install apache2
If a firewall is enabled, modify it to allow external access to web ports. Skip this step if the firewall is disabled:
$ sudo ufw app list
$ sudo ufw allow 'Apache'
$ sudo ufw status
Check that the Apache web server is running:
$ sudo systemctl status apache2
Add the following lines to the Wazuh agent
/var/ossec/etc/ossec.confconfiguration file. This sets the Wazuh agent to monitor the access logs of your Apache server:<localfile> <log_format>syslog</log_format> <location>/var/log/apache2/access.log</location> </localfile>
Restart the Wazuh agent to apply the configuration changes:
$ sudo systemctl restart wazuh-agent
Wazuh dashboard
Follow these steps to configure an active response that blocks the source IP address of a detected web attack.
On the Wazuh dashboard, create the active response configuration as described in configuration, with the following settings:
Field
Value
Name
web_attack_arExecutable
block-ipLocation
LocalType
stateless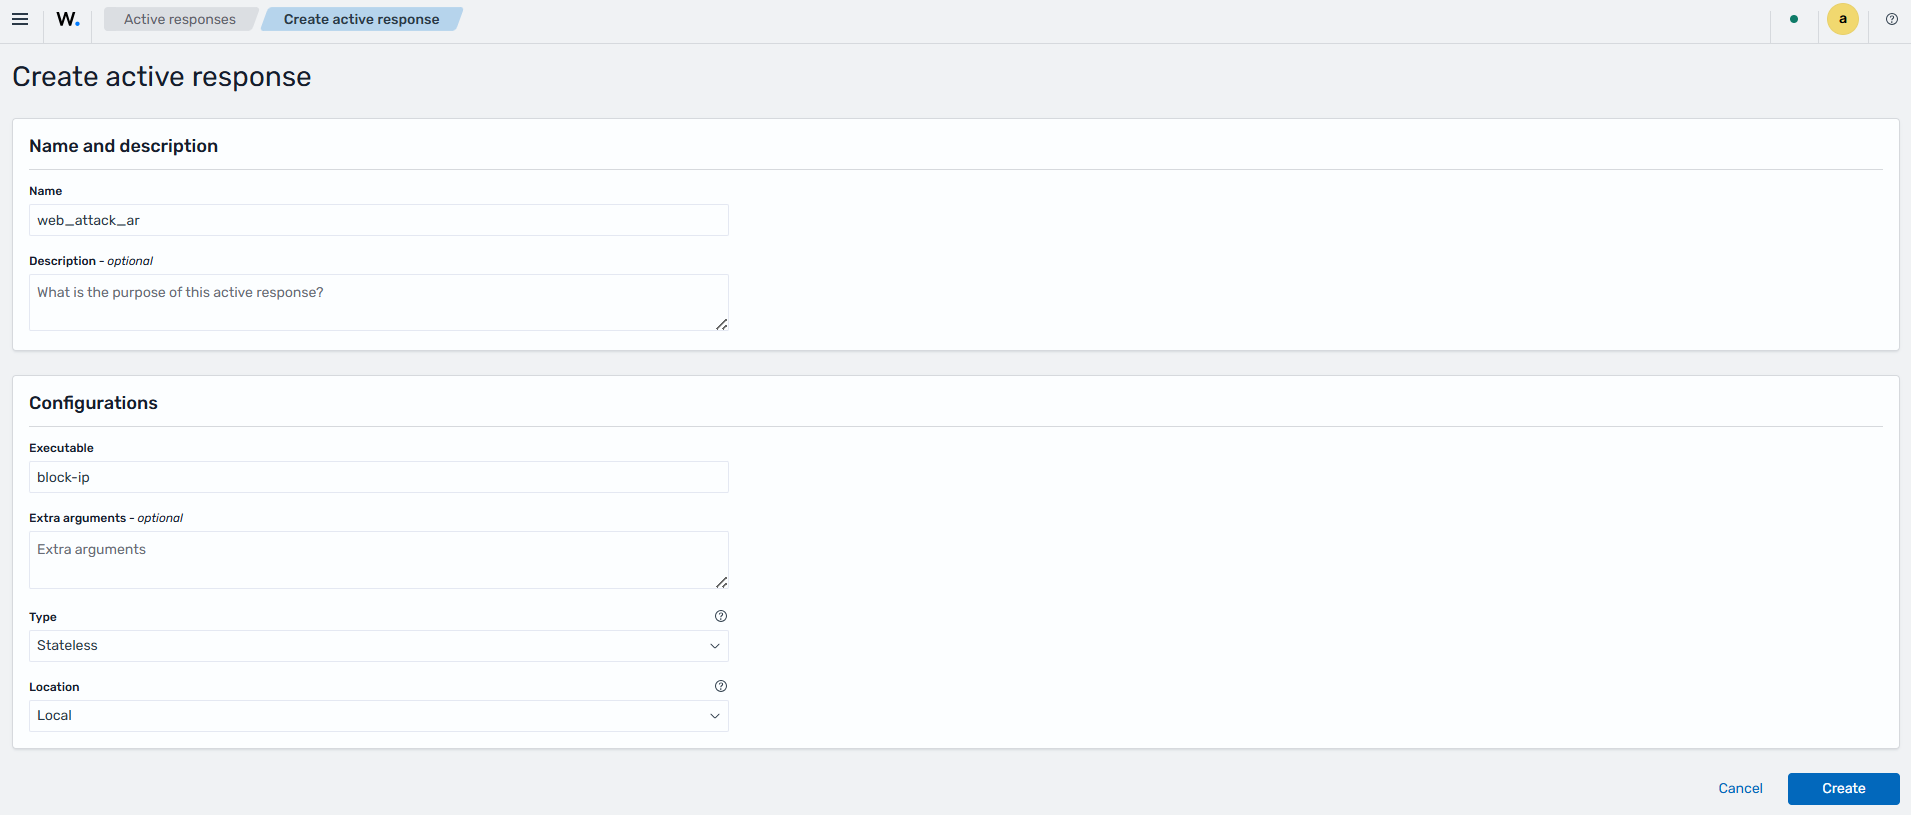
Navigate to Explore > Alerting.
Switch to the Monitors tab, then click Create Monitor. Fill in the following parameters.
Field
Value
Monitor name
web_attack_ar_monitorMonitor type
Active responseMonitor defining method
Visual editorFrequency
By intervalRun every
1 Minute(s)Index
wazuh-findings-v5-applicationsQuery name
web_attack_ar_queryField
wazuh.rule.id is 06d50562-06a8-5dd8-a091-772e8120660f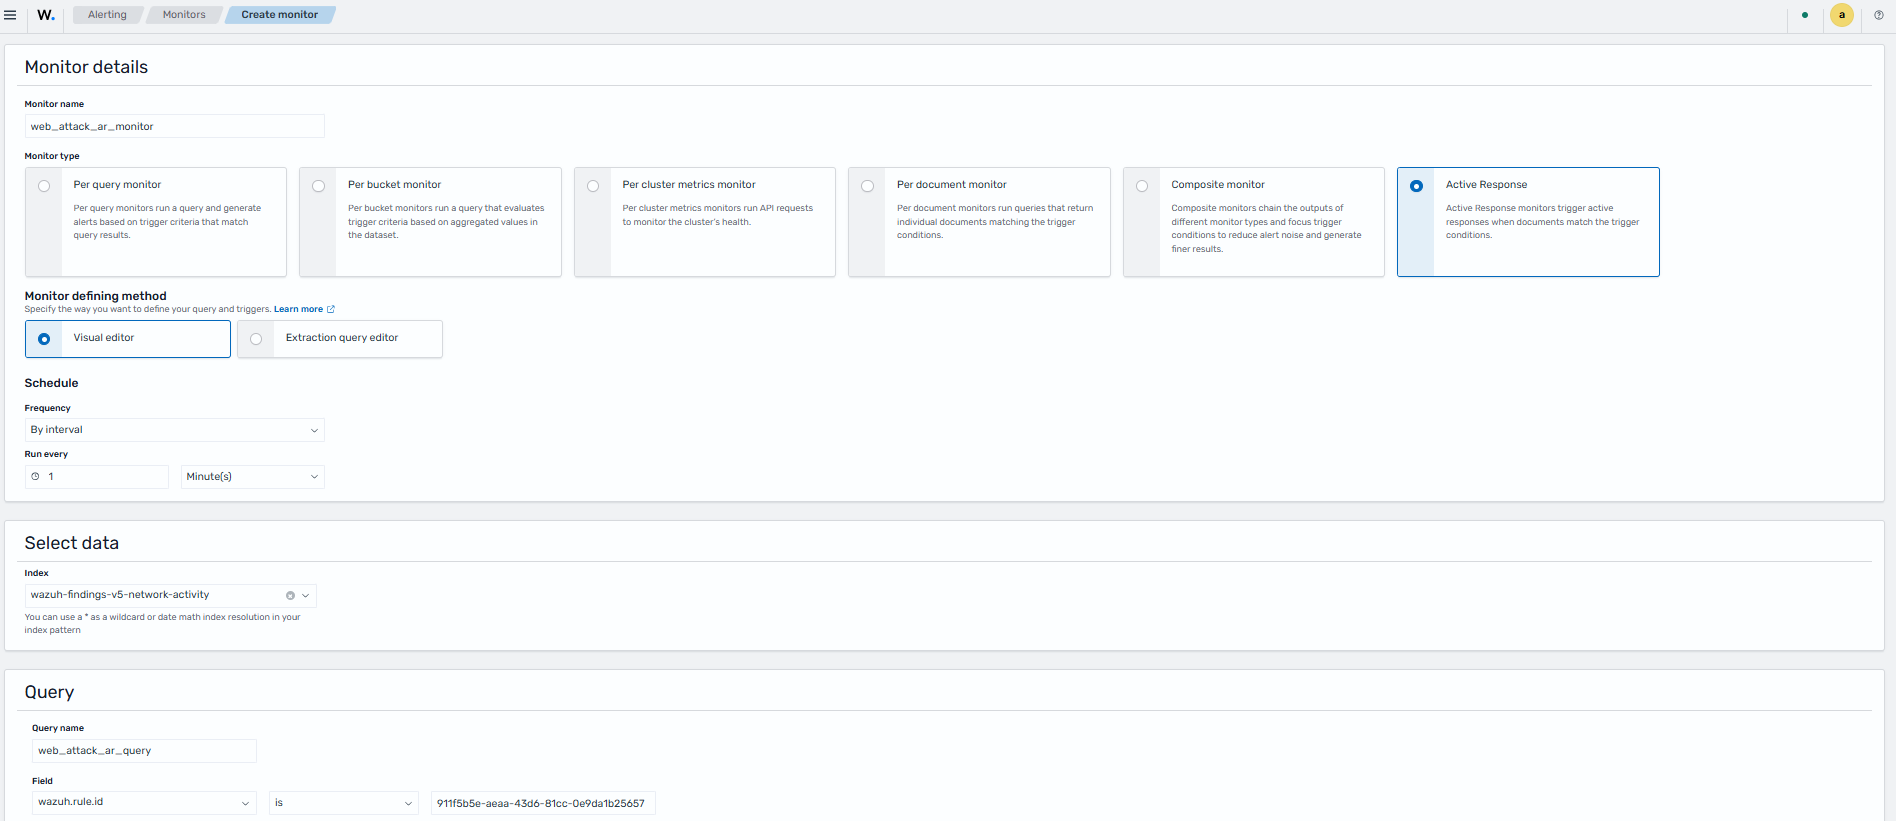
In the Triggers section, click Add trigger and fill in the following parameters.
Field
Value
Trigger name
web_attack_ar_triggerSeverity level
(1)HighestSpecify queries or tags
web_attack_ar_query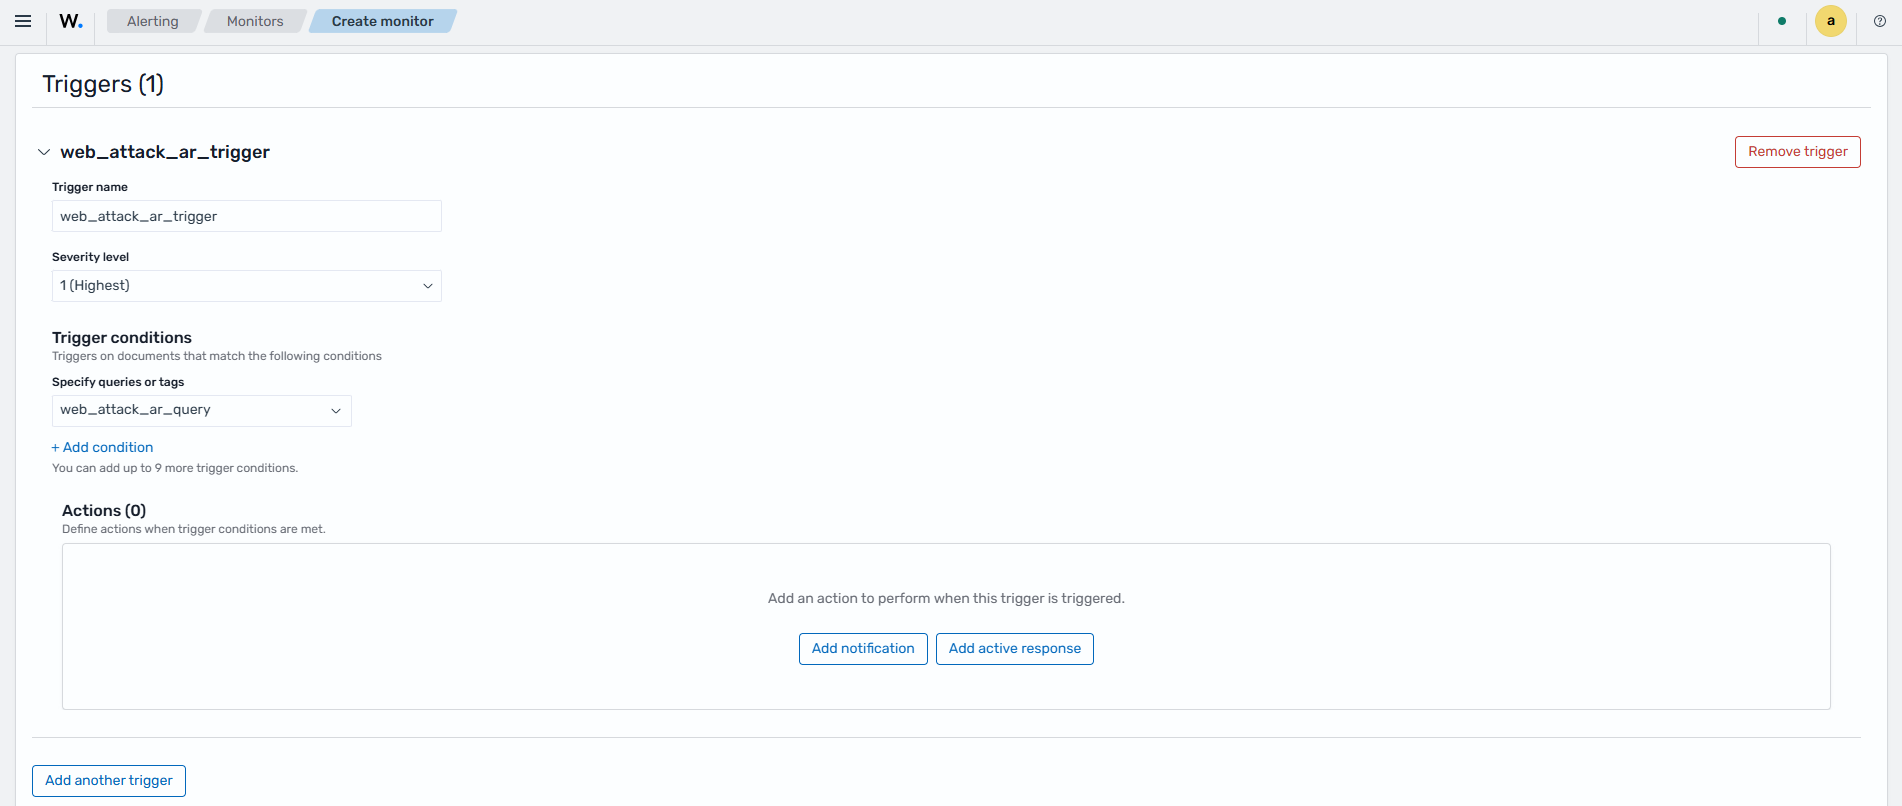
In the Actions subsection, click Add active response and fill in the following parameters.
Field
Value
Action name
web_attack_ar_actionActive response
[Active response] web_attack_ar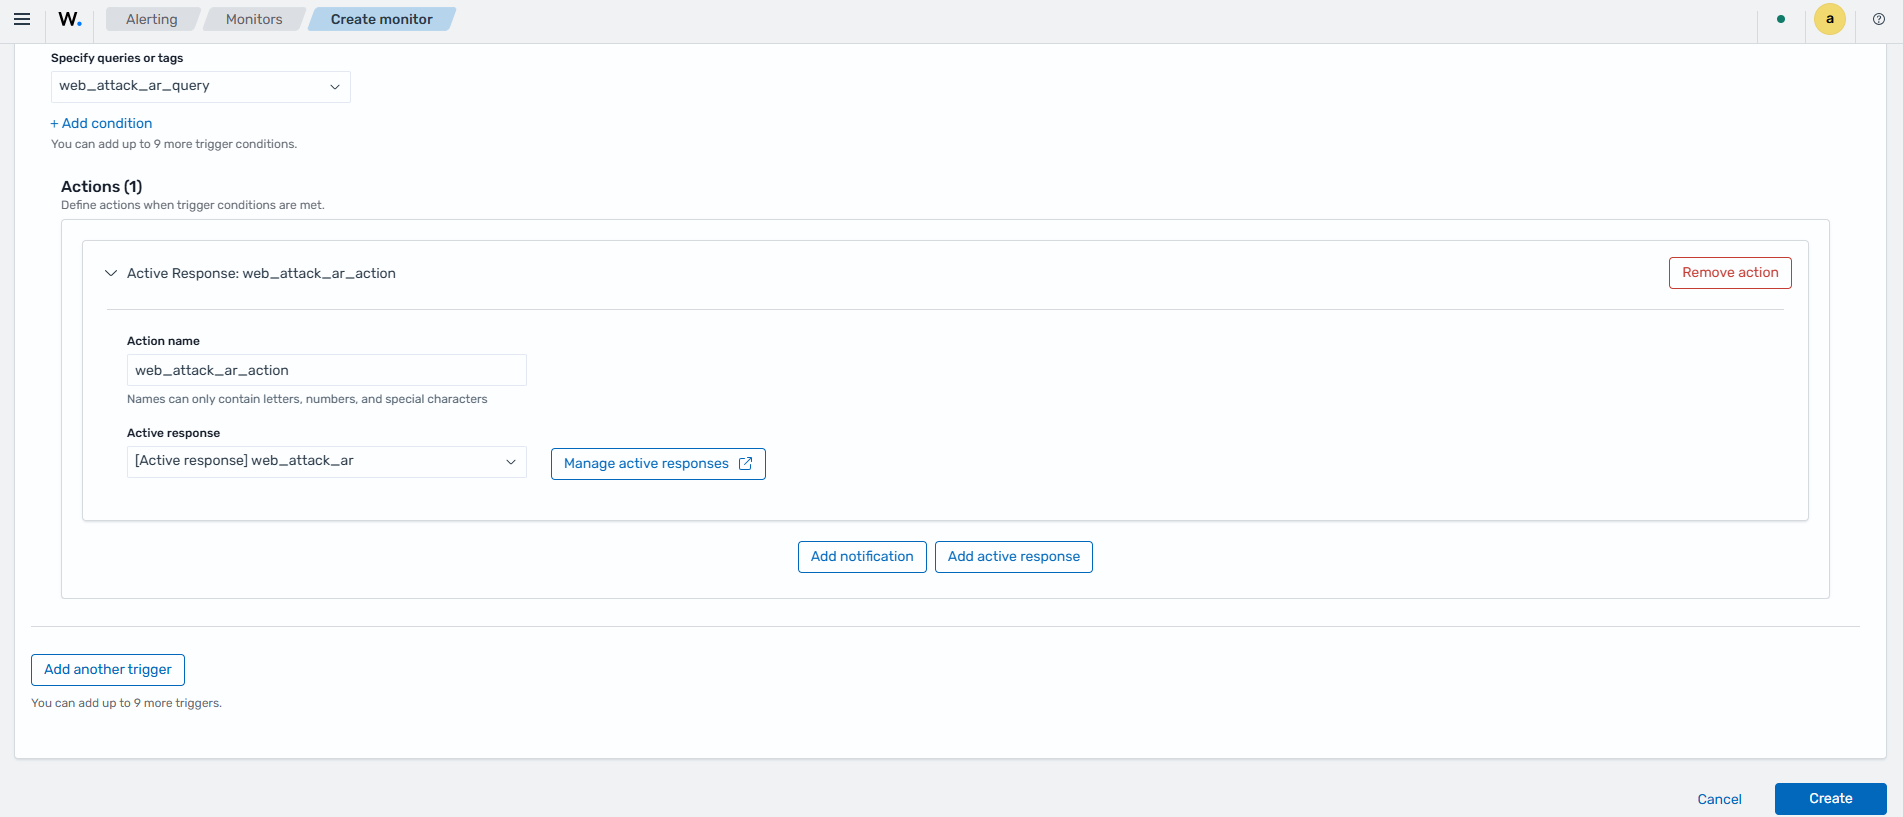
Click Create to save the monitor.
Attack emulation
Perform the following attack emulation from the RHEL 9.0 endpoint:
Replace <WEBSERVER_IP_ADDRESS> with the Ubuntu IP address and execute the following command from the attacker endpoint:
$ curl -A "Mozilla/5.0 (Windows NT 10.0; Win64; x64) AppleWebKit/537.36" "http://<WEBSERVER_IP_ADDRESS>/index.html?q=<script>document.cookie</script>"
The attacker endpoint connects to the victim's web servers the first time. This triggers a web attack finding and then triggers the block-ip active response to block any successive connections.
Run the attack command again after two minutes. The attacker IP is now blocked:
$ curl -A "Mozilla/5.0 (Windows NT 10.0; Win64; x64) AppleWebKit/537.36" "http://<WEBSERVER_IP_ADDRESS>/index.html?q=<script>document.cookie</script>"
The command output looks similar to this:
curl: (28) Failed to connect to 192.168.56.118 port 80 after 134781 ms: Couldn't connect to server
Visualize the findings
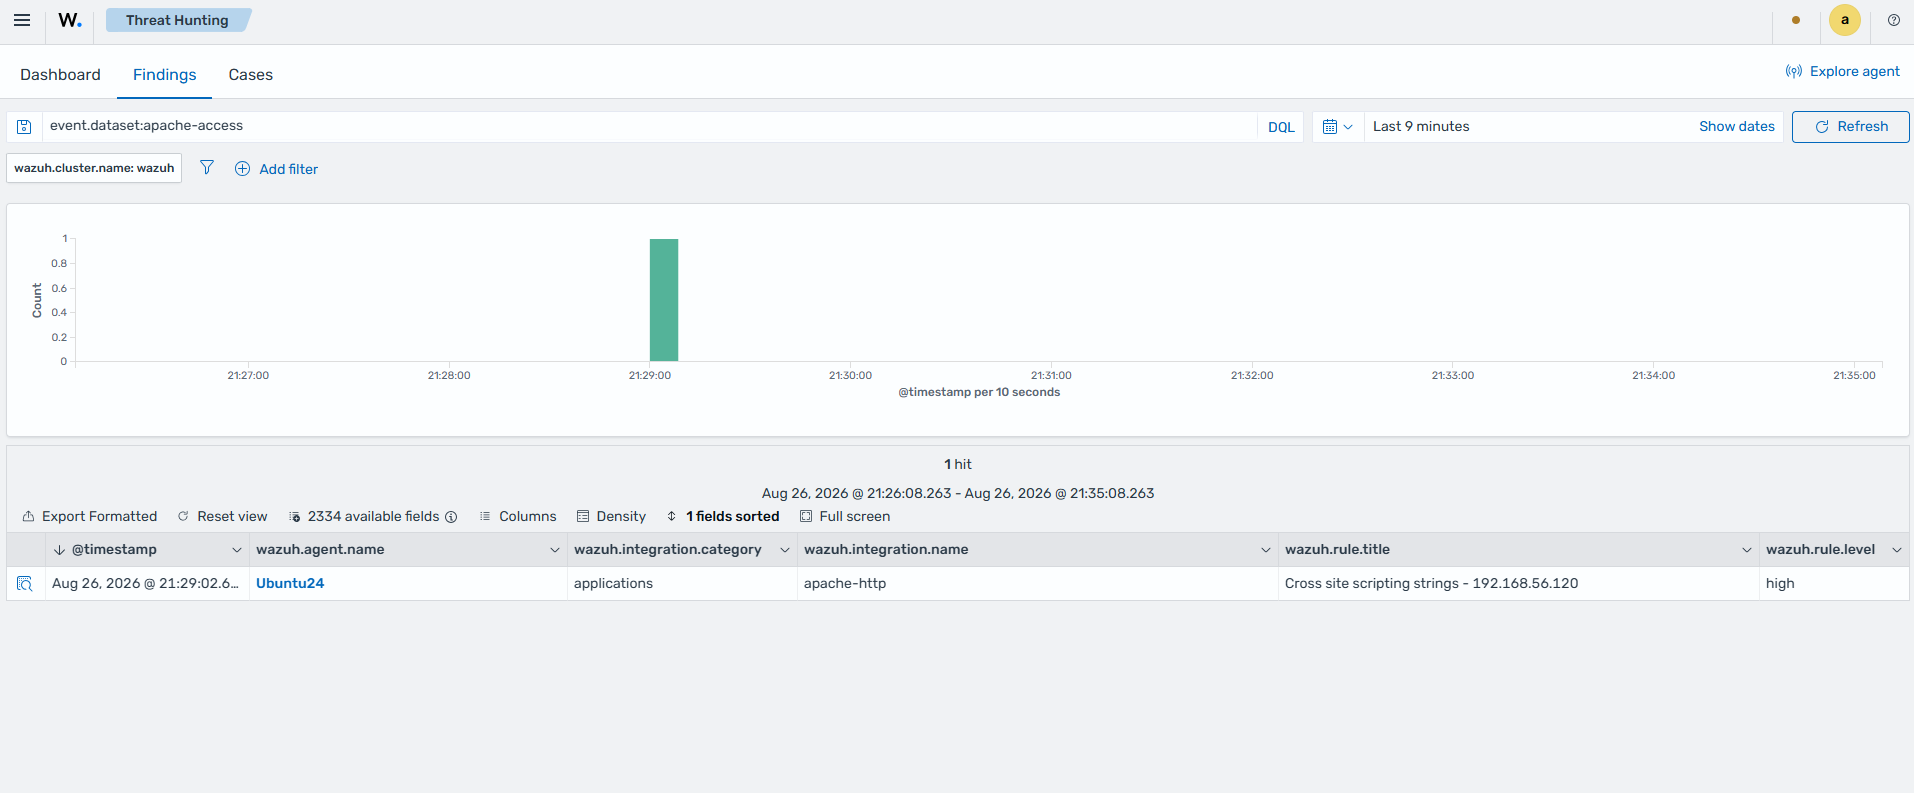
You can visualize the findings in the Wazuh dashboard. To do this, go to the Threat Hunting module and add the filters below in the search bar to query the findings.
event.dataset:apache-access
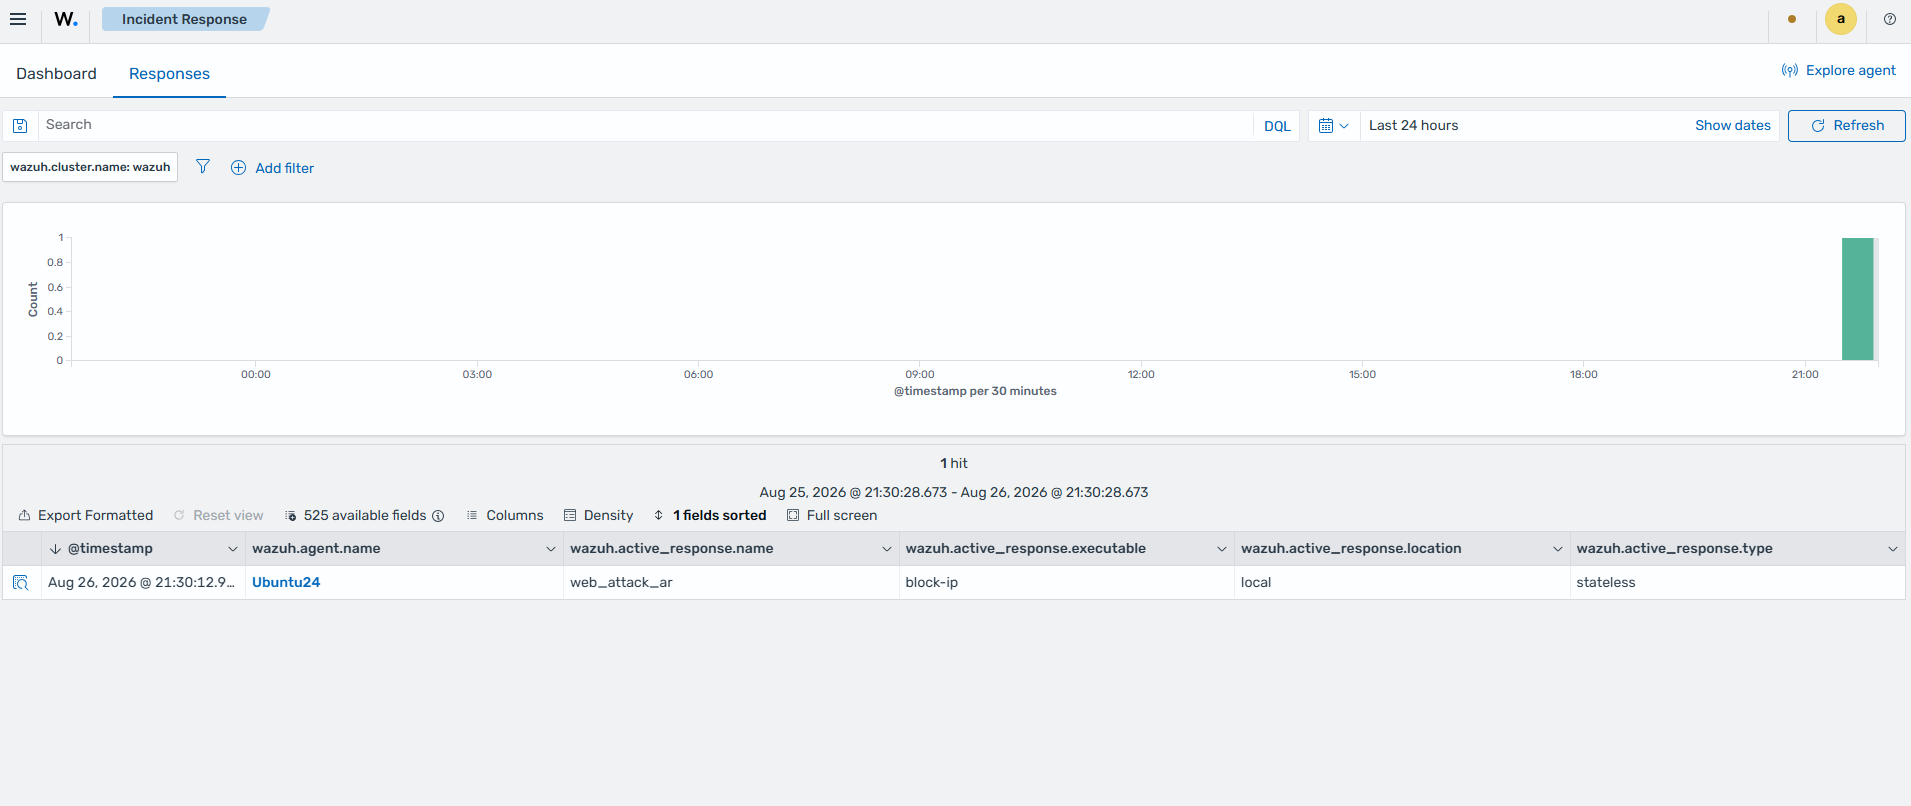
The block-ip active response triggers to block the attacker IP. Navigate to Security operations > Incident Response. Switch to the Responses tab to see details about the triggered Active response.
Check the /var/ossec/logs/active-responses.log file to see the following similar log entry confirming the attacker IP was blocked:
The command output looks similar to this:
2026/08/06 12:50:47 active-response/bin/block-ip: [INFO] Method=firewalld Action=start Details=Attempting method: firewalld (lock=yes)
2026/08/06 12:50:47 active-response/bin/block-ip: Binary 'firewall-cmd' not found in default paths: firewall-cmd (2)
2026/08/06 12:50:47 active-response/bin/block-ip: [WARNING] Method=firewalld Action=skipped Details=Method not available on this system - trying next
2026/08/06 12:50:47 active-response/bin/block-ip: [INFO] Method=iptables Action=start Details=Attempting method: iptables (lock=yes)
2026/08/06 12:50:47 active-response/bin/block-ip: [INFO] Method=iptables Action=success Details=IP 192.168.56.120 successfully blocked
2026/08/06 12:50:47 active-response/bin/block-ip: Ended