Use cases
The following use cases demonstrate how to review vulnerabilities across monitored endpoints and verify vulnerability remediation using the Wazuh dashboard.
Prerequisites
Before you start, make sure that you have the following:
A Wazuh manager with Vulnerability Detection enabled: Follow the instructions in the quickstart guide to set up a Wazuh manager.
Linux, Windows, or macOS endpoints with the Wazuh agent installed and enrolled.
The Wazuh Syscollector module is enabled on the monitored endpoints (Enable hotfix collection on Windows endpoints).
Use case 1: View vulnerabilities across the environment
This use case shows how to review detected vulnerabilities across Linux, Windows, and macOS endpoints from the Wazuh dashboard.
Confirm that the Wazuh agents enrolled in the prerequisites section are active. Go to Agent management > Summary on the Wazuh dashboard and verify that each endpoint has an
activeStatus.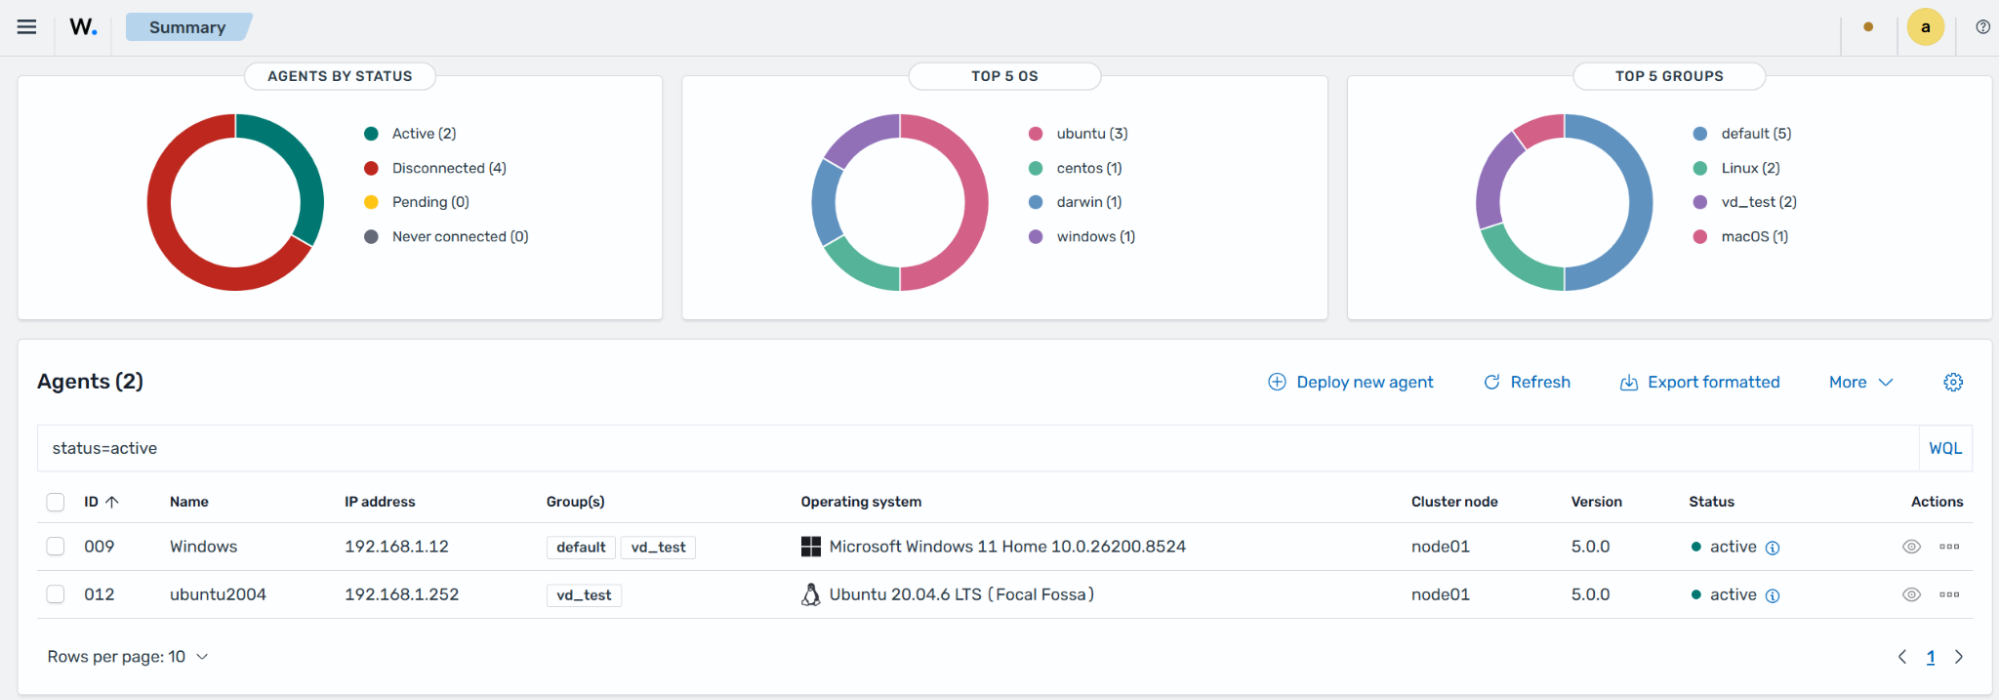
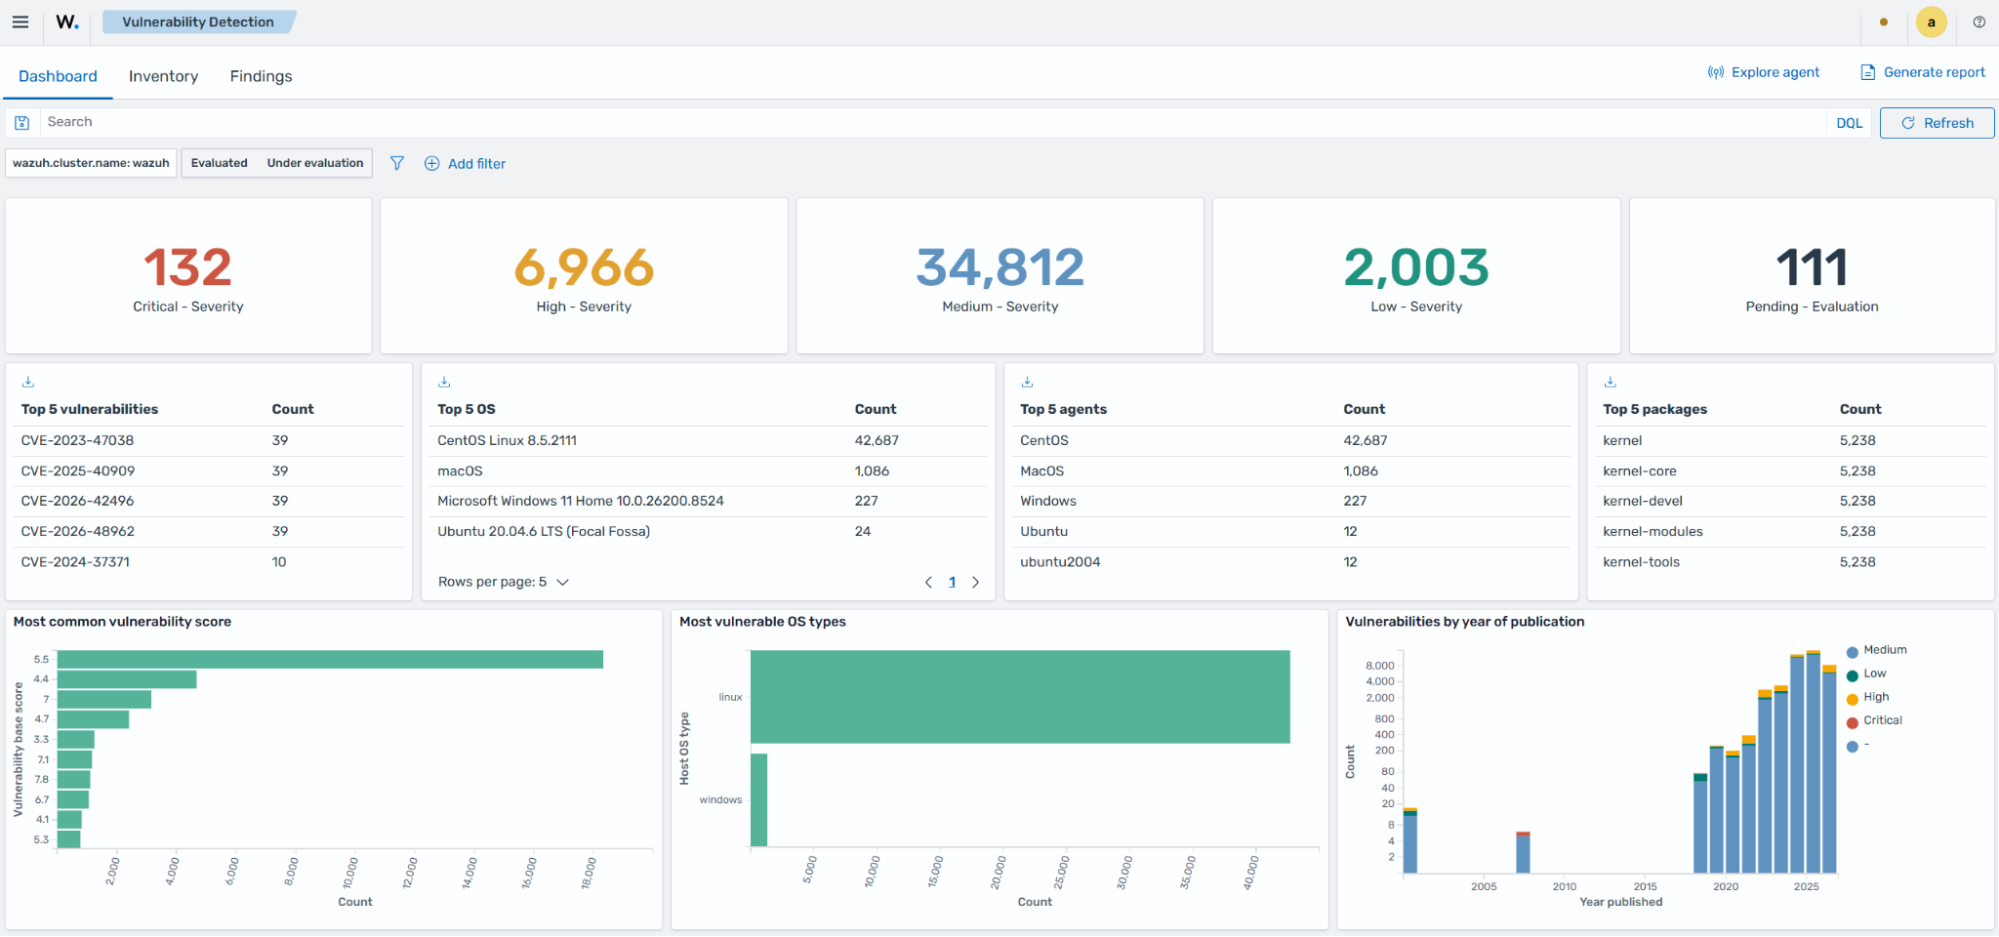
Go to Threat intelligence > Vulnerability Detection > Dashboard on the Wazuh dashboard. The image below shows the global vulnerability summary across monitored endpoints.
Go to Threat intelligence > Vulnerability Detection > Inventory on the Wazuh dashboard. You can filter the inventory by CVE, severity, agent, or package name to identify endpoints that need remediation. The image below shows the Inventory tab with a filter applied for vulnerabilities with
Criticalseverity.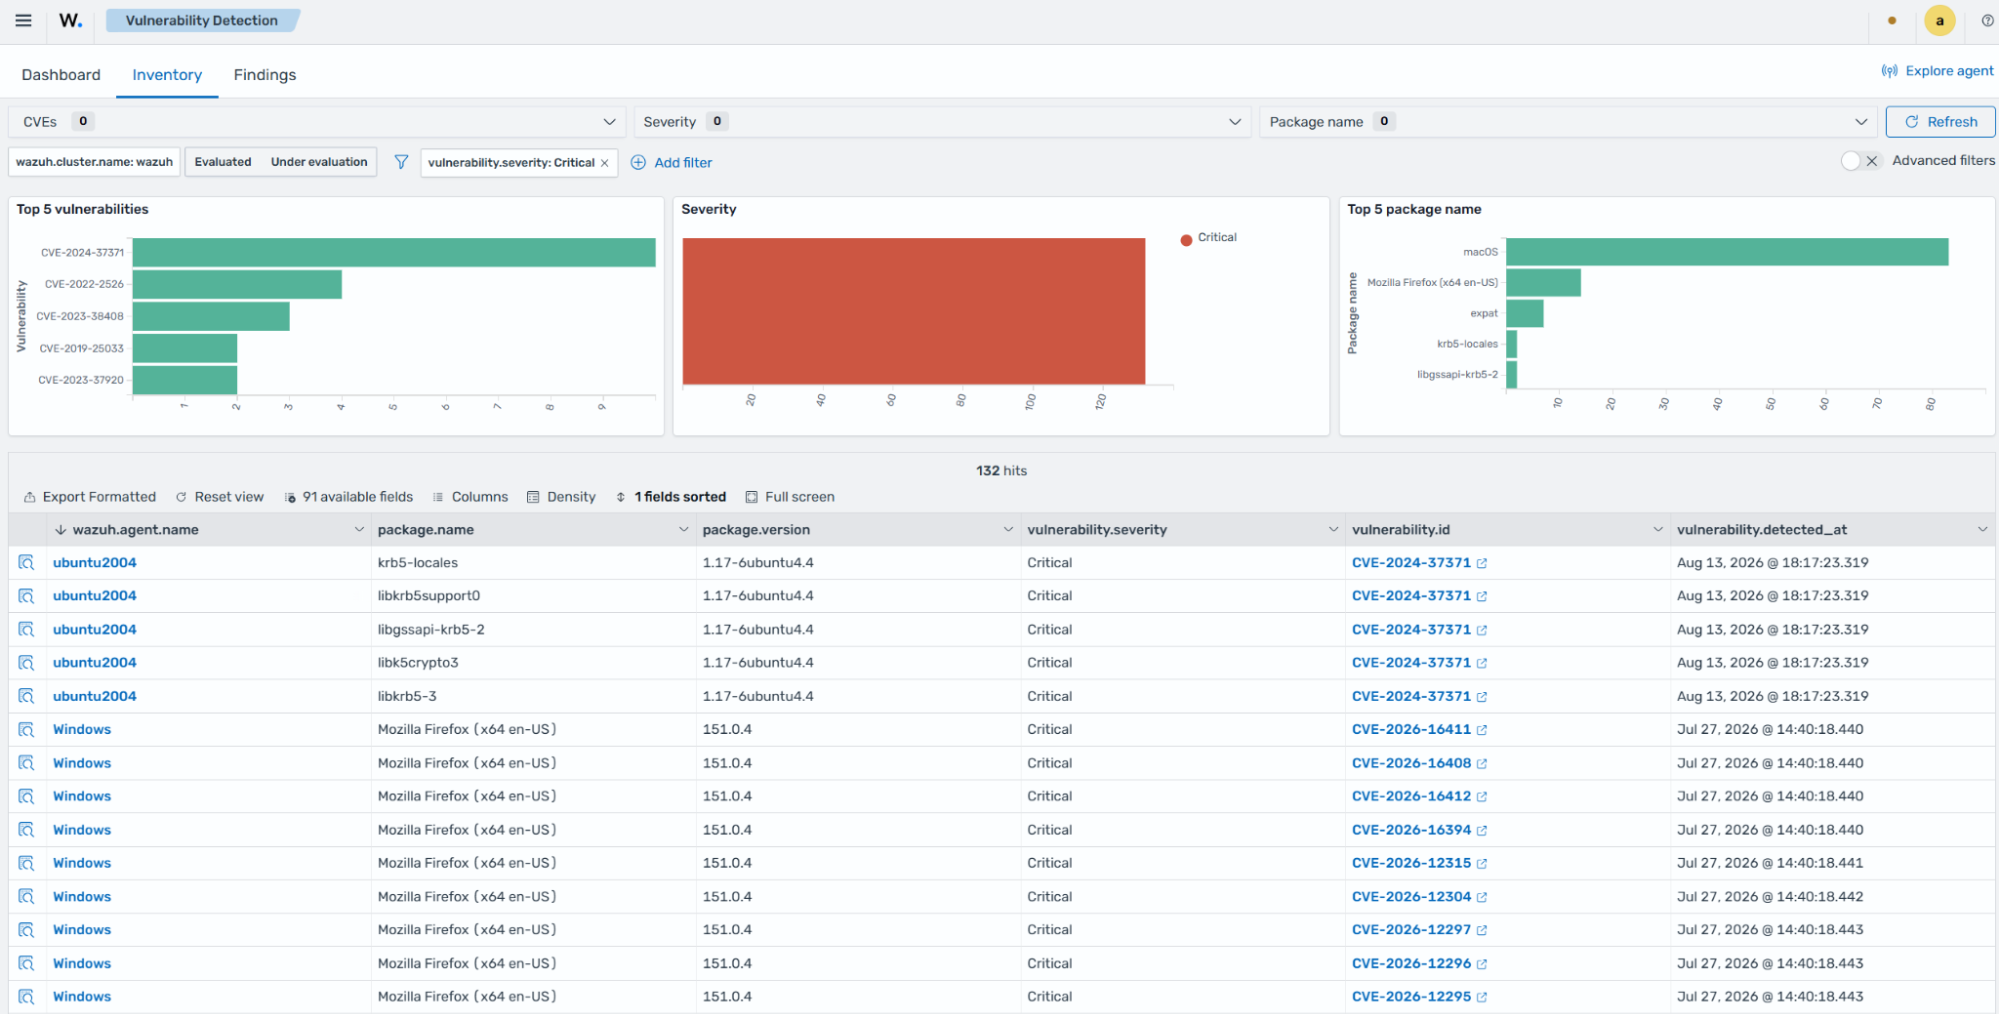
Select a specific vulnerability by clicking Inspect vulnerability details to view more information. This image below shows details for CVE-2026-16411 affecting Mozilla Firefox (x64 en-US) version 151.0.4. The
vulnerability.scanner.referencefield provides a link to the corresponding Wazuh CTI vulnerability page.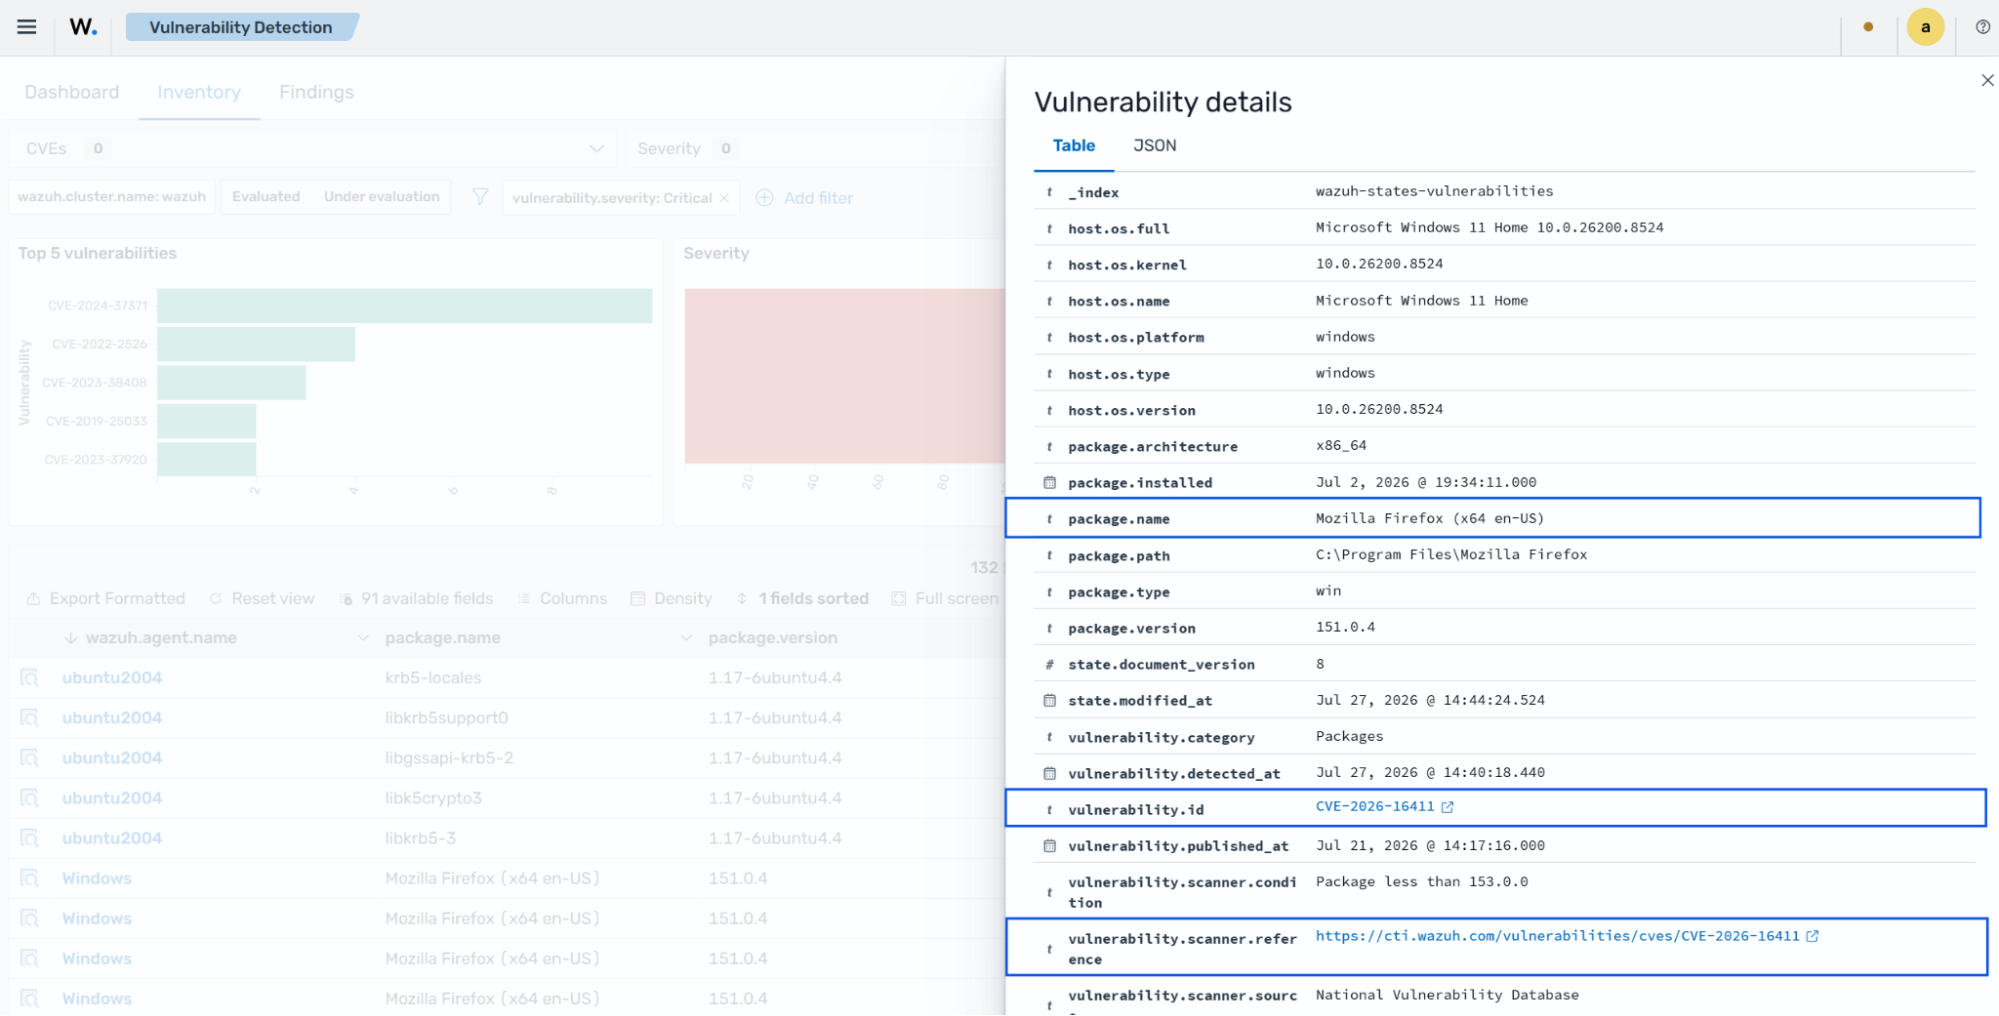
Use case 2: Track vulnerability remediation
This use case shows how to track vulnerability remediation on a Windows endpoint. We install a vulnerable Notepad++ package, confirm that Wazuh detects it, uninstall the package, and verify that Wazuh updates the vulnerability inventory and findings.
Create a test group and add the agent to the group
Go to Agent management > Groups on the Wazuh dashboard.
Click Add new group and name the group
vd_test.Click the pencil icon to edit the group configuration.
Add the following configuration below.
<agent_config>
  <wodle name="syscollector">
    <disabled>no</disabled>
    <interval>60s</interval>
    <scan_on_start>yes</scan_on_start>
    <packages>yes</packages>
    <synchronization>
      <enabled>yes</enabled>
      <interval>60s</interval>
    </synchronization>
  </wodle>
</agent_config>
This configuration enables Syscollector package inventory collection, runs a scan when the Wazuh agent starts, and reduces the scan and synchronization intervals to 60 seconds for testing.
Next, add the Windows agent to the
vd_testgroup. Still on the Groups page, selectvd_test. Click Manage agents and add the Windows agent to the group.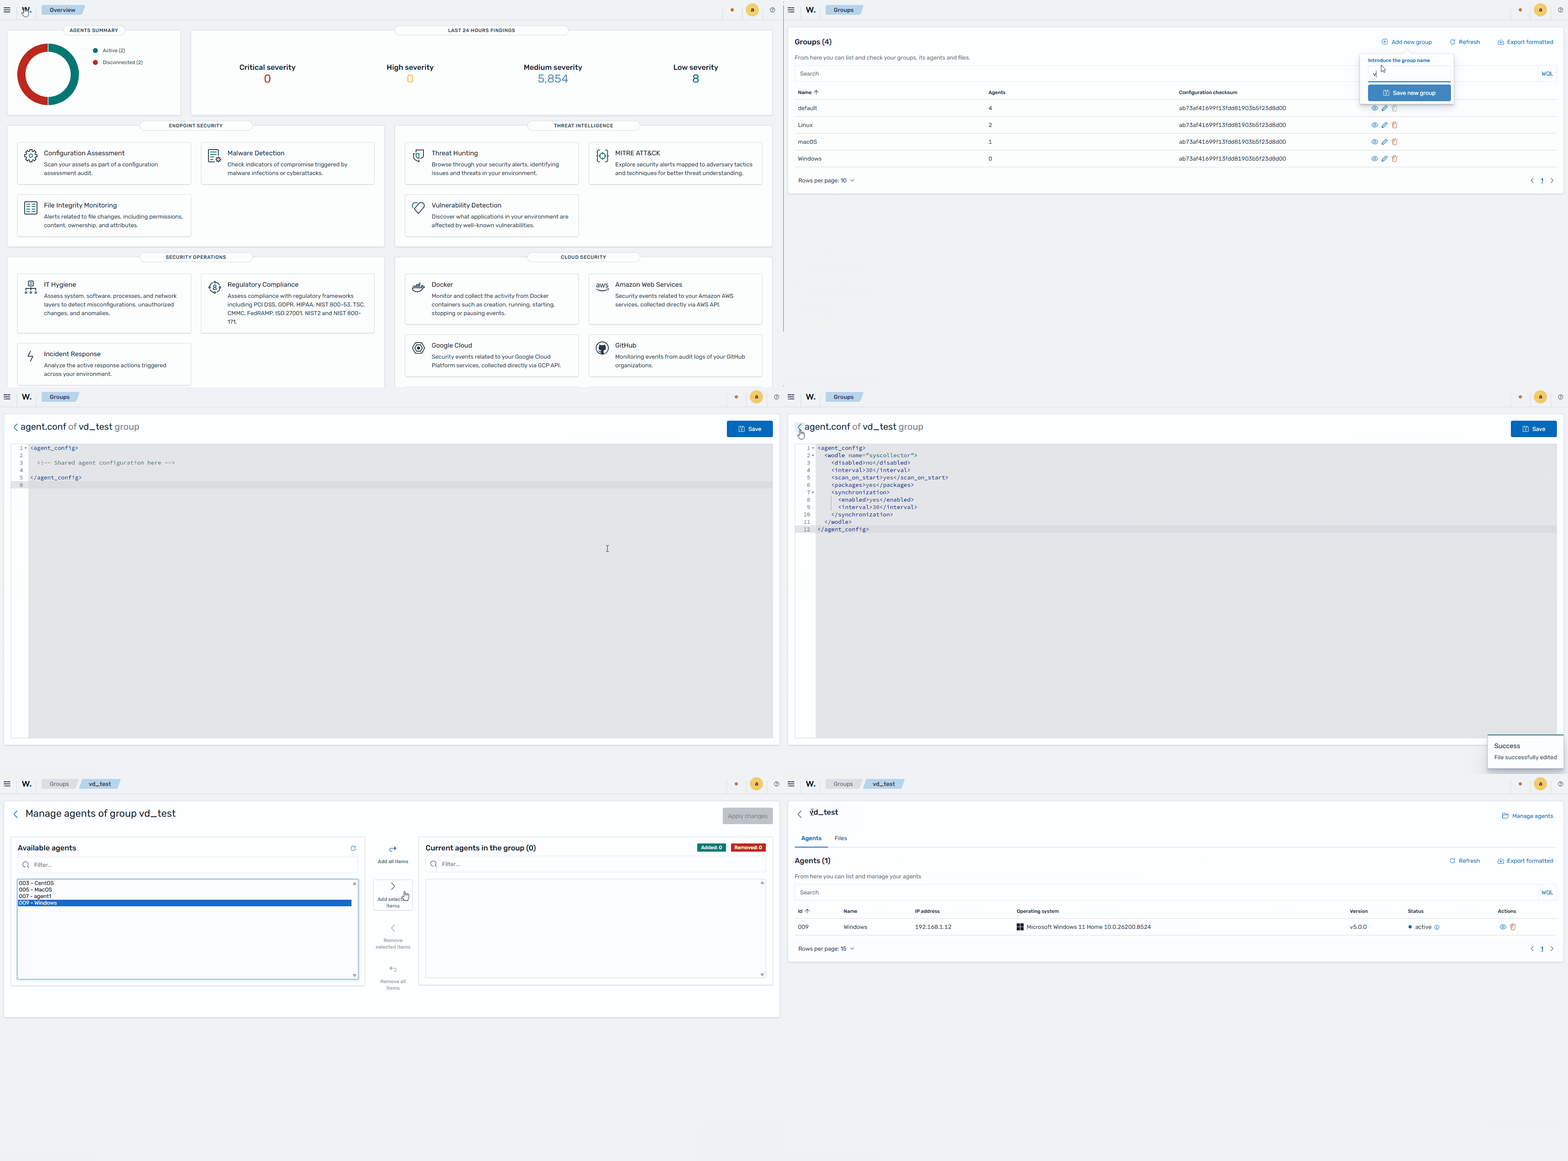
Check the vulnerability inventory of the agent
Wait for the Wazuh Syscollector module to complete the first scan (with
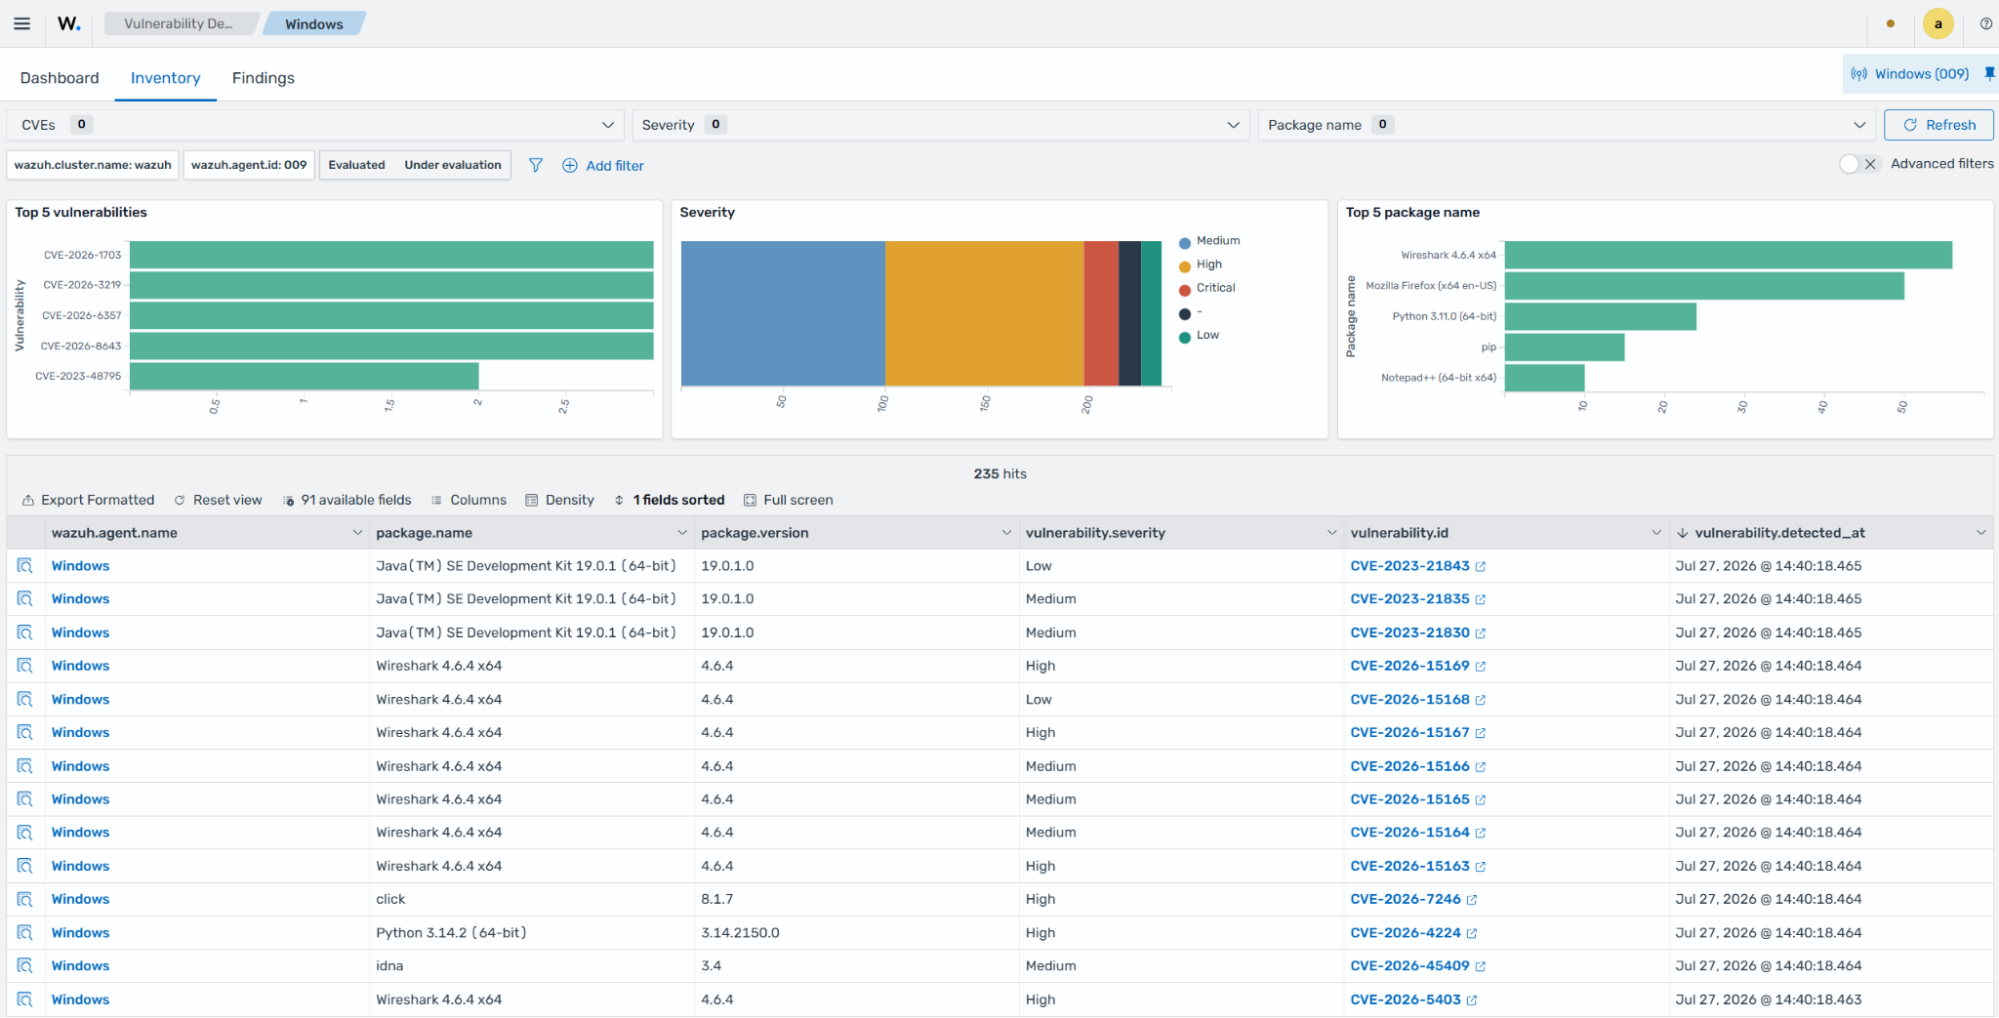
intervalconfigured as60s, this happens within 60 seconds of the agent connecting, and withscan_on_startconfigured asyes, restarting the Wazuh agent triggers it immediately).Go to Threat intelligence > Vulnerability Detection > Dashboard on the Wazuh dashboard. Click Explore agent and select the Windows agent.
Verify that the Vulnerability detection first scan has completed successfully. The initial scan does not generate findings in the Findings tab, but it builds the vulnerability inventory. Go to the Inventory tab.
Install a vulnerable package
Install a vulnerable application on the Windows agent. Run the commands below in PowerShell with administrator privileges to install Notepad++ 8.5.6.
> Invoke-WebRequest -Uri "https://github.com/notepad-plus-plus/notepad-plus-plus/releases/download/v8.5.6/npp.8.5.6.Installer.x64.exe" -OutFile "$env:USERPROFILE\Downloads\npp.8.5.6.Installer.x64.exe"; Start-Process "$env:USERPROFILE\Downloads\npp.8.5.6.Installer.x64.exe" -ArgumentList "/S" -Wait
> Test-Path "C:\Program Files\Notepad++\notepad++.exe"
Output
True
Wait for the Wazuh Syscollector module to complete the first scan (with
intervalconfigured as60s, this happens within a minute of the agent connecting, and withscan_on_startconfigured asyes, restarting the Wazuh agent triggers it immediately).Confirm the package is present in the Inventory tab. Apply the following filter to validate the package has been detected:
package.name is Notepad++ (64-bit x64).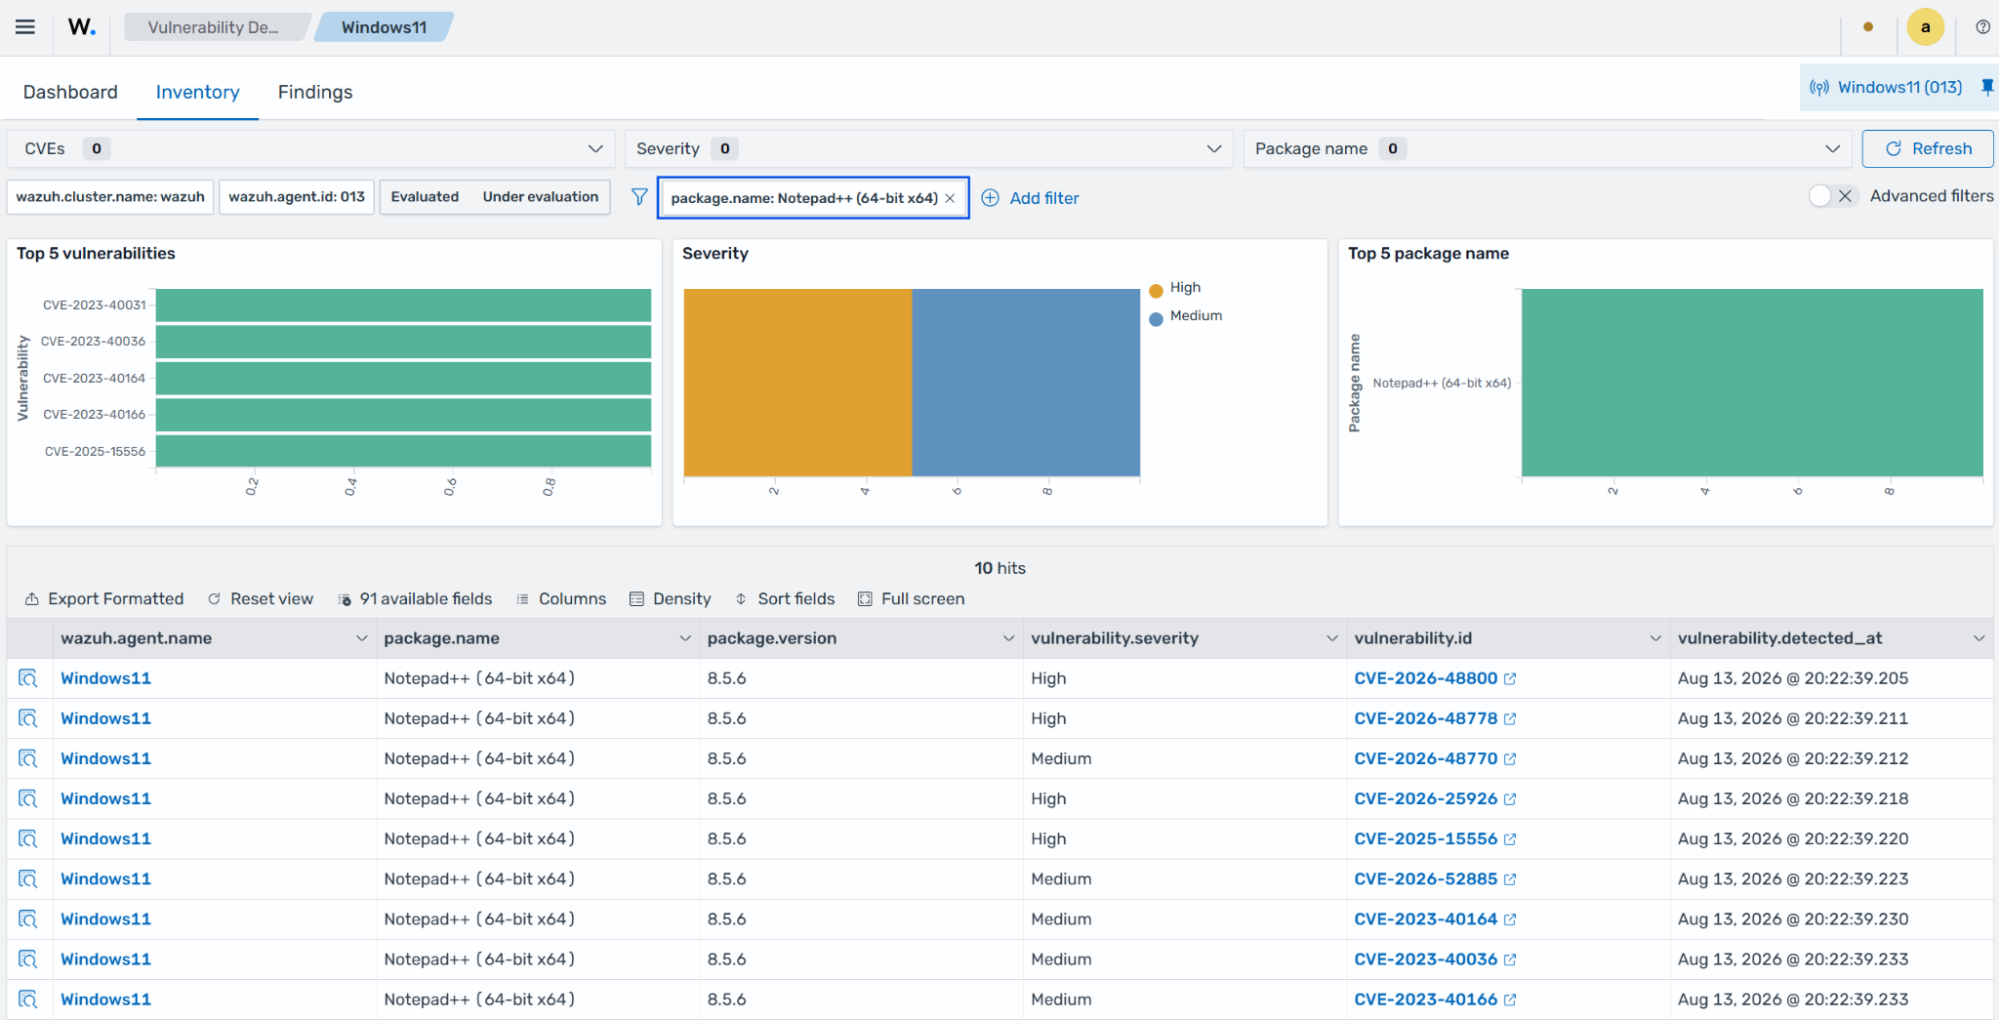
Go to the Findings tab to confirm that Wazuh generated
vulnerability-detectedfindings for the installed package.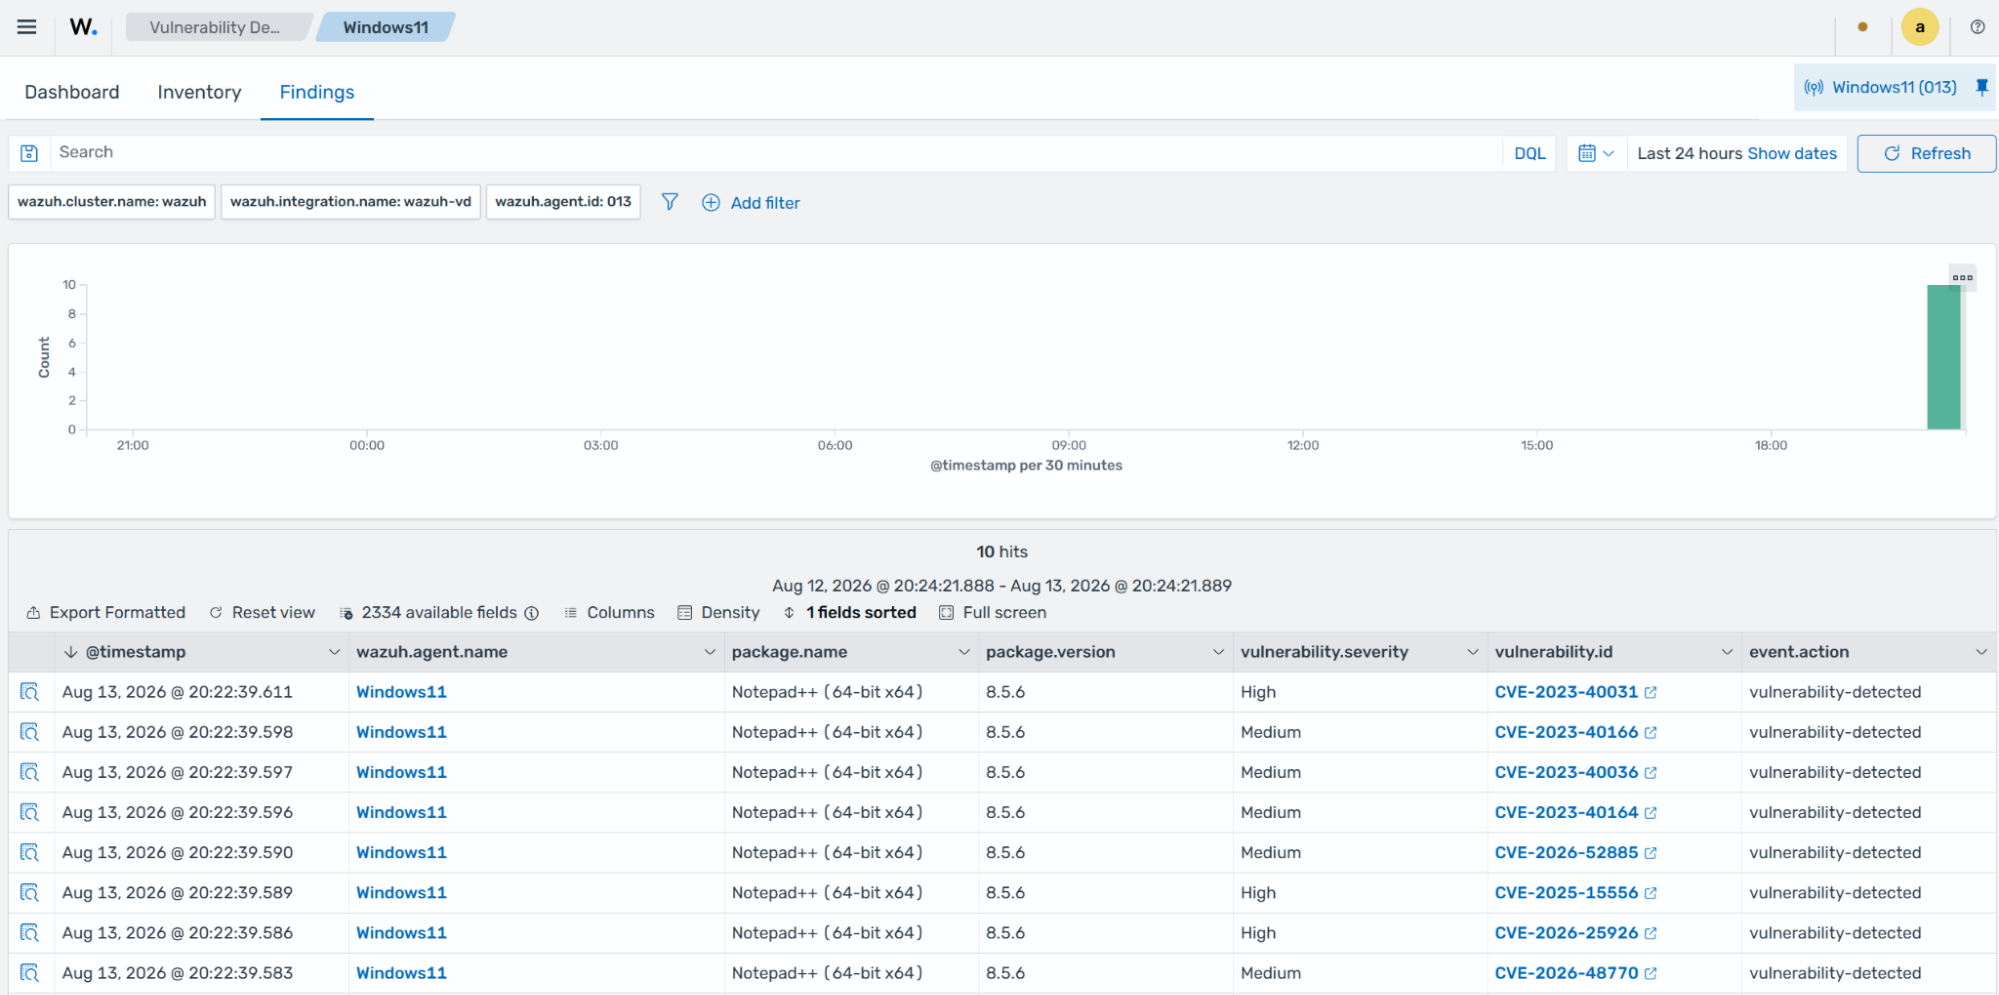
Uninstall the vulnerable package
Uninstall the vulnerable Notepad++ package to remediate the vulnerabilities. Run the command below in PowerShell with administrator privileges to uninstall Notepad++ 8.5.6.
> Start-Process "C:\Program Files\Notepad++\uninstall.exe" -ArgumentList "/S" -Wait
> Test-Path "C:\Program Files\Notepad++\notepad++.exe"
Output
False
Wait for the Wazuh Syscollector module to complete another scan (up to 60 seconds).
Confirm the package is no longer present in the Inventory tab. Apply the following filter to validate that the package is not detected:
package.name is Notepad++ (64-bit x64).
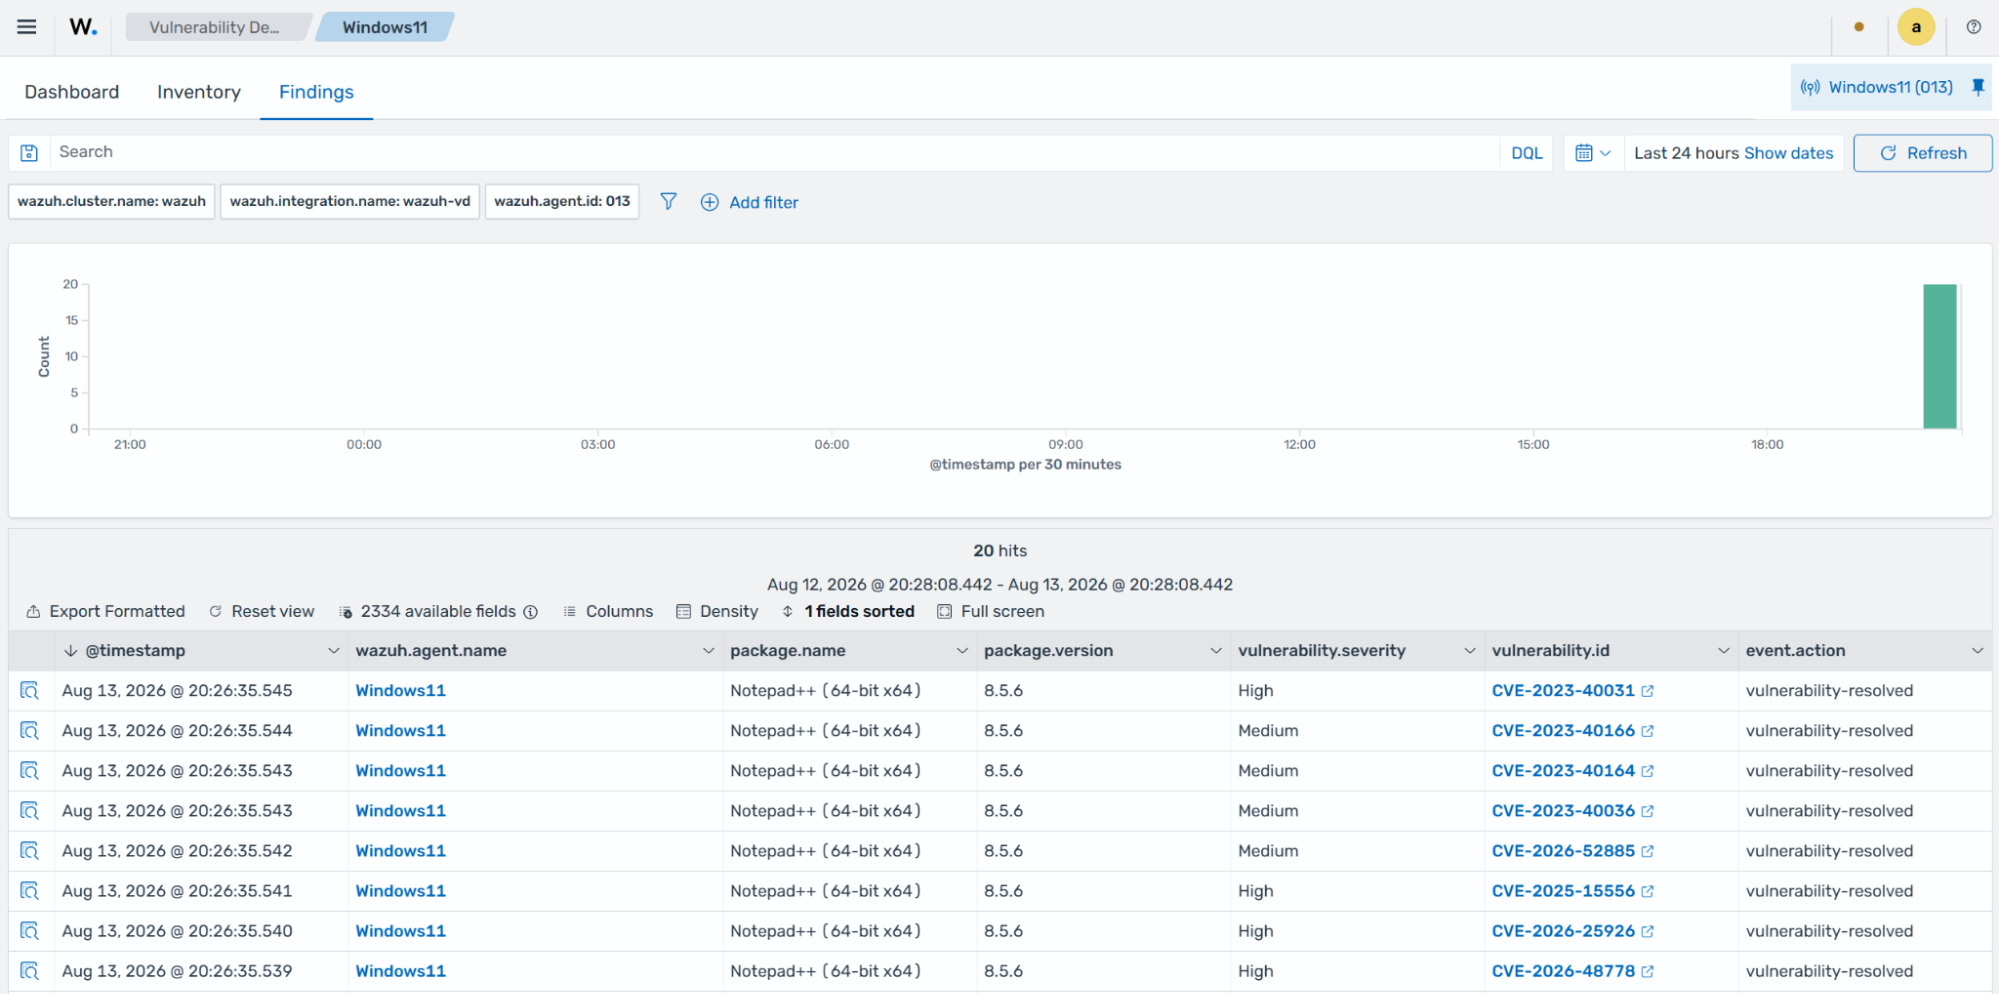
Go to the Findings tab to confirm that Wazuh generated
vulnerability-resolvedfindings for the removed package.